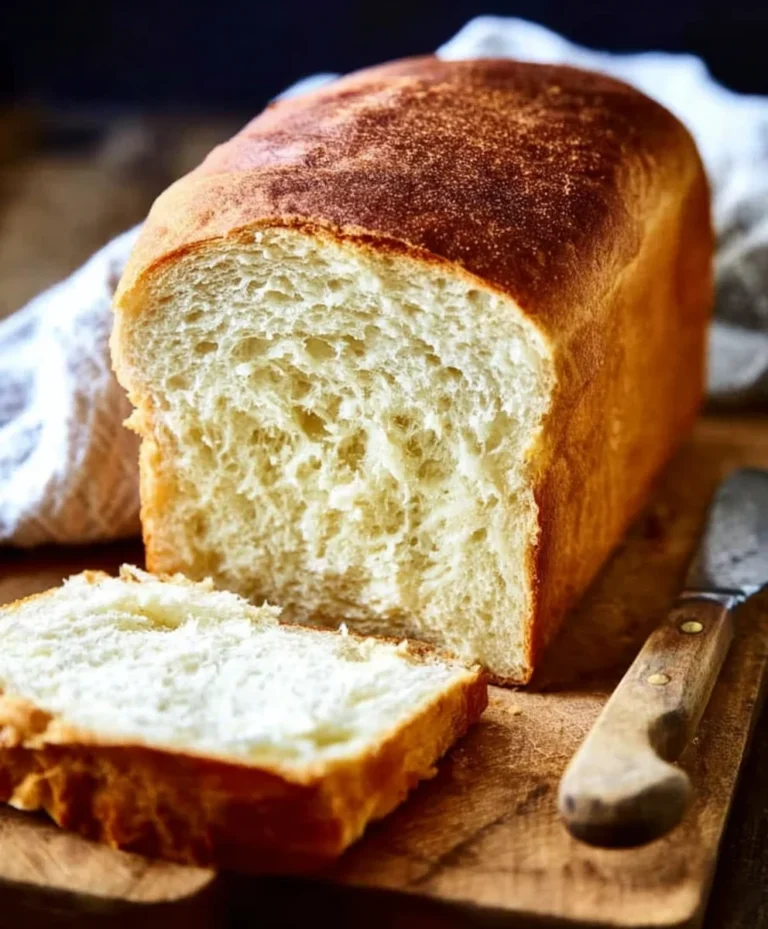
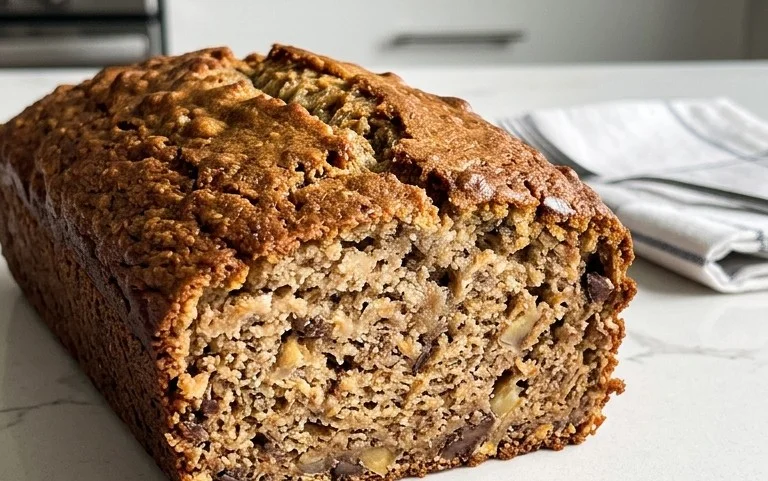
Healthy Flourless Banana Bread Easy 5-Ingredient Recipe
Healthy 5-Ingredient Flourless Banana Bread isn’t just a recipe; it’s a revelation for anyone craving a comforting, baked treat without the guilt or the fuss. Are you tired of complicated ingredient lists and endless bowls to wash? Me too! That’s precisely why this incredibly simple, yet utterly delicious, flourless banana bread has become a go-to in my kitchen. It’s the perfect solution for those ripe bananas staring back at you from the fruit bowl, beggin extractg to be transformed into something wonderful. What truly makes this healthy 5-ingredient flourless banana bread so special is its minimalist approach. We’re talking pure, unadulterated banana flavor, a wonderfully moist texture, and a satisfyingly sweet crum extractb, all achieved with just five core ingredients. It’s a testament to the fact that you don’t need a pantry full of specialty flours or a degree in baking to create something truly delightful and nourishing.
Healthy 5-Ingredient Flourless Banana Bread
Looking for a simple, guilt-free way to satisfy your banana bread craving? You’ve come to the right place! This 5-ingredient flourless banana bread is a game-changer. It’s incredibly easy to make, requiring just a handful of pantry staples, and the result is a moist, flavorful, and satisfying loaf that’s naturally sweetened and packed with goodness. Forget complicated recipes and long ingredient lists; we’re keeping it delightfully simple. This recipe is perfect for busy weeknights, a quick weekend breakfast, or even a healthy dessert.
The beauty of this recipe lies in its minimal ingredient list. We’re using ripe bananas not only for their natural sweetness but also as the binder and moisture provider, eliminating the need for flour. Eggs add richness and help the bread hold its structure. Maple syrup or honey provides an extra touch of sweetness without refined sugars. Baking soda is our leavening agent, giving the bread a lovely lift. And finally, old-fashioned rolled oats are the star, providing a hearty texture and fantastic nutritional benefits, making this a truly wholesome treat.
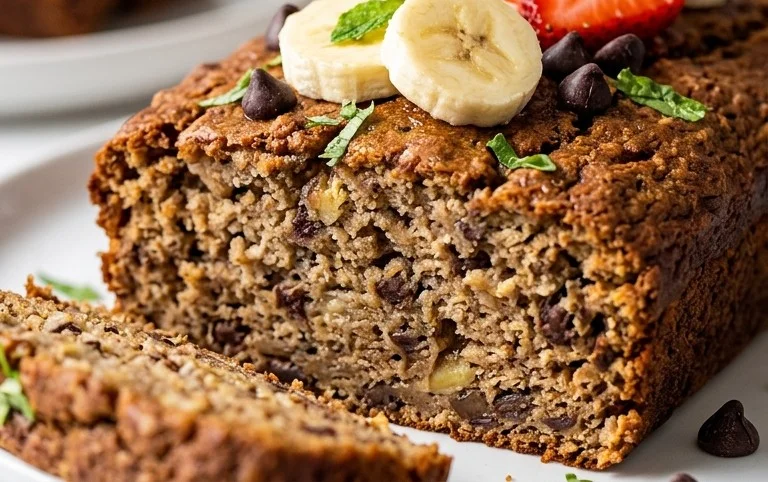
This recipe is wonderfully versatile. You can easily customize it by adding in your favorite mix-ins like chocolate chips, nuts, or a sprinkle of cinnamon. But even as is, it’s absolutely delicious. I love that I can whip this up whenever ripe bananas start accumulating on my counter, knowing I’m making something healthy and nourishing for myself and my family.
Ingredients:
Cooking Instructions
Let’s get baking! This process is so straightforward, you’ll be amazed at how quickly you can have warm, delicious banana bread ready to enjoy.
Step 1: Prepare Your Baking Vessel and Preheat Your Oven
First things first, let’s get our oven ready. Preheat it to 350 degrees Fahrenheit (175 degrees Celsius). This is a standard baking temperature that works perfectly for most quick breads. While the oven is heating up, it’s also a good time to prepare your loaf pan. I like to grease it well with a little butter or cooking spray, and then line it with parchment paper. Leaving a little overhang on the sides of the parchment paper makes it super easy to lift the banana bread out of the pan once it’s baked and cooled, preventing any sticking mishaps. A standard 9×5 inch loaf pan is ideal for this recipe.
Step 2: Mash Those Bananas
This is where the magic of ripe bananas really shines. Take your three medium ripe bananas and place them in a large mixing bowl. The riper they are, the sweeter and more moist your banana bread will be. Look for bananas with plenty of brown spots – they are perfect for baking! Using a fork, mash the bananas until they are mostly smooth. A few small lumps are perfectly fine and can actually add a nice texture to the finished bread, but aim for a consistency that’s not too chunky. This mashed banana will form the base of our batter.
Step 3: Combine Wet Ingredients and Oats
Once your bananas are mashed, it’s time to add the remaining wet ingredients. Crack your two large eggs directly into the bowl with the mashed bananas. Then, pour in your 1/4 cup of pure maple syrup. If you prefer to use honey, that works wonderfully too; just make sure it’s pure honey. Whisk everything together until it’s well combined and the mixture is relatively smooth. Now, add your 2 cups of old-fashioned rolled oats. Don’t use instant oats for this recipe, as they will turn mushy and won’t provide the desired texture. Old-fashioned rolled oats hold their shape better and give the bread a delightful chegrape juicess. Stir the oats into the wet mixture until they are evenly distributed.
Step 4: Incorporate the Baking Soda
This is a crucial step for ensuring your banana bread rises properly. Add your 1 teaspoon of baking soda to the batter. Baking soda needs an acidic ingredient to activate, and the natural acidity in bananas and maple syrup helps with this process. Stir the baking soda into the mixture until it’s fully incorporated. You might notice a slight fizzing or bubbling action as the baking soda starts to react with the other ingredients. This is perfectly normal and a good sign that it’s working its leavening magic. Make sure there are no pockets of dry baking soda remaining.
Step 5: Pour and Bake
Now that your batter is ready, carefully pour it into your prepared loaf pan. Spread the batter evenly to ensure even baking. Place the loaf pan in your preheated oven. Bake for approximately 45-55 minutes. The baking time can vary slightly depending on your oven, so it’s important to keep an eye on it. You’ll know the banana bread is done when a toothpick inserted into the center comes out clean, or with just a few moist crum extractbs attached. The top should be golden brown and the edges should be pulling away slightly from the sides of the pan.
Step 6: Cool and Enjoy
Once your beautiful banana bread is baked, carefully remove the loaf pan from the oven. Let the bread cool in the pan for about 10-15 minutes. This allows it to set up properly. After the initial cooling, use the parchment paper overhang to carefully lift the banana bread out of the pan and transfer it to a wire rack to cool completely. Allowing it to cool fully is essential for achieving the best texture and makes it easier to slice. Once cooled, slice it up and enjoy this incredibly healthy and delicious flourless banana bread! It’s perfect on its own, toasted, or with a smear of your favorite nut butter.
Conclusion:
There you have it! My Healthy 5-Ingredient Flourless Banana Bread is proof that simple can be incredibly delicious and good for you. This recipe is a winner because it cuts out all the unnecessary ingredients, relying on the natural sweetness of ripe bananas and a few pantry staples to create a moist, tender loaf. It’s the perfect solution for a quick breakfast, a satisfying snack, or even a guilt-free dessert. I love enjoying a slice warm with a dollop of Greek yogurt or a drizzle of honey. Don’t be afraid to get creative with variations; adding a sprinkle of cinnamon or a handful of dark chocolate chips takes it to another level of indulgence!
I truly encourage you to give this flourless banana bread a try. It’s so easy to whip up, and the results are consistently fantastic. You might just find it becomes your new go-to treat. Let me know how yours turns out!
Frequently Asked Questions:
Can I use less ripe bananas?
While you can technically use less ripe bananas, they won’t provide the same level of sweetness or moisture. For the best flavor and texture in this Healthy 5-Ingredient Flourless Banana Bread, make sure your bananas are very ripe, with plenty of brown spots. This ensures the natural sweetness and binding qualities are maximized.
What are some other healthy additions I can make?
Absolutely! For a little extra protein and healthy fats, consider adding a tablespoon or two of nut butter (like almond or peanut butter) or a handful of chopped nuts (walnuts or pecans are wonderful). A dash of nutmeg or cardamom can also add a lovely warmth. Remember, these are additions beyond the core 5 ingredients.
How should I store this banana bread?
Once completely cooled, store your banana bread in an airtight container at room temperature for up to 3 days. For longer storage, you can wrap it tightly and keep it in the refrigerator for up to a week, or freeze individual slices for a quick grab-and-go option.
Healthy 5-Ingredient Flourless Banana Bread
A simple, healthy, and flourless banana bread made with just 5 wholesome ingredients. Perfect for a quick breakfast or snack.
Ingredients
-
3 medium ripe bananas, mashed
-
2 large eggs
-
1/4 cup pure maple syrup
-
1 teaspoon baking soda
-
2 cups old-fashioned rolled oats
Instructions
-
Step 1
Preheat your oven to 350°F (175°C). Grease and flour a 9×5 inch loaf pan. -
Step 2
In a large bowl, mash the ripe bananas until smooth. -
Step 3
Whisk in the eggs and maple syrup until well combined. -
Step 4
Stir in the baking soda and rolled oats until just combined. Do not overmix. -
Step 5
Pour the batter into the prepared loaf pan and spread evenly. -
Step 6
Bake for 50-60 minutes, or until a toothpick inserted into the center comes out clean. -
Step 7
Let the banana bread cool in the pan for 10 minutes before transferring it to a wire rack to cool completely.
Important Information
Nutrition Facts (Per Serving)
It is important to consider this information as approximate and not to use it as definitive health advice.
Allergy Information
Please check ingredients for potential allergens and consult a health professional if in doubt.