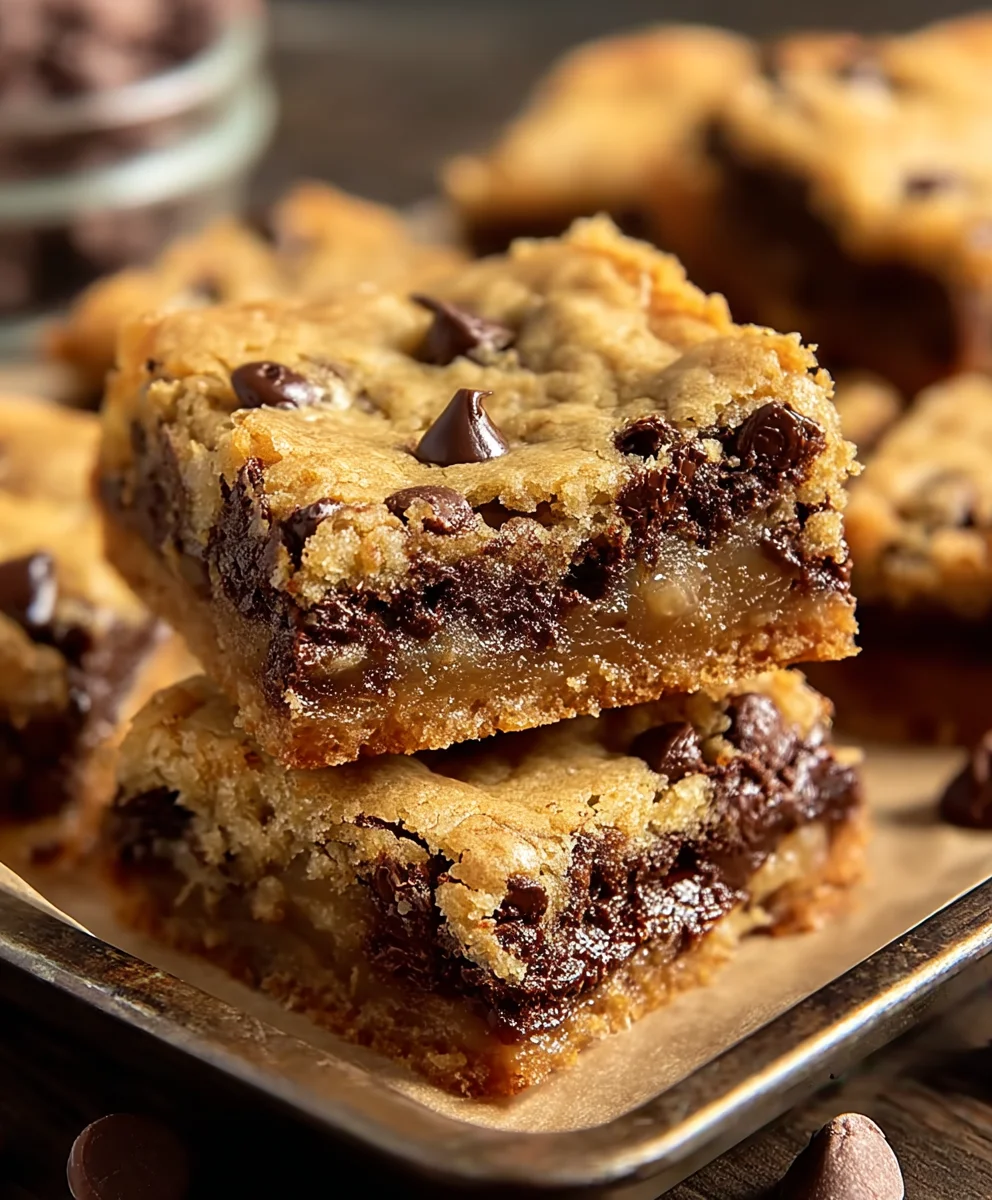
Gooey Chocolate Chip Cookie Bars – Best Recipe Ever
Gooey Chocolate Chip Cookie Bars are more than just a dessert; they’re a ticket to pure, unadulterated happiness. Forget the fuss of scooping individual cookies; these bars deliver that same irresistible, chewy, chocolate-laden experience in a delightfully easy-to-share format. Imagin extracte a golden-brown, slightly crisp edge giving way to a wonderfully soft and decadent center, studded with pockets of molten chocolate that stretch and ooze with every bite. It’s this perfect textural contrast, combined with the comforting, classic flavor of chocolate chip cookies, that makes them so universally adored. What truly sets these gooey chocolate chip cookie bars apart is their incredible versatility. Whether you’re craving a sweet treat for a movie night, a crowd-pleasing dessert for a potluck, or simply a moment of personal indulgence, these bars rise to the occasion. They’re also remarkably forgiving, making them a fantastic recipe for bakers of all skill levels. Get ready to create a batch that will vanish in minutes, leaving evergin extracte begging for the secret to your incredible gooey chocolate chip cookie bars.

Ingredients:
- 1 1/2 cups all-purpose flour
- 1/2 teaspoon baking soda
- 1/4 teaspoon baking powder
- 1/2 teaspoon sea salt
- 1/2 cup butter, softened
- 1/2 cup granulated sugar
- 1/2 cup light brown sugar, packed
- 1 large egg
- 1 1/2 teaspoon vanilla extract
- 1 cup chocolate chips (this is typically about half of a standard 12-ounce bag)
Preparing Your Gooey Chocolate Chip Cookie Bars
Preheating and Pan Preparation
Before we dive into mixing, let’s get our baking environment ready. Preheat your oven to 350 degrees Fahrenheit (175 degrees Celsius). This consistent temperature is crucial for ensuring your cookie bars bake evenly, developing that perfect chewy texture on the inside and a slightly crisp edge. Now, let’s prepare your baking pan. I recommend using an 8×8 inch baking pan. To prevent sticking and make removal a breeze, generously grease the pan with butter or cooking spray. Alternatively, you can line the pan with parchment paper, leaving some overhang on the sides. This parchment sling will allow you to lift the entire baked slab out of the pan in one piece, making cutting into perfect bars so much easier.
Combining Dry Ingredients
In a medium-sized mixing bowl, we’re going to whisk together our dry ingredients. This step is important for distributing the leavening agents and salt evenly throughout the flour, which will help our bars rise properly and have balanced flavor. Add the 1 1/2 cups of all-purpose flour, 1/2 teaspoon of baking soda, 1/4 teaspoon of baking powder, and 1/2 teaspoon of sea salt to your bowl. Use a whisk or a fork to thoroughly combine them. You want to ensure there are no clumps of baking soda or powder. This initial step ensures that every bite of your cookie bars will be consistent in taste and texture.
Creaming Butter and Sugars
Now comes the part that contributes to the wonderful tenderness and structure of our bars: creaming the butter and sugars. In a large mixing bowl, or the bowl of your stand mixer fitted with the paddle attachment, add the 1/2 cup of softened butter. It’s important that the butter is truly softened – not melted, but pliable enough to be easily creamed. This will allow it to incorporate air, which is key to a tender crum extractb. Add the 1/2 cup of granulated sugar and the 1/2 cup of packed light brown sugar to the butter. Beat these together on medium speed until the mixture is light, fluffy, and pnon-alcoholic ale in color. This process typically takes about 2 to 3 minutes. You’ll see the mixture transform from a dense mass into a creamy, airy foundation for our cookie bars. Scrape down the sides of the bowl occasionally to make sure all the butter and sugar are incorporated evenly.
Incorporating Wet Ingredients and Flour Mixture
Once your butter and sugar mixture is perfectly creamed, it’s time to add the wet ingredients. Add the 1 large egg and 1 1/2 teaspoons of vanilla extract to the bowl. Beat on medium-low speed until just combined. Be careful not to overmix at this stage. Overmixing can develop the gluten in the flour too much, leading to tougher bars. Next, we’ll gradually add our dry ingredient mixture to the wet ingredients. Add about half of the flour mixture to the bowl and mix on low speed until just incorporated. Then, add the remaining half of the flour mixture and continue mixing on low speed until no streaks of flour remain. Again, the key here is to mix only until everything is combined. The dough will be thick and wonderfully fragrant from the vanilla.
Adding the Chocolatey Goodness
This is arguably the most exciting step! We’re going to gently fold in the star of the show: the chocolate chips. Add the 1 cup of chocolate chips to the dough. Use a spatula or a wooden spoon to gently fold them into the batter. The goal is to distribute the chocolate chips evenly throughout the dough without overworking it. You want to see pockets of melty chocolate throughout your baked bars, so don’t be afraid to have plenty! Some people like to reserve a few chocolate chips to sprinkle on top before baking for an extra chocolatey visual appeal, which I highly recommend. This final touch adds an extra layer of deliciousness and makes your bars look as tempting as they taste.
Baking and Cooling for Perfect Gooeyness
Now, spread the cookie dough evenly into your prepared 8×8 inch baking pan. Use your spatula to smooth the top so it’s relatively even. Place the pan in your preheated oven and bake for 25 to 30 minutes. The baking time can vary slightly depending on your oven, so keep an eye on them. You’re looking for the edges to be golden brown and set, while the center should still look slightly soft and underbaked – this is the secret to achieving that irresistible gooey texture. Once baked, remove the pan from the oven and let it cool completely in the pan on a wire rack. This cooling period is absolutely crucial. As the bars cool, they will continue to set up and the gooeyness will develop. Resist the urge to cut into them while they are hot; you’ll end up with a messy, unformed situation. Once completely cooled, you can lift them out using the parchment paper overhang or cut them directly in the pan. Cut into squares or rectangles, and enjoy the ultimate gooey chocolate chip cookie bar experience.
Conclusion:
We’ve reached the end of our delightful journey into crafting the ultimate Gooey Chocolate Chip Cookie Bars! This recipe is designed to deliver that perfect balance of chewy edges and a wonderfully soft, gooey center that truly defines an exceptional cookie bar. The simple steps ensure that even novice bakers can achieve impressive results, filling your kitchen with an irresistible aroma. Don’t hesitate to get creative and make these your own; they are incredibly versatile and always a crowd-pleaser. We hope you enjoy every single bite of these incredible Gooey Chocolate Chip Cookie Bars. Remember, baking is about joy and sharing, so gather your loved ones and create some sweet memories!
Frequently Asked Questions:
Can I make these Gooey Chocolate Chip Cookie Bars ahead of time?
Yes, you absolutely can! For the best texture, it’s recommended to bake them and let them cool completely before storing. They are best enjoyed within 2-3 days. For longer storage, you can wrap individual bars tightly in plastic wrap and then place them in an airtight container. They can also be frozen for up to 3 months, though they might lose a tiny bit of their signature gooeyness upon thawing. Simply let them come to room temperature before enjoying.
What are some good serving suggestions for Gooey Chocolate Chip Cookie Bars?
These Gooey Chocolate Chip Cookie Bars are fantastic served warm, perhaps with a scoop of vanilla ice cream for an extra decadent treat. They are also delicious on their own with a glass of cold milk. For a slightly more sophisticated touch, you can dust them with a little powdered sugar or drizzle them with melted chocolate. They make an excellent addition to any dessert spread or as a simple afternoon pick-me-up.
Can I add nuts or other mix-ins to the Gooey Chocolate Chip Cookie Bars?
Absolutely! Nuts like walnuts or pecans are a classic addition and pair wonderfully with chocolate. You can also try adding M&M’s, white chocolate chips, or even a swirl of caramel or peanut butter to the batter before baking. Just be mindful not to overmix the batter once you add extra ingredients. Aim for about 1 cup of additional mix-ins per batch.
Gooey Chocolate Chip Cookie Bars – Best Recipe Ever
The ultimate gooey chocolate chip cookie bar recipe, featuring a perfectly chewy center and slightly crisp edges.
Ingredients
-
1 1/2 cups all-purpose flour
-
1/2 teaspoon baking soda
-
1/4 teaspoon baking powder
-
1/2 teaspoon sea salt
-
1/2 cup butter, softened
-
1/2 cup granulated sugar
-
1/2 cup light brown sugar, packed
-
1 large egg
-
1 1/2 teaspoon vanilla extract
-
1 cup chocolate chips
Instructions
-
Step 1
Preheat oven to 350°F (175°C). Grease an 8×8 inch baking pan or line with parchment paper. -
Step 2
In a medium bowl, whisk together flour, baking soda, baking powder, and salt. -
Step 3
In a large bowl, cream together softened butter, granulated sugar, and brown sugar until light and fluffy. -
Step 4
Beat in the egg and vanilla extract until just combined. Gradually add the dry ingredients, mixing on low speed until just incorporated. Fold in the chocolate chips. -
Step 5
Spread the dough evenly into the prepared pan. Bake for 25-30 minutes, or until the edges are golden brown and the center is still slightly soft. -
Step 6
Let cool completely in the pan on a wire rack before cutting into bars.
Important Information
Nutrition Facts (Per Serving)
It is important to consider this information as approximate and not to use it as definitive health advice.
Allergy Information
Please check ingredients for potential allergens and consult a health professional if in doubt.