Soft Chewy Lemon Cookies Recipe-Easy & Delicious
Soft & Chewy Lemon Cookies are my absolute favorite kind of cookie to bake, and for good reason! There’s something incredibly comforting about biting into a cookie that’s perfectly tender, with a delightful chegrape juicess that lingers, and then, the bright, zesty punch of lemon that awakens your taste buds. These aren’t your average dry, crum extractbly cookies; oh no, these are the kind that make you close your eyes with pure bliss. We all crave treats that offer that perfect balance of sweet and tangy, and these Soft & Chewy Lemon Cookies deliver just that. They’re surprisingly simple to make, yet they taste so elegant and homemade, a true testament to the power of fresh ingredients. Get ready to fill your kitchen with an irresistible citrus aroma!
Soft & Chewy Lemon Cookies
There are few things more delightful than a perfectly baked cookie. And when it comes to cookies, the balance of sweet, tangy, and delightfully chewy can be a true masterpiece. My Soft & Chewy Lemon Cookies are precisely that – a burst of sunshine in every bite. They boast a tender interior with just the right amount of crum extractble, all infused with a vibrant lemon flavor that isn’t overpowering but rather a refreshing lift. Whether you’re looking for a treat to brighten a gloomy afternoon, a crowd-pleasing dessert for your next gathering, or simply a way to satisfy a sweet craving, these cookies are sure to become a favorite. The secret to their irresistible texture lies in a few key ingredients and techniques, ensuring that each cookie is a small marvel of baking perfection.
These cookies are surprisingly simple to make, requiring no fancy equipment or complicated steps. The bright citrus notes come from both fresh lemon zest and a touch of lemon extract, creating a complex and authentic lemon flavor that dances on your palate. The use of an extra egg yolk contributes to their incredible chegrape juicess and rich texture, while cornstarch helps to guarantee that tender bite we all crave. Don’t be shy with the lemon zest; it’s where a lot of that fragrant, natural lemon oil resides. And for that extra sparkle and delightful crunch on the outside, a roll in granulated sugar before baking adds a beautiful finish and a subtle textural contrast. Get ready to fill your kitchen with the most wonderful aroma and your cookie jar with pure happiness.
Ingredients:
Preparing the Dough
1. Creaming the Butter and Sugar: Begin extract by creaming together the softened unsalted butter and 1 ½ cups of granulated sugar in a large mixing bowl. You can use an electric mixer (handheld or stand mixer) for this, or a sturdy whisk and some elbow grease. Beat them together until the mixture is light and fluffy, which should take about 3-5 minutes. This creaming process is crucial as it incorporates air into the dough, which will contribute to the cookies’ light texture. Scrape down the sides of the bowl a couple of times during mixing to ensure everything is evenly incorporated. Next, add the tablespoon of fresh lemon zest to the butter and sugar mixture. The zest releases its aromatic oils, infusing the dough with that wonderful lemon fragrance even before we add the extracts. Mix until just combined.
2. Adding Wet Ingredients: Now, it’s time to incorporate the eggs and lemon extract. Add the room temperature large egg and the extra large egg yolk to the creamed mixture. Adding them one at a time and beating well after each addition helps to ensure they are fully emulsified into the dough, creating a smoother and more stable batter. The room temperature aspect is important here; cold eggs won’t incorporate as smoothly into the butter and sugar, potentially leading to a greasier texture. Beat until the eggs are thoroughly combined and the mixture is glossy. Finally, stir in the 2 teaspoons of lemon extract. If you prefer a less intense lemon flavor or a hint of vanilla, you can use 1 teaspoon of lemon extract and 1 teaspoon of vanilla extract. Mix until everything is just incorporated.
3. Incorporating Dry Ingredients: In a separate medium bowl, whisk together the 3 cups of all-purpose flour, 1 teaspoon of baking soda, 1 teaspoon of cornstarch, and ¾ teaspoon of salt. Whisking these dry ingredients together before adding them to the wet ingredients ensures that the leavening agents and salt are evenly distributed, which is key for uniform cookie rise and flavor. Now, gradually add the dry ingredients to the wet ingredients, mixing on low speed or by hand until just combined. Be careful not to overmix the dough at this stage. Overmixing can develop the gluten in the flour too much, resulting in tougher cookies. Once you no longer see streaks of dry flour, stop mixing.
4. Adding the Lemon Juice: Finally, stir in the 2 tablespoons of fresh lemon juice. This adds another layer of bright, tangy lemon flavor and also helps to slightly moisten the dough. Stir until just incorporated. The dough might seem a little soft at this point, which is perfectly fine. For the best texture and to make the dough easier to handle, it’s highly recommended to cover the bowl with plastic wrap and chill the dough in the refrigerator for at least 30 minutes, or up to 2 days. Chilling allows the flavors to meld, the flour to hydrate fully, and the butter to firm up, which will result in cookies that spread less and have a chewier texture.
Baking the Cookies
5. Shaping and Rolling: Preheat your oven to 375°F (190°C). Line baking sheets with parchment paper or silicone baking mats. This prevents sticking and makes for easier cleanup. Place the ¼ cup of granulated sugar for rolling and garnishing into a shallow bowl. Once the dough has chilled, scoop rounded tablespoons of dough (a cookie scoop is excellent for this!) and roll them into smooth balls. Then, gently roll each ball in the prepared granulated sugar, coating all sides. This sugar coating will caramelize slightly as the cookies bake, giving them a delightful crisp exterior and a beautiful sparkle.
6. Baking to Perfection: Place the sugared dough balls onto the prepared baking sheets, leaving about 2 inches of space between each cookie to allow for spreading. Bake for 9-12 minutes, or until the edges are lightly golden brown and the centers are still slightly soft and appear underbaked. This is the secret to chewy cookies! They will continue to set as they cool on the baking sheet. For an extra burst of lemon flavor, you can sprinkle a tiny bit of extra lemon zest on top of the cookies immediately after they come out of the oven, before they start to set. Allow the cookies to cool on the baking sheets for 5-10 minutes before carefully transferring them to a wire rack to cool completely. This resting period on the warm baking sheet is crucial for achieving that perfect chewy texture. Enjoy these delightful bursts of sunshine!

Conclusion:
And there you have it – your guide to creating the most delightful soft & chewy lemon cookies! This recipe truly delivers on its promise of bright, zesty flavor with that perfect tender crum extractb and satisfying chew. I love how simple the process is, making it approachable for bakers of all levels. These cookies are a fantastic way to brighten any day, whether you’re looking for a sweet treat with your afternoon tea or a charming addition to a cookie platter. Don’t hesitate to try this recipe; I’m confident you’ll be hooked after the first bite!
For serving, these cookies are wonderful on their own, but they also pair beautifully with a glass of cold milk, a hot cup of coffee, or even a light citrus-infused tea. Consider dusting them with a little powdered sugar for an extra touch of elegance, or even dipping half of each cookie in white chocolate for a decadent twist.
Feeling adventurous? You can easily adapt this recipe. Try adding a touch of poppy seeds for a classic lemon-poppy seed combination, or incorporate finely grated lime zest alongside the lemon for a more complex citrus profile. A small amount of dried cranberries could also offer a lovely tart counterpoint.
Frequently Asked Questions:
Can I make these lemon cookies ahead of time?
Absolutely! Baked and cooled lemon cookies can be stored in an airtight container at room temperature for up to 3-4 days. They tend to maintain their soft and chewy texture well.
My cookies spread too much. What went wrong?
This is a common baking challenge! Over-mixing the dough after adding the flour can develop the gluten too much, leading to spreading. Also, ensure your butter and sugar are creamed sufficiently but not to the point of being too aerated. Chilling the dough for about 30 minutes before baking can also help prevent excessive spreading.
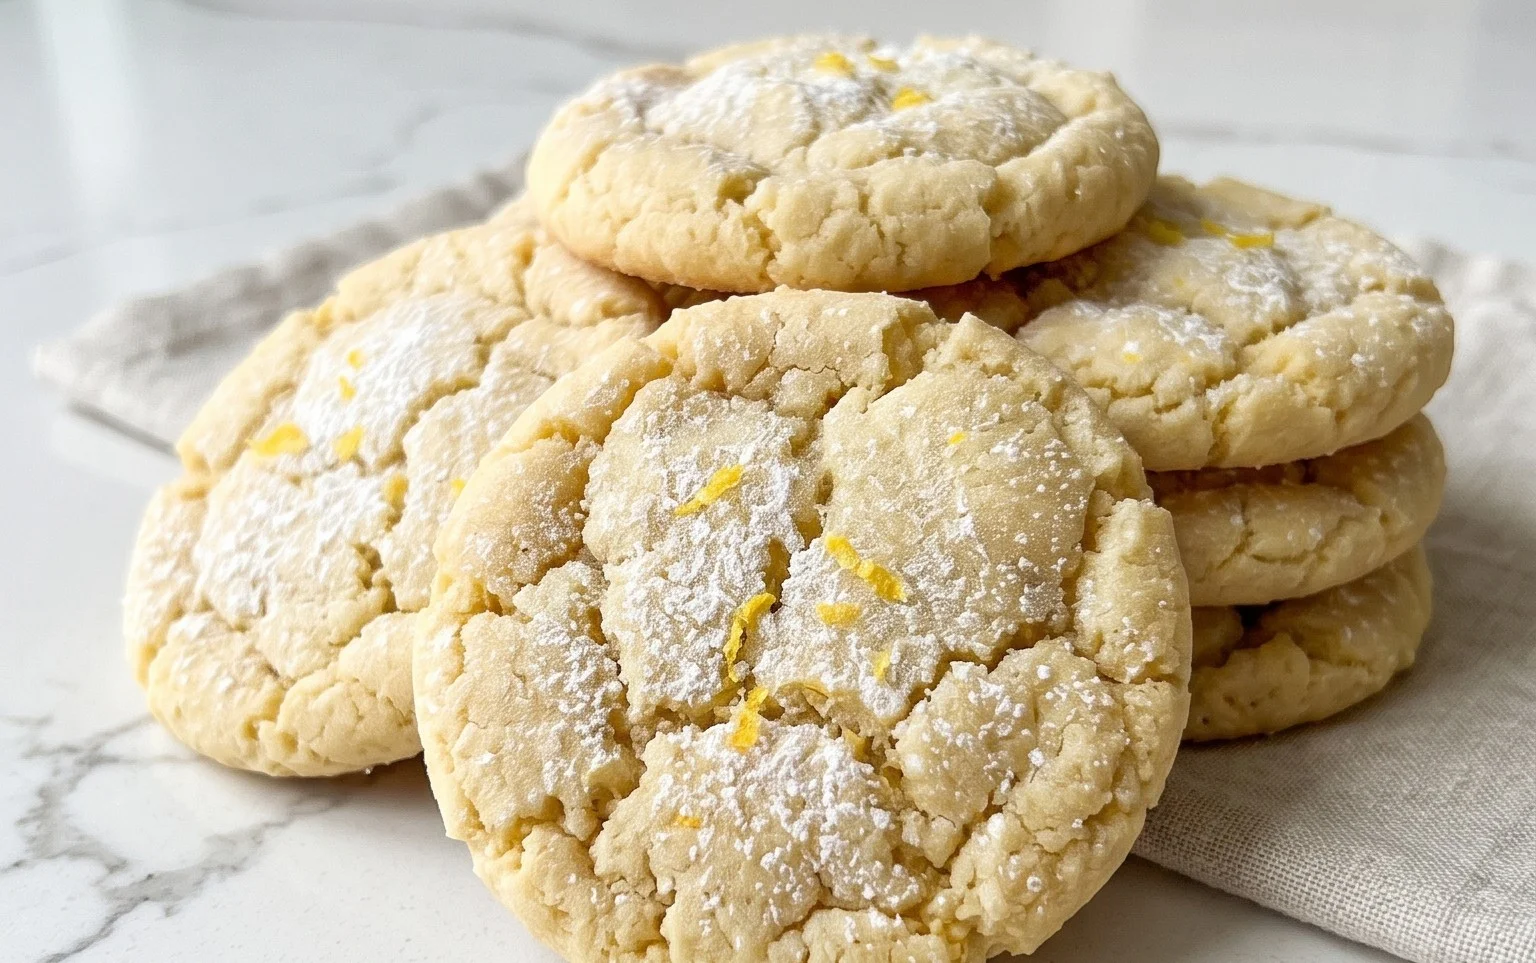
Soft & Chewy Lemon Cookies
Delightfully soft and chewy lemon cookies bursting with bright citrus flavor, finished with a sweet sugar coating.
Ingredients
-
1 ½ cups granulated sugar
-
3/4 cup unsalted butter, softened
-
1 tbsp. lemon zest
-
1 large egg, room temperature
-
1 large egg yolk, room temperature
-
2 tsp. lemon extract
-
3 cups all-purpose flour, spooned and leveled
-
1 tsp. baking soda
-
1 tsp. cornstarch
-
3/4 tsp. salt
-
2 tbsp. lemon juice
-
¼ cup granulated sugar, for rolling & garnishing
Instructions
-
Step 1
In a large bowl, cream together the 1 ½ cups granulated sugar and softened unsalted butter until light and fluffy. -
Step 2
Beat in the lemon zest, large egg, large egg yolk, and lemon extract until well combined. -
Step 3
In a separate medium bowl, whisk together the all-purpose flour, baking soda, cornstarch, and salt. -
Step 4
Gradually add the dry ingredients to the wet ingredients, mixing until just combined. Stir in the lemon juice. -
Step 5
Roll rounded tablespoons of dough into balls and then roll each ball in the ¼ cup granulated sugar for rolling and garnishing. -
Step 6
Place dough balls on a baking sheet lined with parchment paper, about 2 inches apart. -
Step 7
Bake at 375°F (190°C) for 10-12 minutes, or until the edges are lightly golden and the centers are still soft. -
Step 8
Let cookies cool on the baking sheet for a few minutes before transferring to a wire rack to cool completely.
Important Information
Nutrition Facts (Per Serving)
It is important to consider this information as approximate and not to use it as definitive health advice.
Allergy Information
Please check ingredients for potential allergens and consult a health professional if in doubt.