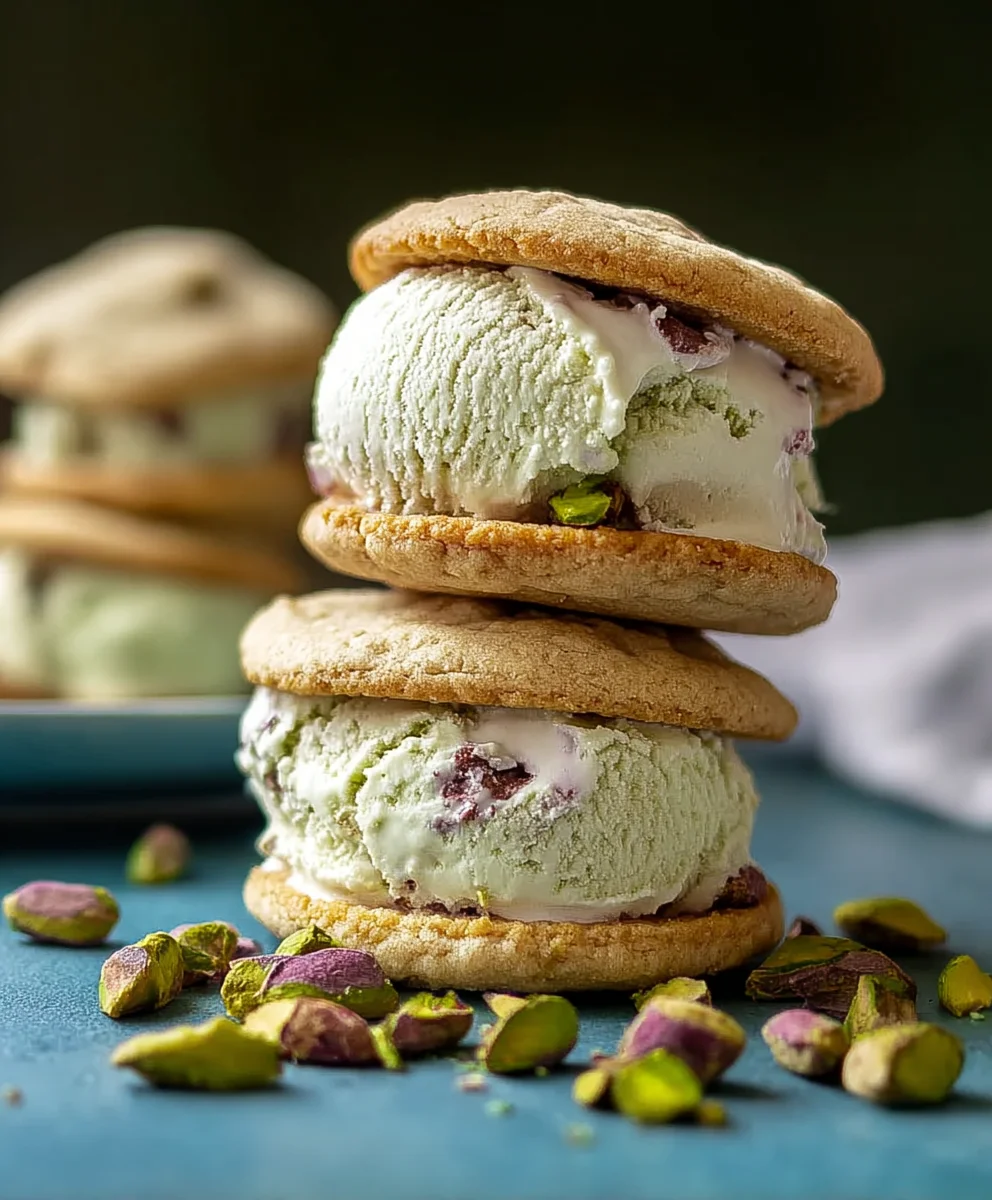
Pistachio Cookie Ice Cream Sandwiches – Easy Recipe
Pistachio Cookie Ice Cream Sandwiches are the ultimate treat for anyone who adores the delightful crunch of a perfectly baked cookie and the cool, creamy embrace of homemade ice cream. Forget those bland, store-bought options; we’re diving headfirst into a world of vibrant green and nutty perfection. What is it about these particular treats that captivate our taste buds and bring us back for more? It’s the harmonious marriage of textures and flavors – the slightly chewy, intensely pistachio-flavored cookie yielding to a lusciously smooth, sweet ice cream filling. This isn’t just any dessert; it’s an experience, a sophisticated yet utterly comforting indulgence that elevates a simple concept to something truly extraordinary. Get ready to impress yourself and anyone lucky enough to share these incredible Pistachio Cookie Ice Cream Sandwiches.
Ingredients:
- 1 cup unsalted butter, softened
- ¾ cup granulated sugar
- 1 large egg
- 1 teaspoon vanilla extract
- 2 cups all-purpose flour
- ½ cup finely ground pistachios
- ¼ teaspoon salt
- 2 cups vanilla ice cream, slightly softened
- ¼ cup chopped pistachios (for rolling)
Cookie Dough Preparation
Creaming the Butter and Sugar
- In a large mixing bowl, combine the softened unsalted butter and granulated sugar. Using an electric mixer on medium speed, cream these two ingredients together until the mixture becomes light and fluffy. This process, often called creaming, incorporates air into the butter and sugar, which is crucial for creating tender cookies. Continue mixing for about 2-3 minutes, scraping down the sides of the bowl occasionally with a spatula to ensure everything is evenly combined. You’re looking for a pnon-alcoholic ale yellow, airy consistency.
- Once the butter and sugar are well creamed, add the large egg and the vanilla extract to the bowl. Increase the mixer speed slightly to medium-high and beat until the egg is fully incorporated and the mixture is smooth and homogenous. Again, make sure to scrape down the sides of the bowl to gather any unincorporated bits. This step adds moisture and richness to the cookie dough.
Incorporating Dry Ingredients
- In a separate medium bowl, whisk together the all-purpose flour, finely ground pistachios, and salt. Whisking the dry ingredients before adding them to the wet ingredients helps to distribute the salt and ground pistachios evenly throughout the flour, preventing pockets of saltiness or intense pistachio flavor in certain bites.
- Gradually add the dry ingredient mixture to the wet ingredient mixture in the large mixing bowl, mixing on low speed until just combined. Be careful not to overmix the dough at this stage. Overmixing can develop the gluten in the flour too much, leading to tough cookies. Mix only until you no longer see streaks of dry flour. The dough should be thick and slightly sticky.
Shaping and Baking the Cookies
Chilling and Scooping the Dough
- Cover the cookie dough tightly with plastic wrap and refrigerate for at least 1 hour. This chilling period is essential for several reasons. First, it allows the flavors to meld together. Second, and more importantly for this recipe, it firms up the butter, making the dough easier to handle and preventing the cookies from spreading too much during baking. A well-chilled dough will result in cookies that hold their shape better, which is ideal for sandwiching ice cream.
- Once the dough is well-chilled, preheat your oven to 350°F (175°C). Line two baking sheets with parchment paper. Parchment paper is a lifesaver here, preventing the cookies from sticking to the baking sheets and making cleanup a breeze. Take the chilled dough out of the refrigerator. You’ll notice it’s much firmer. Using a small cookie scoop (about 1.5 tablespoons), scoop out portions of the dough. Roll each portion into a smooth ball between your palms. You want consistent sizes so that your cookie sandwiches will look uniform. Place the dough balls about 2 inches apart on the prepared baking sheets. The spacing allows for a little bit of spread without them running into each other.
Baking and Cooling
- Bake the cookie dough balls for 10-12 minutes, or until the edges are lightly golden brown and the centers appear slightly soft. The exact baking time will depend on your oven and the size of your cookies, so keep a close eye on them. They should not be deeply browned, as they will continue to cook slightly as they cool on the baking sheet.
- Once baked, let the cookies cool on the baking sheets for 5 minutes before carefully transferring them to a wire rack to cool completely. This resting period on the baking sheet allows the cookies to set up. If you try to move them too soon, they might break. Allowing them to cool completely on the wire rack ensures they are firm enough to handle and won’t melt the ice cream prematurely.
Assembling the Pistachio Cookie Ice Cream Sandwiches
Ice Cream Filling and Rolling
- While the cookies are cooling, take the slightly softened vanilla ice cream out of the freezer. You want it soft enough to scoop and spread easily, but not so soft that it’s completely melted. If it’s too hard, let it sit at room temperature for about 10-15 minutes.
- Once the cookies are completely cool, begin extract assembling your ice cream sandwiches. Take two cookies that are roughly the same size and shape. Spread about 2-3 tablespoons of the slightly softened vanilla ice cream onto the flat side of one cookie. Gently place the other cookie on top, flat side down, pressing down lightly to spread the ice cream to the edges.
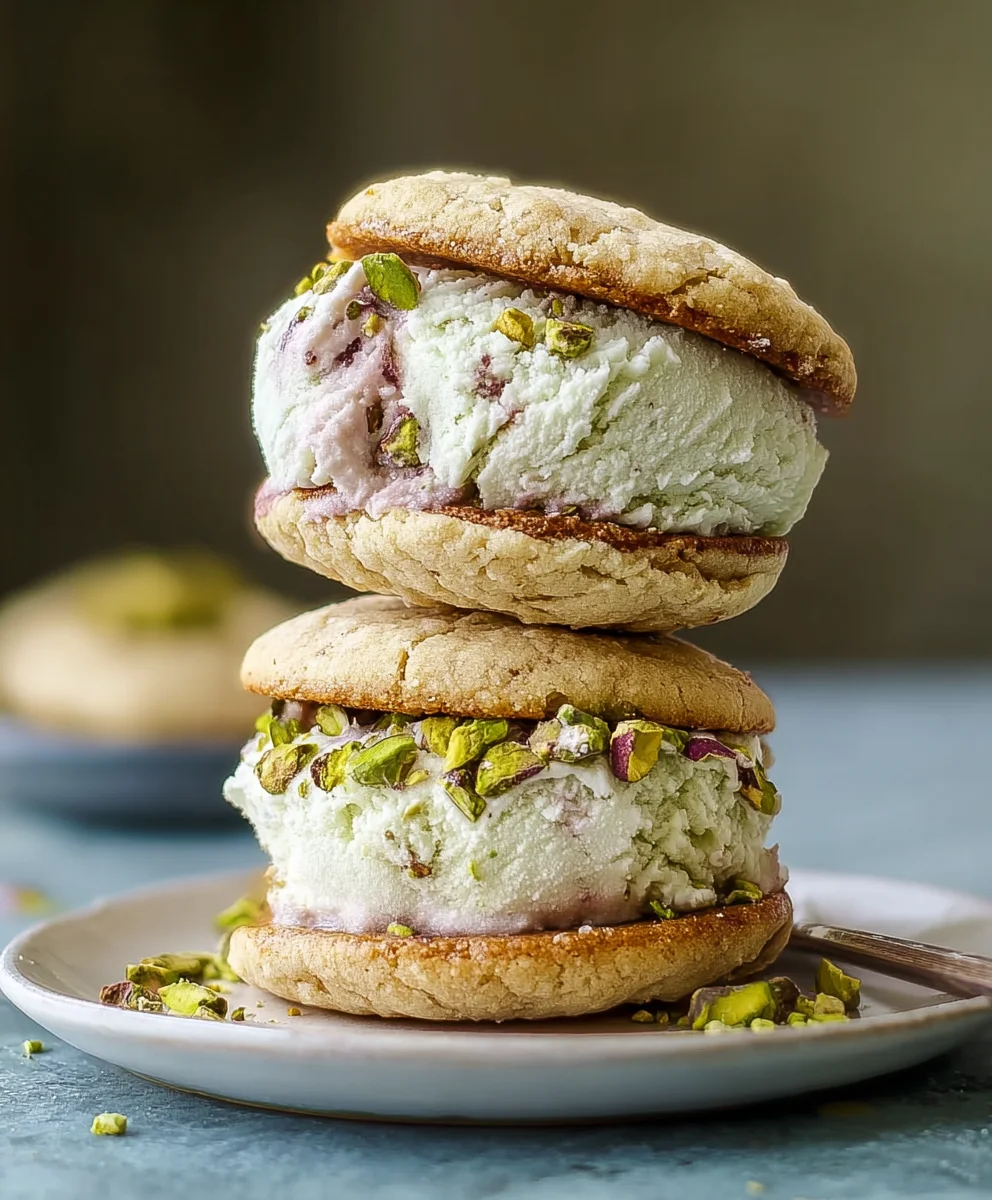
- Immediately after assembling each sandwich, roll the exposed edges of the ice cream in the chopped pistachios. This is where those beautiful green pieces come in! They not only add a delightful crunch and visual appeal but also reinforce that wonderful pistachio flavor. You can gently press the sides of the ice cream sandwich into the chopped nuts to help them adhere.
- Place the assembled ice cream sandwiches on a baking sheet lined with parchment paper and immediately return them to the freezer. It’s crucial to freeze them until the ice cream is firm again, usually for at least 1-2 hours. This step ensures that when you bite into your Pistachio Cookie Ice Cream Sandwich, the ice cream holds its shape and provides that perfect, refreshing contrast to the chewy cookie.
Conclusion:
There you have it – a delightful journey into crafting your very own Pistachio Cookie Ice Cream Sandwiches! We’ve walked through the steps to create these visually stunning and incredibly delicious treats, from baking the perfectly chewy pistachio cookies to layering them with your favorite creamy ice cream. The combination of the nutty, slightly salty pistachio and the sweet, cool ice cream is truly a match made in dessert heaven. Don’t be afraid to get creative with your ice cream flavor choices – classic vanilla or a rich chocolate would be fantastic, but consider a swirl of raspberry or even a coffee ice cream for a more adventurous twist!
For an extra touch, consider rolling the exposed ice cream edges in chopped pistachios, mini chocolate chips, or even a sprinkle of edible glitter for a festive flair. These Pistachio Cookie Ice Cream Sandwiches are perfect for summer gatherings, a special birthday treat, or simply when you need a little pick-me-up. Now go forth and enjoy the fruits of your labor – happy baking (and assembling)!
Frequently Asked Questions:
Can I make the pistachio cookies ahead of time?
Absolutely! The pistachio cookies can be baked a day or two in advance and stored in an airtight container at room temperature once completely cooled. This makes assembling your Pistachio Cookie Ice Cream Sandwiches much quicker when you’re ready to serve.
What kind of ice cream works best?
Almost any ice cream will work! However, for the best structural integrity and flavor balance, a slightly firmer ice cream is ideal. Opt for premium ice creams that are less airy. Avoid very soft-serve style ice creams that can melt too quickly during assembly.
Pistachio Cookie Ice Cream Sandwiches – Easy Recipe
Delightful and easy-to-make ice cream sandwiches featuring chewy pistachio cookies and creamy vanilla ice cream, rolled in crunchy chopped pistachios.
Ingredients
-
1 cup unsalted butter, softened
-
¾ cup granulated sugar
-
1 large egg
-
1 teaspoon vanilla extract
-
2 cups all-purpose flour
-
½ cup finely ground pistachios
-
¼ teaspoon salt
-
2 cups vanilla ice cream, slightly softened
-
¼ cup chopped pistachios (for rolling)
Instructions
-
Step 1
Cream softened unsalted butter and granulated sugar in a large bowl with an electric mixer until light and fluffy (about 2-3 minutes). Scrape down the sides of the bowl as needed. Add the large egg and vanilla extract, and beat until fully incorporated and smooth. -
Step 2
In a separate bowl, whisk together all-purpose flour, finely ground pistachios, and salt. Gradually add this dry mixture to the wet ingredients, mixing on low speed until just combined. Do not overmix. -
Step 3
Cover the cookie dough tightly with plastic wrap and refrigerate for at least 1 hour to firm up. Preheat your oven to 350°F (175°C) and line two baking sheets with parchment paper. Scoop 1.5-tablespoon portions of chilled dough, roll into balls, and place about 2 inches apart on the prepared baking sheets. -
Step 4
Bake for 10-12 minutes, or until the edges are lightly golden brown and centers appear slightly soft. Let cookies cool on the baking sheets for 5 minutes before transferring to a wire rack to cool completely. -
Step 5
While cookies cool, ensure vanilla ice cream is slightly softened. Once cookies are completely cool, spread 2-3 tablespoons of ice cream onto the flat side of one cookie. Top with another cookie, pressing lightly. -
Step 6
Immediately roll the exposed ice cream edges in chopped pistachios. Place assembled sandwiches on a parchment-lined baking sheet and return to the freezer for at least 1-2 hours until firm.
Important Information
Nutrition Facts (Per Serving)
It is important to consider this information as approximate and not to use it as definitive health advice.
Allergy Information
Please check ingredients for potential allergens and consult a health professional if in doubt.