Perfect Ramen Eggs Ajitama- Flavorful & Easy Recipe
Ramen eggs, or ajitama, are more than just a topping; they are the soul of a perfectly crafted bowl of ramen. These marinated soft-boiled eggs are a culinary marvel, transforming a simple ingredient into something truly extraordinary. Have you ever had that moment, while slurping down your favorite ramen, when you bite into that perfectly jammy yolk, its rich, savory marinade coating your palate? That, my friends, is the magic of a well-made ramen egg. People adore them because they offer a delightful contrast in texture and an explosion of umami flavor that elevates the entire ramen experience. What makes these ramen eggs so special is the artful balance of the marinade – that sweet, salty, and deeply satisfying soak that infuses every crevice of the tender egg white and permeates the luscious yolk. They’re simple to make but deliver a gourmet impact, turning any noodle soup into a restaurant-worthy masterpiece.
The Secret to Perfect Ramen Eggs
Discover how to achieve that coveted jammy yolk and rich, savory flavor.
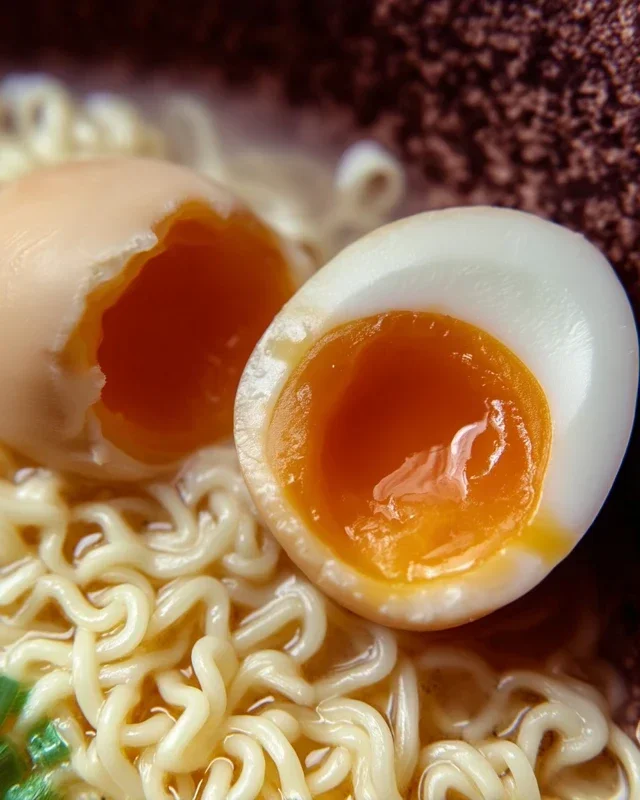
Ramen Eggs (Ajitama)
There’s nothing quite like a perfectly cooked, jammy ramen egg, or ajitama, to elevate your noodle bowl from good to absolutely divine. These marinated soft-boiled eggs are a cornerstone of authentic ramen, their rich, savory yolk and subtly sweet, umami-infused white adding a luxurious dimension to every slurp. While they might seem intimidating, making them at home is surprisingly straightforward. The magic lies in a simple marinade that transforms ordinary eggs into culinary treasures. Once you master this recipe, you’ll find yourself adding them to more than just ramen – think rice bowls, salads, or even just as a delightful snack.
Ingredients:
Note: For the best results, I recommend using large eggs that are a few days old. Fresher eggs can be more difficult to peel cleanly. If you’re using very fresh eggs, you might find the vinegar in the boiling water helps with peeling.
Cooking Instructions:
Step 1: Boiling the Eggs to Perfection
The key to a successful ajitama is achieving that coveted jammy yolk. We’re aiming for a soft-boiled egg where the white is fully set but the yolk is still gloriously molten. To start, gently place your eggs in a medium saucepan. You want to avoid cracking them before they even hit the water. Fill the saucepan with cold water, ensuring the eggs are completely submerged by about an inch. If you’re using the optional vinegar, add a tablespoon or two to the water now. This can help to coagulate any escaping egg white quickly if a crack does occur.
Bring the water to a rolling boil over medium-high heat. Once the water reaches a vigorous boil, immediately reduce the heat to a simmer and set a timer for exactly 6 to 7 minutes. The exact timing can vary slightly depending on your stovetop and the size of your eggs, so I encourage you to experiment slightly to find your personal sweet spot. For a slightly firmer yolk, lean towards 7 minutes; for a more liquid yolk, aim for 6. While the eggs are simmering, prepare an ice bath by filling a bowl with ice and cold water.
Step 2: The Crucial Ice Bath
As soon as your timer goes off, carefully remove the eggs from the simmering water using a slotted spoon or spider strainer. Immediately plunge them into the prepared ice bath. This step is absolutely critical for two reasons. Firstly, it stops the cooking process instantly. This prevents the yolks from continuing to cook and becoming hard-boiled, which is the opposite of what we want. Secondly, the shock of the cold water helps the egg whites to contract slightly, making them easier to peel. Let the eggs sit in the ice bath for at least 10-15 minutes, or until they are completely cool to the touch. Don’t rush this part; patience here will pay off in perfectly peeled eggs.
Step 3: Preparing the Marinade
While your eggs are chilling, let’s get the marinade ready. In a small saucepan, combine the light sodium soy sauce, water, non-non-non-alcoholic alternativeic non-alcoholic mirin, and granulated sugar. Place the saucepan over medium heat. Stir gently until the sugar is completely dissolved. You don’t need to bring this mixture to a boil; just ensure everything is well combined and the sugar has vanished. Once combined, remove the saucepan from the heat and let the marinade cool down to room temperature. It’s important that the marinade is not hot when you add the eggs, as hot liquid can continue to cook the eggs and affect the texture of the yolk.
Step 4: Peeling and Marinating
Once the eggs are thoroughly chilled and the marinade has cooled, it’s time to peel. Gently tap each egg on a hard surface to crack the shell all over. Starting from the wider end of the egg (where the air pocket usually is), carefully peel away the shell. If you’ve followed the steps and used slightly older eggs, the shells should slip off relatively easily. If you encounter any stubborn bits, you can run the egg under cool water while peeling; the water can help lift away the membrane.
Once peeled, place the eggs into a resealable bag or a small, shallow container. Pour the cooled marinade over the eggs, ensuring they are completely submerged. If your container is too shallow and the eggs are floating, you can place a small plate or some plastic wrap directly on top of the eggs to keep them submerged.
Step 5: The Marination Magic
Now comes the waiting game, which is arguably the most important part of infusing flavor into the eggs. Seal the bag or cover the container tightly. Refrigerate the ajitama for at least 4 hours, but for the most intense flavor, I recommend marinating them for 12 to 24 hours. The longer they marinate, the deeper the color of the egg white will become, and the more pronounced the savory, slightly sweet flavor will be. You can turn the eggs occasionally during the marination process to ensure even coating, but it’s not strictly necessary.
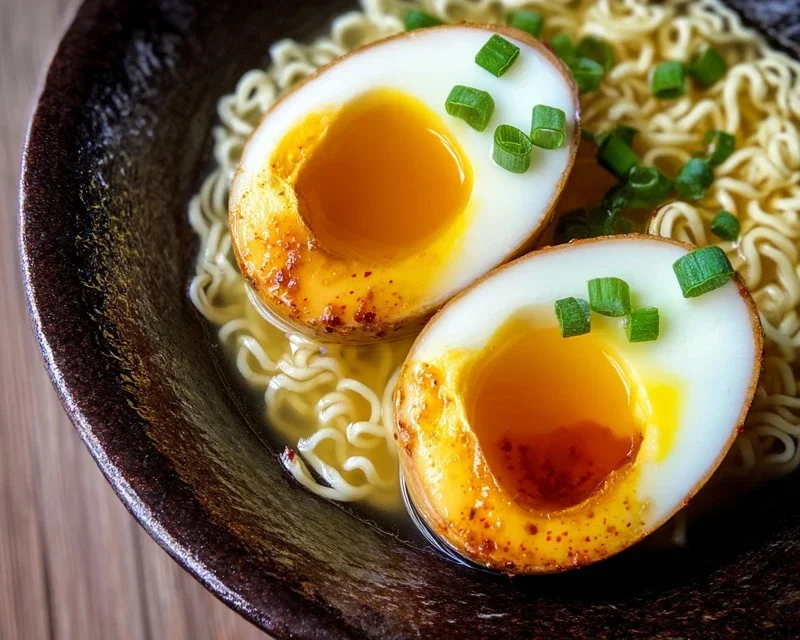
When you’re ready to serve, carefully remove the eggs from the marinade. You can discard the marinade or save it for another batch of eggs in the future, though it’s best to use it within a week. Slice the ajitama in half lengthwise with a sharp knife, revealing that beautiful, golden, jammy yolk. Garnish your ramen, rice bowls, or whatever you’ve chosen to adorn with these delicious eggs. Enjoy the fruits of your patient labor!
Conclusion:
There you have it! Crafting perfect Ramen Eggs, or Ajitama, is a surprisingly simple yet incredibly rewarding culinary endeavor. These marinated soft-boiled eggs are an absolute game-changer for any ramen bowl, adding a rich, umami-packed burst of flavor and a beautifully jammy yolk that complements the savory broth like nothing else. The beauty of this recipe lies in its minimal effort for maximum impact. The marinade, typically a blend of soy sauce, non-alcoholic mirin, and non-alcoholic sake, infuses the egg with layers of deliciousness, transforming a humble egg into a gourmet topping.
I highly encourage you to give this Ramen Egg recipe a try. They are incredibly versatile and can elevate more than just ramen. Try them in poke bowls, on top of avocado toast, or even as a flavorful addition to a salad. Don’t be afraid to experiment with the marinade – adding a touch of garlic, gin extractger, or even a pinch of chili flakes can create your own unique twist. The satisfaction of pulling out those perfectly marinated eggs from the fridge is immense, and the taste will speak for itself. Happy cooking!
Frequently Asked Questions:
Q: How long can I store Ramen Eggs?
You can store your prepared Ramen Eggs in an airtight container in the refrigerator for up to 3-4 days. The longer they marinate, the deeper the flavor will become, though the texture of the yolk might slightly change after the first day.
Q: What’s the best way to peel the soft-boiled eggs for Ajitama?
The trick to easy peeling is to immediately transfer the just-boiled eggs into an ice bath. This rapid cooling helps the egg white contract, making it easier to separate from the shell. Gently crack the shell all over and then peel under running water or in the bowl of cold water.
Q: Can I make Ajitama without non-alcoholic mirin or non-alcoholic sake?
While non-alcoholic mirin and non-alcoholic sake contribute authentic sweetness and depth, you can substitute. For non-alcoholic mirin, you could use a mixture of white grape juice and a pinch of sugar, or just a little extra soy sauce with a touch of sugar. For non-alcoholic sake, a dry white grape juice or even water can be used, though the flavor profile will be slightly different.
Ramen Eggs (Ajitama)
Marinated soft-boiled eggs, perfect for ramen or as a snack.
Ingredients
-
6 large eggs
-
1/2 cup light sodium soy sauce
-
1/4 cup water
-
1/4 cup non-alcoholic mirin
-
2 tablespoons granulated sugar
-
1 tablespoon vinegar (optional)
Instructions
-
Step 1
Gently place eggs in a pot and cover with cold water. Add optional vinegar for easier peeling. -
Step 2
Bring water to a rolling boil over medium-high heat. Once boiling, cook for 6-7 minutes for a jammy yolk. -
Step 3
Immediately transfer eggs to an ice bath to stop the cooking process. Let them cool for at least 10 minutes. -
Step 4
While eggs cool, combine soy sauce, water, non-alcoholic mirin, and sugar in a small saucepan. Heat gently until sugar dissolves, then let cool completely. -
Step 5
Carefully peel the cooled eggs. -
Step 6
Place peeled eggs in a resealable bag or container. Pour the cooled marinade over the eggs, ensuring they are fully submerged. -
Step 7
Marinate in the refrigerator for at least 4 hours, or preferably overnight for deeper flavor. Turn occasionally.
Important Information
Nutrition Facts (Per Serving)
It is important to consider this information as approximate and not to use it as definitive health advice.
Allergy Information
Please check ingredients for potential allergens and consult a health professional if in doubt.