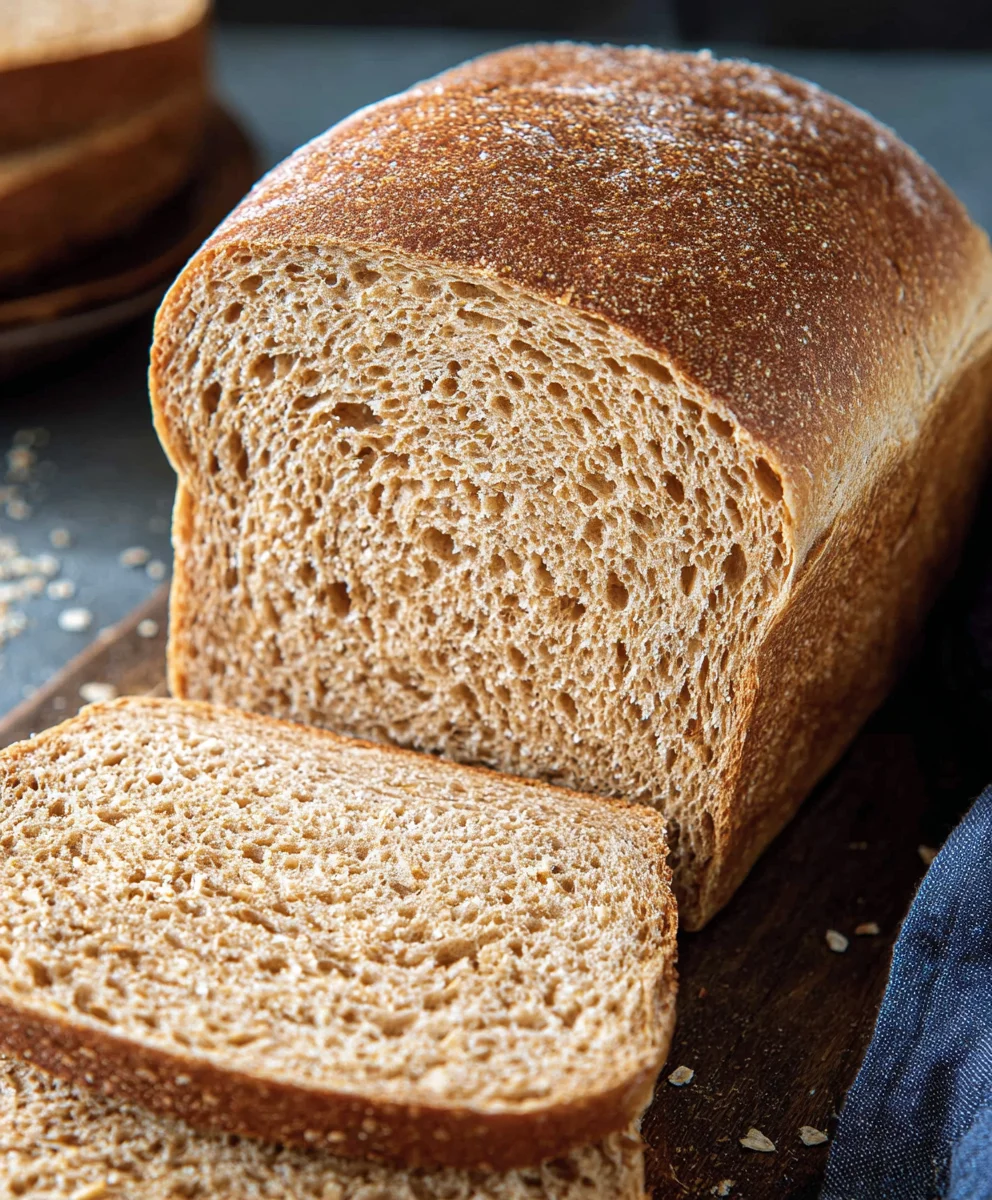
Easy Whole Wheat Bread-Homemade Healthy Loaf
Whole wheat bread is so much more than just a staple; it’s a comforting embrace, a healthy foundation, and a versatile canvas for countless culinary creations. There’s a deep satisfaction that comes from slicing into a freshly baked loaf of whole wheat bread, the hearty aroma filling your kitchen. People adore it not only for its robust flavor and satisfying chew but also for its incredible nutritional benefits. Unlike its refined counterparts, whole wheat bread retains all parts of the grain kernel – the bran, germ, and endosperm – delivering a powerful punch of fiber, vitamins, and minerals. This makes it a fantastic choice for those looking to boost their daily intake of essential nutrients and feel good about what they’re eating. What truly sets this recipe apart is its ability to achieve a perfectly tender crum extractb and a delightfully crisp crust, all while being incredibly straightforward to make at home. Get ready to elevate your sandwich game and your breakfast toast with this exceptional whole wheat bread.
Ingredients:
- 1 cup water
- ¼ cup milk (any kind will work, but whole milk adds richness)
- 3 tablespoons honey (for sweetness and to feed the yeast)
- 2 ¼ teaspoons active dry yeast (or instant yeast, which is 1 standard packet)
- 3 cups (approximately 339 grams) whole wheat flour, plus extra for dusting
- 1 ½ teaspoons salt
- 3 tablespoons unsalted butter, softened and cut into 6 roughly equal pieces
Preparing the Dough
Activating the Yeast
The first step in creating a beautiful loaf of homemade Whole Wheat Bread is to ensure our yeast is alive and ready to work its magic. In a large mixing bowl, combine the 1 cup of water and ¼ cup of milk. Warm the liquids gently; they should feel lukewarm to the touch, similar to a baby’s bathwater. You don’t want them too hot, as this can kill the yeast, nor too cold, as it won’t activate properly. Add the 3 tablespoons of honey to this liquid mixture. The honey not only adds a touch of sweetness to our bread but also acts as food for the yeast, helping it to bloom and become active. Sprinkle the 2 ¼ teaspoons of active dry yeast over the surface of the liquid. If you’re using active dry yeast, let it sit undisturbed for about 5 to 10 minutes. You should see a frothy, foamy layer form on the surface. This “blooming” indicates that the yeast is alive and ready to leaven our bread. If you don’t see this foam, your yeast might be old or the water wasn’t the right temperature, and you’ll want to start this step again with fresh yeast. If you’re using instant yeast, you can often skip the blooming step and mix it directly with the dry ingredients, but blooming is a good practice to confirm yeast viability regardless.
Combining the Dry Ingredients
While the yeast is blooming, let’s prepare our dry ingredients. In a separate medium bowl, whisk together the 3 cups of whole wheat flour and 1 ½ teaspoons of salt. Whisking ensures that the salt is evenly distributed throughout the flour, which is important for both flavor and controlling yeast activity. The salt helps to strengthen the gluten structure as well, leading to a better texture in the finished loaf.
Bringin extractg it all Together
Once your yeast has bloomed, pour the activated yeast mixture into the bowl with the dry ingredients. Now, it’s time to start forming the dough. Using a sturdy spoon or a dough wgin extractk, begin to mix the wet and dry ingredients together. Continue mixing until a shaggy dough forms and most of the flour is incorporated. At this stage, the dough will be quite sticky and unmanageable, which is perfectly normal for whole wheat bread.
Kneading the Dough
The Kneading Process
Turn the shaggy dough out onto a lightly floured surface. This is where the real worgin extractf kneading begins. If you’re using a stand mixer with a dough hook, you can add all the ingredients to the mixer bowl and let it do the heavy lifting for you. However, kneading by hand is a rewarding experience and offers a great way to connect with the dough. Start by gently pressing and folding the dough. Use the heels of your hands to push the dough away from you, then fold it back over on itself. Rotate the dough slightly after each push and fold. Initially, the dough will be sticky and might cling to your hands and the work surface. Resist the urge to add too much extra flour at this early stage, as this can make your bread dry. Instead, use a bench scraper to help lift the dough and scrape up any bits that stick.
Adding the Butter
After about 5 minutes of initial kneading, the dough should start to become a little smoother and less sticky. Now is the time to incorporate the softened butter. Add the 3 tablespoons of unsalted butter, cut into 6 pieces, to the dough. Continue kneading, incorporating the butter into the dough. This might seem strange, but the butter will be absorbed as you knead. The dough will go through a sticky phase again as the butter is worked in, but keep kneading. This step adds richness, tenderness, and a wonderful flavor to the final Whole Wheat Bread. Continue kneading for another 8 to 10 minutes, or until the dough is smooth, elastic, and passes the windowpane test. To perform the windowpane test, take a small piece of dough and gently stretch it. If you can stretch it thin enough to see light through it without it tearing, your gluten is well-developed and the dough is ready.
First Rise (Proofing)
Preparing for the Rise
Lightly grease a clean large bowl with a little bit of oil or cooking spray. Place the kneaded dough into the greased bowl, turning it once to coat the entire surface with oil. This prevents the dough from drying out as it rises. Cover the bowl tightly with plastic wrap or a clean, damp kitchen towel.
The Rising Environment
Find a warm, draft-free spot in your kitchen for the dough to rise. An oven that has been turned off but is still slightly warm, or a spot near a sunny window, works well. Allow the dough to rise for approximately 1 to 1 ½ hours, or until it has doubled in size. The exact time will depend on the temperature of your kitchen. Patience is key here; a good, slow rise develops excellent flavor.
Shaping and Second Rise
Shaping the Loaf
Once the dough has doubled in size, gently punch it down to release the air. Turn the dough out onto a lightly floured surface and shape it into your desired loaf form. For a standard loaf pan, you’ll want to pat the dough into a rectangle and then roll it up tightly, pinching the seam to seal. If you’re making a round loaf, gently shape it into a ball.
Preparing the Pan and Second Rise
Lightly grease a 9×5 inch loaf pan or line a baking sheet with parchment paper if you are making a freeform loaf. Place the shaped dough into the prepared pan or onto the baking sheet. Cover loosely with plastic wrap or a kitchen towel. Let the dough rise for another 30 to 45 minutes, or until it looks puffy and has almost doubled again. This second rise is crucial for a light and airy texture. Preheat your oven to 375°F (190°C) during the last 15 minutes of this second rise.
Baking the Bread
Baking to Perfection
Once the dough has completed its second rise and the oven is preheated, it’s time to bake. Carefully place the loaf pan or baking sheet into the center of the preheated oven. Bake for 30 to 35 minutes. You’ll know the bread is done when it’s golden brown on top and the internal temperature reaches between 190°F and 200°F (88°C and 93°C) when measured with an instant-read thermometer. If the top is browning too quickly, you can loosely tent the loaf with aluminum foil.
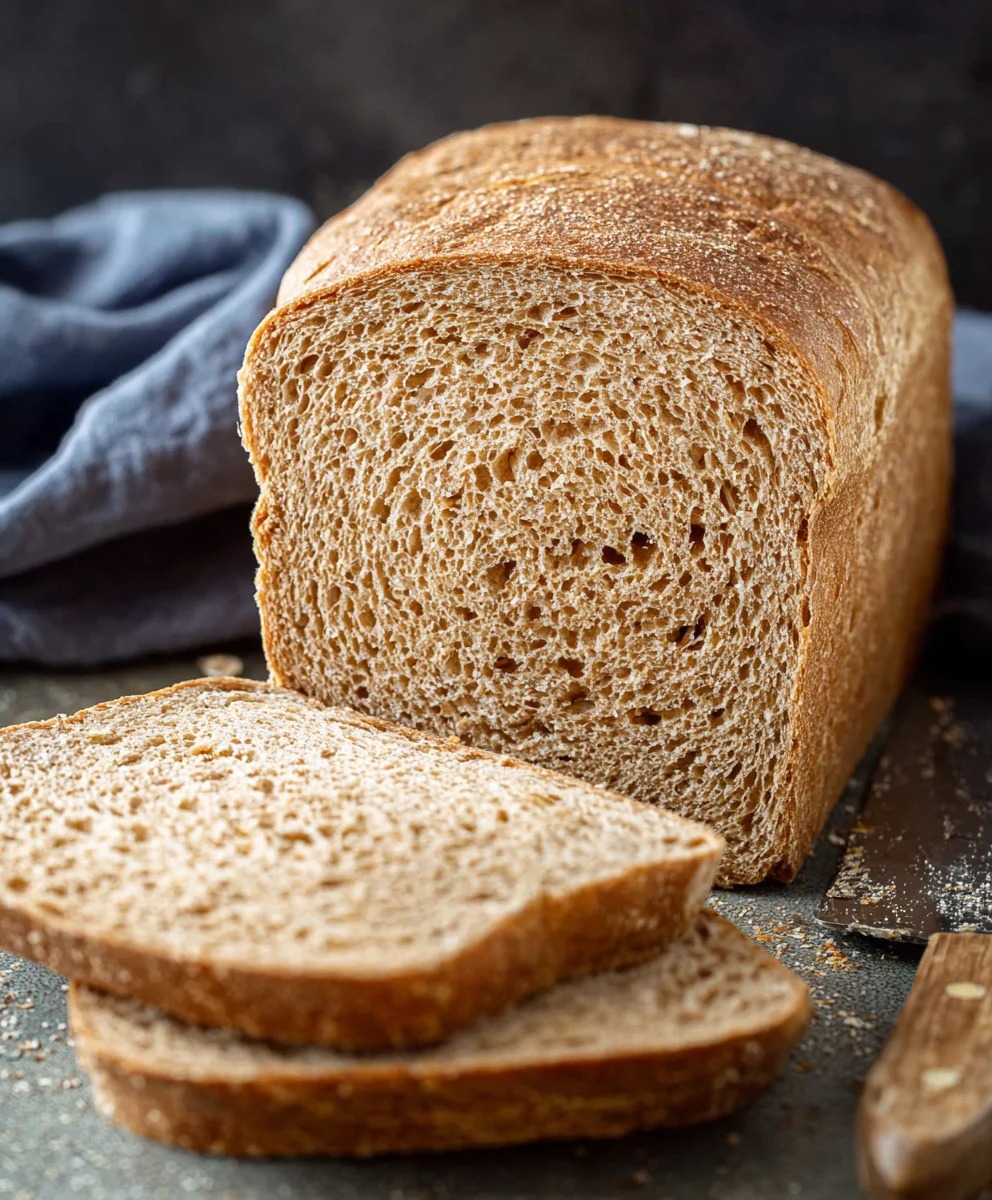
Cooling is Key
The most difficult part of baking bread is waiting for it to cool! Once baked, immediately remove the bread from the loaf pan and place it on a wire rack. This allows air to circulate around the entire loaf, preventing the bottom crust from becoming soggy. Let the bread cool completely before slicing, at least for 1 to 2 hours. Slicing hot bread can result in a gummy interior. Enjoy your delicious homemade Whole Wheat Bread!
Conclusion:
And there you have it – your very own delicious and wholesome Whole Wheat Bread, fresh from your oven! This recipe is designed to be approachable for bakers of all levels, and the reward of a perfectly risen, wonderfully textured loaf is truly satisfying. We’ve walked through each step, from activating the yeast to achieving that beautiful golden crust, and I encourage you to embrace the process and enjoy the aromatic journey. This Whole Wheat Bread is incredibly versatile, making it a fantastic base for all your favorite meals and snacks.
For serving suggestions, consider this Whole Wheat Bread toasted with a smear of butter, topped with avocado and a sprinkle of chili flakes, or as the foundation for a hearty sandwich. It also makes an excellent accompaniment to soups and stews. Don’t be afraid to experiment with variations! You could add seeds like sunflower or pumpkin to the dough for extra crunch, or incorporate a touch of honey for a subtle sweetness. The possibilities are as endless as your culinary imagin extractation!
Frequently Asked Questions:
Why is my Whole Wheat Bread dense?
A dense loaf can often be due to a few common reasons. Ensure your yeast was fresh and properly activated; if it didn’t foam, it might be dead. Over-mixing the dough can develop too much gluten, making it tough, or under-kneading means not enough gluten development for a good rise. Lastly, make sure your proofing environment was warm enough – yeast thrives in warmth, so a cool kitchen can slow down the rise significantly.
Can I use all-purpose flour instead of whole wheat flour?
While you can substitute some of the whole wheat flour with all-purpose flour, using 100% all-purpose flour will result in a different texture and flavor profile. Whole wheat flour contains bran and germ, which absorb more liquid and contribute to a denser, nuttier loaf. If you do substitute, you might need to slightly adjust the liquid content and expect a lighter, less hearty bread.
Easy Whole Wheat Bread-Homemade Healthy Loaf
A simple and delicious recipe for homemade whole wheat bread, perfect for a healthy and satisfying loaf.
Ingredients
-
1 cup water
-
1/4 cup milk
-
3 tablespoons honey
-
2 1/4 teaspoons active dry yeast
-
3 cups whole wheat flour, plus extra for dusting
-
1 1/2 teaspoons salt
-
3 tablespoons unsalted butter, softened and cut into 6 roughly equal pieces
Instructions
-
Step 1
Activate the yeast: In a large mixing bowl, combine 1 cup water and 1/4 cup milk. Warm gently to lukewarm. Add 3 tablespoons honey and sprinkle 2 1/4 teaspoons active dry yeast over the surface. Let sit for 5-10 minutes until frothy. -
Step 2
Combine dry ingredients: In a separate medium bowl, whisk together 3 cups whole wheat flour and 1 1/2 teaspoons salt. -
Step 3
Bring it all together: Pour the activated yeast mixture into the bowl with the dry ingredients. Mix with a spoon or dough whisk until a shaggy dough forms. -
Step 4
Knead the dough: Turn the dough onto a lightly floured surface. Knead for about 5 minutes. Add 3 tablespoons softened butter, piece by piece, and continue kneading for another 8-10 minutes until smooth, elastic, and passes the windowpane test. -
Step 5
First rise (proofing): Lightly grease a clean large bowl. Place the dough in the bowl, turning once to coat. Cover tightly and let rise in a warm, draft-free spot for 1 to 1.5 hours, or until doubled in size. -
Step 6
Shape and second rise: Gently punch down the dough and shape it into a loaf. Place in a greased 9×5 inch loaf pan or on a baking sheet. Cover loosely and let rise for another 30-45 minutes until puffy. Preheat oven to 375°F (190°C) during the last 15 minutes of the second rise. -
Step 7
Bake: Bake for 30-35 minutes, or until golden brown and internal temperature reaches 190-200°F (88-93°C). If browning too quickly, tent loosely with foil. -
Step 8
Cool: Immediately remove from pan and place on a wire rack to cool completely (1-2 hours) before slicing.
Important Information
Nutrition Facts (Per Serving)
It is important to consider this information as approximate and not to use it as definitive health advice.
Allergy Information
Please check ingredients for potential allergens and consult a health professional if in doubt.