
Easy Homemade Bread Recipe – Deliciously Simple Baking
Homemade bread is more than just a food item; it’s an experience. There’s a primal satisfaction, a deep-seated joy that comes from transforming simple ingredients – flour, water, yeast, and salt – into a warm, fragrant loaf. Think about it: the aroma filling your kitchen, the crisp crackle of the crust as you slice into it, the soft, pillowy interior ready to be slathered with butter. This magic is why we love baking bread. It connects us to tradition, to a time when sustenance was a labor of love. What makes homemade bread truly special is the personal touch. You control the ingredients, you imbue it with your own care and attention, and the result is a loaf that’s uniquely yours. Forget the sterile perfection of store-bought loaves; this is bread with soul, ready to grace your table and warm your heart. Let’s embark on this delicious journey together and discover the simple pleasure of crafting perfect homemade bread.
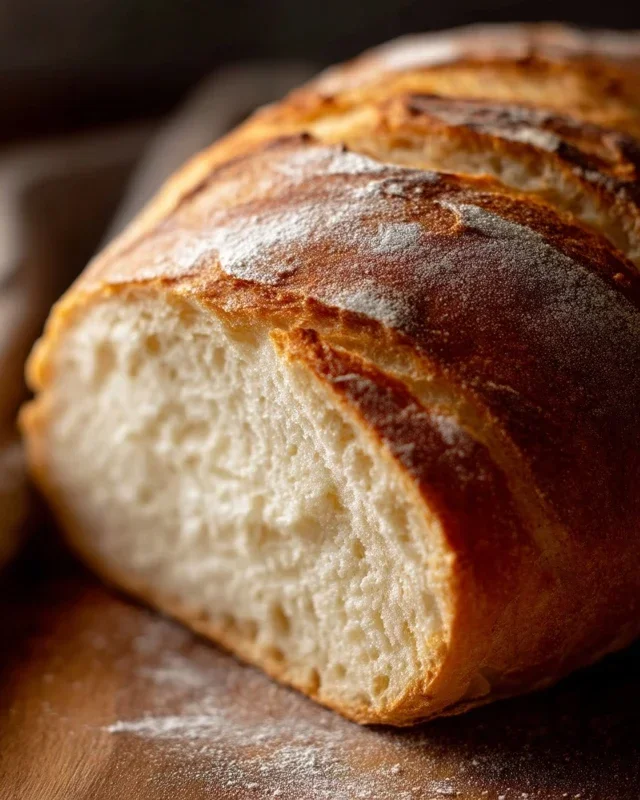
Homemade Bread
There’s something incredibly comforting about the aroma of freshly baked bread wafting through your home. It’s a simple pleasure, a culinary hug, and the best part is, it’s surprisingly achievable right in your own kitchen. Forget those store-bought loaves that often lack that authentic chew and deep flavor. Today, we’re diving into the rewarding world of homemade bread. This recipe is designed for begin extractners, but it yields a loaf that will impress even seasoned bakers. We’ll guide you through each step, demystifying the process and ensuring you end up with a beautiful, golden-brown masterpiece.
Ingredients:
Bringin extractg the Dough to Life
The journey of making bread begin extracts with awakening the yeast. In a large mixing bowl, pour the warm water. The temperature is crucial here; too hot and you’ll kill the yeast, too cool and it won’t activate properly. Aim for that sweet spot between 105 and 115 degrees Fahrenheit. Sprinkle the active dry yeast over the water. If you’re using honey, add it now; its natural sugars will feed the yeast. If you prefer sugar, you can add that too. Give it a gentle stir and let it sit for about 5-10 minutes. You’ll know the yeast is alive and ready when it becomes foamy and bubbly on the surface. This “blooming” process is your first sign of success!
Next, we introduce the other foundational elements. Add the salt to the foamy yeast mixture. Salt not only adds flavor but also controls the yeast’s activity, preventing it from over-proofing. Then, pour in the oil. The oil contributes to the softness and tenderness of the final loaf, providing a lovely crum extractb. Give this mixture a quick whisk to combine everything.
Now comes the star of the show: the flour. Start by adding about 4 cups of flour to the wet ingredients. Using bread flour will result in a chewier loaf with a more developed gluten structure, which is ideal for bread. However, all-purpose flour works perfectly well too, especially for a softer crum extractb. Stir everything together with a wooden spoon or a sturdy spatula until it forms a shaggy dough. At this point, the dough will be sticky and unmanageable.
Kneading: Developing Strength and Structure
This is where the magic truly happens – kneading. Kneading is essential for developing the gluten network in the dough, which gives bread its structure and elasticity. Turn the shaggy dough out onto a lightly floured surface. Begin extract to push the dough away from you with the heel of your hand, then fold it back over itself. Rotate the dough a quarter turn and repeat. You’ll need to add more flour gradually, a tablespoon at a time, as you knead. Be careful not to add too much flour too soon, as this can result in a dry, dense loaf. The dough is ready when it becomes smooth, elastic, and no longer sticks to your hands or the work surface. It should feel alive and springy. This process typically takes about 8-10 minutes of active kneading. If you have a stand mixer with a dough hook, you can let it knead for about 6-8 minutes on medium speed.
First Rise: Letting the Dough Grow
Once your dough has been beautifully kneaded, it’s time for its first rest and rise. Lightly grease a clean bowl with a little oil. Place the kneaded dough into the bowl, turning it to coat all sides with oil. This prevents the dough from drying out as it rises. Cover the bowl tightly with plastic wrap or a clean kitchen towel. Find a warm, draft-free spot in your kitchen for the dough to rise. This could be in a slightly warmed oven (turned off, of course!), on top of your refrigerator, or simply in a sunny spot on the counter. Let the dough rise for about 1 to 1.5 hours, or until it has doubled in size. You’ll know it’s ready when you gently poke it with your finger and the indentation remains.
Shaping and Second Rise: Preparing for the Oven
Gently punch down the risen dough to release the air. Turn it out onto a lightly floured surface and shape it into your desired loaf. For a classic loaf pan shape, gently flatten the dough into a rectangle, then roll it up tightly like a jelly roll. Pinch the seam closed and tuck the ends underneath. Place the shaped loaf into a greased loaf pan. Again, cover the pan loosely with plastic wrap or a kitchen towel and let it rise for a second time. This second rise is crucial for creating a light and airy texture. It will take about 30-45 minutes, or until the dough has visibly puffed up and risen about an inch above the rim of the pan. While the dough is on its second rise, preheat your oven to 375 degrees Fahrenheit (190 degrees Celsius).
Baking to Perfection
Once the loaf has completed its second rise, it’s time to bake! For an extra golden and crisp crust, you can brush the top of the loaf with a little milk or an egg wash just before baking. Place the loaf pan into the preheated oven. Bake for 30-40 minutes, or until the crust is a deep golden brown and the internal temperature of the bread reaches 200-210 degrees Fahrenheit (93-99 degrees Celsius) when tested with an instant-read thermometer. You can also tell it’s done when the bottom of the loaf sounds hollow when tapped.
Cooling: The Final, Crucial Step
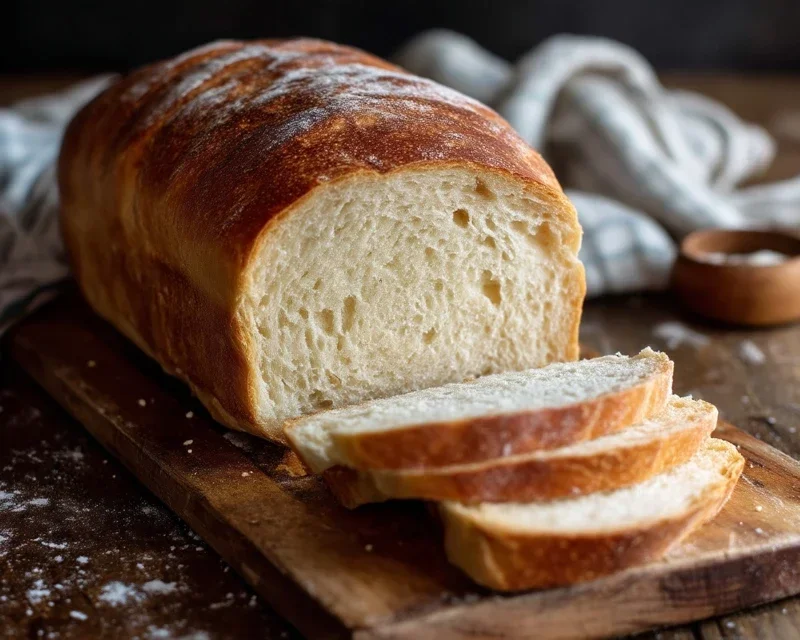
As tempting as it is, resist the urge to slice into your bread immediately! Once baked, carefully remove the loaf from the pan and place it on a wire rack to cool completely. This allows the steam to escape and the crust to crisp up properly. Slicing too early can result in a gummy texture. Patience is key here, but the reward of that first perfect slice of warm, homemade bread is absolutely worth it. Enjoy!
Conclusion:
You’ve made it! By following these steps, you’re well on your way to enjoying the unparalleled satisfaction of baking your very own homemade bread. This recipe is fantastic because it demystifies the bread-making process, offering a simple yet effective method that consistently yields a wonderfully crusty exterior and a soft, airy interior. Imagin extracte the aroma filling your kitchen – it’s truly a reward in itself! This versatile loaf is perfect for almost any meal. Enjoy it warm with a generous slathering of butter, use it to build hearty sandwiches, or serve it alongside your favorite soups and stews. Don’t be afraid to experiment with variations! You can add herbs, seeds, or even a touch of cheese to the dough for unique flavors. I truly encourage you to give this homemade bread recipe a try; the sense of accomplishment and the delicious results are absolutely worth it. Baking your own bread is a simple pleasure that brings so much joy.
Frequently Asked Questions:
Why is my bread dense instead of fluffy?
Density can often be caused by a few factors. Ensure you’re measuring your flour accurately, as too much can weigh down the dough. Proper kneading is also crucial to develop gluten, which provides structure and airiness. Make sure your yeast is active by proofing it in warm water before adding it to your dry ingredients. Lastly, allow the dough to rise sufficiently in a warm place; rushing this step will result in a less airy loaf.
Can I freeze this homemade bread?
Absolutely! Once your bread has cooled completely, you can slice it and freeze the individual slices in a freezer-safe bag or wrap the whole loaf tightly in plastic wrap followed by a layer of aluminum foil. It will keep well for up to 3 months, and you can simply toast the slices directly from frozen for a quick and easy treat.
Homemade Bread
A classic, simple recipe for delicious homemade bread, perfect for beginners. This recipe uses basic pantry staples and results in a wonderfully soft and flavorful loaf.
Ingredients
-
2 cups warm water (105-115 degrees Fahrenheit)
-
1 Tablespoon active dry yeast
-
1/4 cup honey
-
2 teaspoons salt
-
2 Tablespoons canola oil
-
4 cups all-purpose flour
Instructions
-
Step 1
In a large bowl, combine the warm water and honey. Sprinkle the yeast over the top and let it sit for 5-10 minutes, or until foamy. -
Step 2
Add the salt and canola oil to the yeast mixture and stir to combine. -
Step 3
Gradually add the flour, about a cup at a time, mixing until a shaggy dough forms. You may not need all 5 1/2 cups of flour. -
Step 4
Turn the dough out onto a lightly floured surface and knead for 5-8 minutes, or until smooth and elastic. The dough should be slightly sticky but manageable. -
Step 5
Place the dough in a lightly oiled bowl, cover with plastic wrap or a clean kitchen towel, and let it rise in a warm place for 1-1.5 hours, or until doubled in size. -
Step 6
Punch down the dough and shape it into a loaf. Place it in a greased loaf pan. -
Step 7
Cover the loaf pan and let the dough rise again for another 30-45 minutes, or until almost doubled. -
Step 8
Preheat your oven to 375 degrees Fahrenheit (190 degrees Celsius). Bake for 30-35 minutes, or until golden brown and the internal temperature reaches 200-210 degrees Fahrenheit (93-99 degrees Celsius). -
Step 9
Remove the bread from the pan and let it cool completely on a wire rack before slicing.
Important Information
Nutrition Facts (Per Serving)
It is important to consider this information as approximate and not to use it as definitive health advice.
Allergy Information
Please check ingredients for potential allergens and consult a health professional if in doubt.