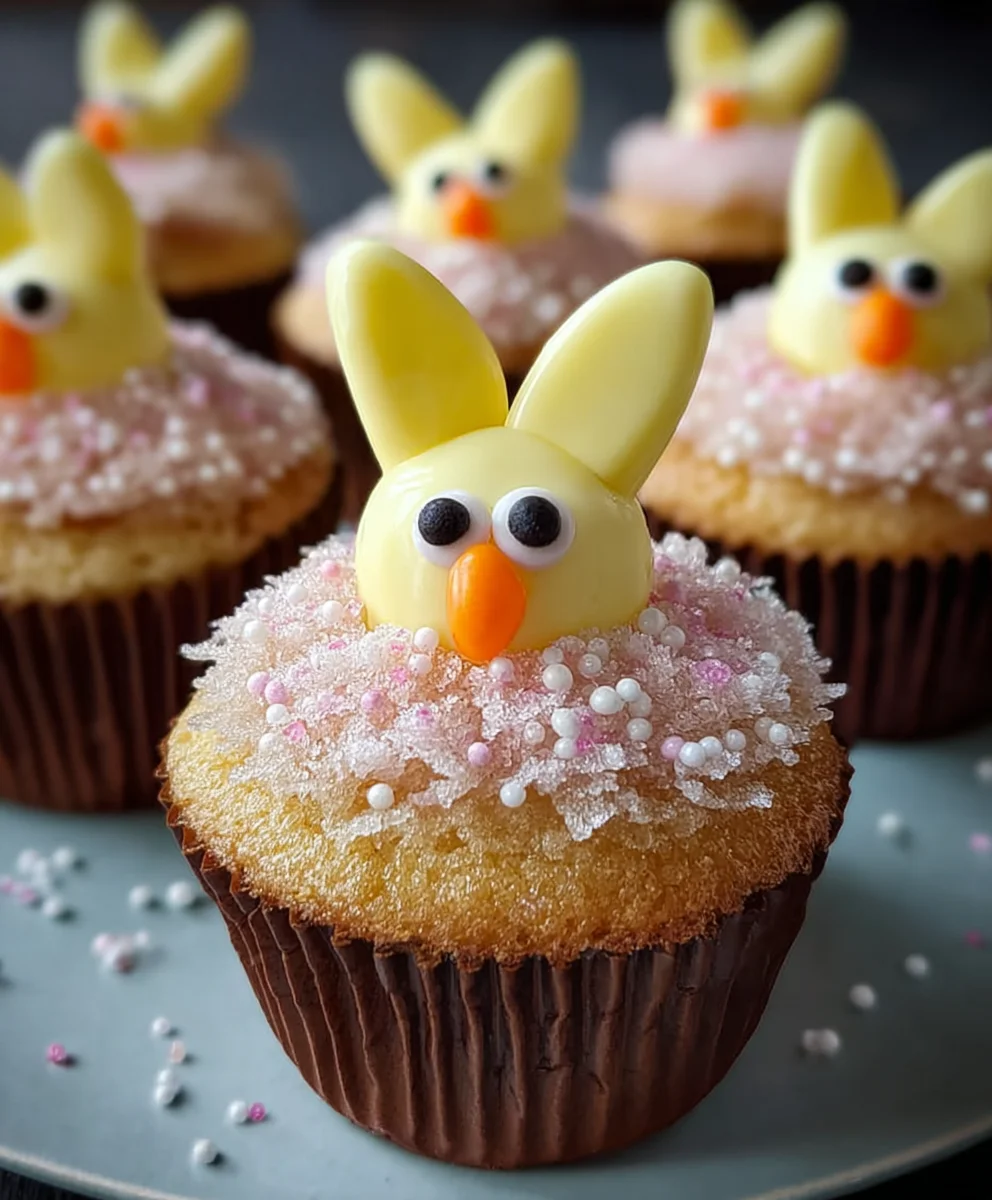
Easter Bunny Chick Cupcakes- Cute Festive Treats
Easter Bunny and Chick Cupcakes are more than just a sweet treat; they are a delightful centerpiece that embodies the joy and whimsy of springtime celebrations. Imagin extracte the smiles that will erupt when your little ones, or even your grown-up loved ones, lay eyes on these adorable creations. What is it about these particular cupcakes that captures everyogin extracts imagination? It’s the sheer cuteness factor, of course! Each one is a miniature edible artwork, transforming simple cake into a festive character. They are perfect for Easter gatherings, classroom parties, or simply as a cheerful way to brighten any ordinary day with a touch of spring magic. The combination of fluffy cake, creamy frosting, and playful decorations makes these Easter Bunny and Chick Cupcakes an absolute must-bake for the season, offering a memorable and delicious experience that goes beyond just taste.
Ingredients:
- 1 recipe Vanilla Cupcakes (or your favorite cake mix), baked and cooled
- 1 recipe Fluffy Vanilla Frosting (or store-bought frosting)
- Yellow and white sprinkles
- Large and mini marshmallows
- Pink colored sanding sugar
- Black decorator icing
- Jelly beans (pink for bunny noses)
- Orange colored gum or M&Ms (for chick beaks)
- Yellow food coloring (for chick frosting)
Preparing Your Cupcakes
Bunny Construction
- Begin extract by preparing your cooled vanilla cupcakes. If you’re using a cake mix, follow the package instructions for baking and ensure they are completely cool before decorating. This is crucial; warm cupcakes will melt your frosting, leading to a messy and less defined design. Once cooled, you can frost them with your fluffy vanilla frosting. Aim for a generous, even layer of frosting on top of each cupcake. This will act as the base for our adorable bunny faces. Don’t worry about making it perfectly smooth; a slightly textured surface can add to the charm.
- For the bunny ears, you’ll need your mini marshmallows. Take a mini marshmallow and cut it in half lengthwise. These halves will form the inner pink part of the bunny ears. Then, take another mini marshmallow and cut it into quarters. These smaller pieces will be the outer white part of the ears. Gently press the cut side of a quarter marshmallow onto the cut side of a half marshmallow. You should now have a two-toned ear shape. Repeat this process for a second ear for each bunny cupcake.
- Now, it’s time to assemble the bunny ears onto the frosted cupcake. Insert the cut edge of your prepared marshmallow ears into the top of the frosted cupcake, positioning them about an inch apart, as if the bunny is perking its ears up. You can gently push them down into the frosting to secure them. If you find they aren’t standing up well, you can use a tiny dab of frosting on the bottom of the ear to help hold them in place.
- Next, we’ll create the bunny’s face. For the nose, select a pink jelly bean and press it gently into the center of the cupcake, just below where the ears are positioned. To create the eyes, use your black decorator icing. Fit the icing with a fine tip, or if using a tube, be careful to draw small dots. Pipe two small dots above the nose for the eyes. For the whiskers, draw three thin lines extending outwards from each side of the nose. You can experiment with slightly different spacing and lengths to give each bunny a unique expression.
- To add a touch of sparkle and detail, sprinkle some white sprinkles around the base of the cupcake and perhaps a few lightly over the top, avoiding the bunny’s face. You can also lightly dust the very top of the ears with a tiny bit of pink colored sanding sugar to give them a subtle rosy hue, if desired. This extra detail really brings the bunny to life.
Chick Creation
- For the chick cupcakes, start with your cooled vanilla cupcakes frosted with the fluffy vanilla frosting. To achieve the perfect chick yellow, add yellow food coloring to your frosting. Start with a few drops and mix thoroughly, adding more until you reach your desired vibrant yellow shade. Remember that the color will deepen slightly as it sits. Spread a generous and even layer of this yellow frosting over the top of each cupcake. A smooth surface works best for the chick’s fluffy appearance.
- To create the chick’s beak, take your orange colored gum or M&Ms. If you’re using gum, you can cut it into small triangle shapes to mimic a beak. If using an orange M&M, its natural shape is often perfect. Gently press the beak into the front of the frosted cupcake, towards the top edge.
- Now for the eyes. Using your black decorator icing, carefully pipe two small dots above the beak. Again, a fine tip is helpful here for precision. You can adjust the placement of the eyes to make your chicks look curious, surprised, or sleepy!
- To give our chicks a fluffy texture, we’ll use the yellow and white sprinkles. Take a handful of yellow sprinkles and gently press them onto the sides of the frosted cupcake. Then, add a few white sprinkles interspersed with the yellow, especially around the top, to mimic a fluffy downy texture. You can also sprinkle a few lightly over the top of the cupcake, around the beak and eyes, for added dimension.
- As a final touch for the chicks, and to add a little variation, you can use a mini marshmallow. You can leave it plain white for a fluffy accent, or you can dip one side in a little of your yellow frosting and attach it to the top of the cupcake as a little tuft of hair. Alternatively, you could cut a large marshmallow in half and use the rounded side to create a slightly more rounded body shape for your chick, frosting it with the yellow frosting.
Conclusion:
And there you have it! Your very own batch of adorable Easter Bunny and Chick Cupcakes is ready to impress. We’ve walked through each step to create these delightful treats, perfect for bringin extractg a touch of springtime joy to any celebration. The moist cake base, combined with the whimsical decorations, makes these cupcakes a guaranteed hit for both kids and adults alike. Don’t be afraid to get creative with your frosting colors and sprinkle choices!
These Easter Bunny and Chick Cupcakes are wonderfully versatile. Serve them as the star of your Easter dessert table, pack them for a festive picnic, or even gift them to friends and family. For serving suggestions, consider pairing them with a glass of milk or a light, fruity punch. You can also arrange them on a tiered stand for a truly show-stopping display.
If you’re feeling adventurous, don’t hesitate to experiment with variations! Try adding a touch of lemon zest to the cake batter for a brighter flavor, or use a different flavor extract like almond or orange. You could also swap out the buttercream for a cream cheese frosting for a tangier profile. The possibilities are endless when it comes to personalizing your Easter Bunny and Chick Cupcakes.
We truly hope you enjoyed making these and that they bring smiles and sweet memories this Easter season. Happy baking!
FAQs for Easter Bunny and Chick Cupcakes:
Q: How should I store leftover Easter Bunny and Chick Cupcakes?
A: Store your Easter Bunny and Chick Cupcakes in an airtight container at room temperature for up to 2-3 days. If your frosting is very delicate or contains cream cheese, it’s best to refrigerate them, but allow them to come back to room temperature before serving for the best texture.
Q: Can I make the cupcake batter and frosting ahead of time?
A: Yes! You can bake the cupcake bases a day in advance and store them in an airtight container. The buttercream frosting can also be made a day ahead and stored in the refrigerator. Just be sure to re-whip it briefly before frosting the cooled cupcakes to ensure it’s smooth and spreadable.
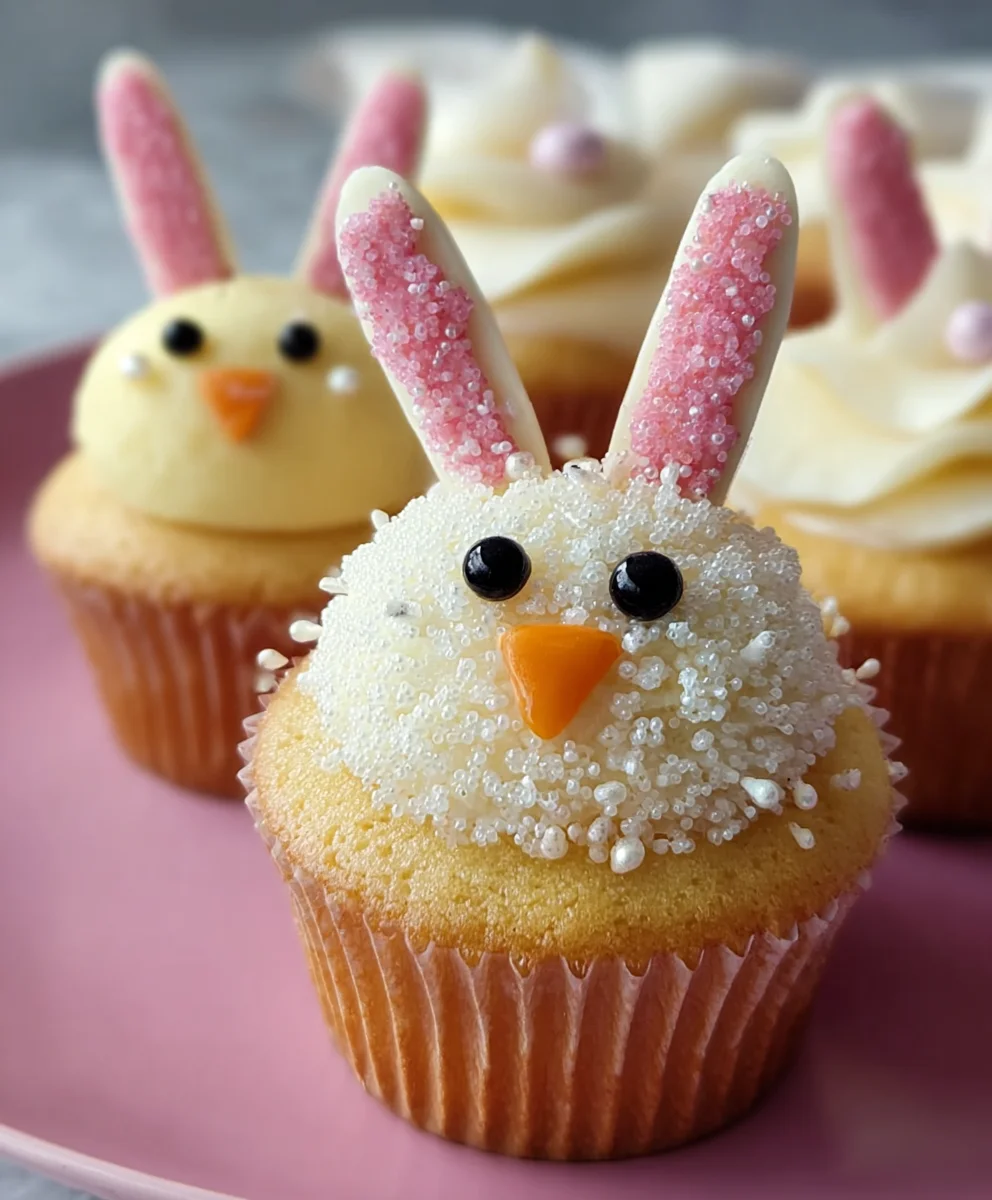
Easter Bunny Chick Cupcakes
Adorable and festive cupcakes decorated to resemble Easter bunnies and chicks, perfect for any spring celebration.
Ingredients
-
1 recipe Vanilla Cupcakes (or your favorite cake mix), baked and cooled
-
1 recipe Fluffy Vanilla Frosting (or store-bought frosting)
-
Yellow and white sprinkles
-
Large and mini marshmallows
-
Pink colored sanding sugar
-
Black decorator icing
-
Jelly beans (pink for bunny noses)
-
Orange colored gum or M&Ms (for chick beaks)
-
Yellow food coloring (for chick frosting)
Instructions
-
Step 1
Prepare cooled vanilla cupcakes and frost them with fluffy vanilla frosting, creating a base for the decorations. Ensure cupcakes are completely cool before frosting to prevent melting. -
Step 2
For bunny ears: cut mini marshmallows in half lengthwise for the pink inner part and into quarters for the white outer part. Combine the cut sides of a quarter and a half marshmallow to form two-toned ears. -
Step 3
Insert prepared marshmallow ears into the top of the frosted cupcake, about an inch apart. Secure with a tiny dab of frosting if needed. -
Step 4
Create the bunny face: press a pink jelly bean into the center for the nose. Pipe two small black dots for eyes above the nose and three thin black lines on each side for whiskers using black decorator icing. -
Step 5
Add sparkle and detail: sprinkle white sprinkles around the base and lightly over the top of the cupcake, avoiding the bunny’s face. Dust the tops of the ears with pink sanding sugar for a rosy hue. -
Step 6
For chick cupcakes: color fluffy vanilla frosting with yellow food coloring until a vibrant shade is achieved. Spread evenly over the top of each cooled cupcake. -
Step 7
Create the chick’s beak using an orange colored gum or M&M. If using gum, cut into a small triangle. Press gently into the front of the frosted cupcake, near the top edge. -
Step 8
Pipe two small black dots above the beak using black decorator icing for the eyes. -
Step 9
Add fluffy texture: gently press yellow sprinkles onto the sides of the frosted cupcake. Intersperse with white sprinkles, especially around the top, to mimic downy texture. -
Step 10
Add final touches: use a mini marshmallow as a fluffy accent on top, or dip one side in yellow frosting for a tuft of hair. Alternatively, cut a large marshmallow in half and frost with yellow frosting for a rounded body shape.
Important Information
Nutrition Facts (Per Serving)
It is important to consider this information as approximate and not to use it as definitive health advice.
Allergy Information
Please check ingredients for potential allergens and consult a health professional if in doubt.