Creamy Caesar Salad Dressing – Easy Homemade Recipe
Homemade Creamy Caesar Salad Dressing is a game-changer for any salad enthusiast. Forget those watery, artificial-tasting store-bought versions! There’s something undeniably satisfying about a perfectly balanced Caesar salad, and the secret, my friends, lies in the dressing. We all love the creamy, tangy, umami-rich flavor explosion that coats every crisp romaine leaf, but often settle for less. What makes a truly spectacular Caesar salad dressing so special? It’s the harmonious blend of ingredients: the sharp bite of garlic, the salty depth of anchovies (or Worcestershire for a shortcut!), the zing of lemon, and the richness of Parmesan, all brought together in a luscious, emulsified embrace. Today, I’m going to share my go-to recipe for a Homemade Creamy Caesar Salad Dressing that’s so good, it will elevate your weeknight dinners and impress your dinner guests. Get ready to fall in love with Caesar salad all over again.
Homemade Creamy Caesar Salad Dressing
Tired of store-bought dressings that are either too watery, too oily, or just plain bland? I get it! The classic Caesar salad deserves a dressing that lives up to its legendary status. And let me tell you, nothing, absolutely nothing, compares to the rich, creamy, and zesty flavor of a homemade Caesar dressing. It’s surprisingly simple to whip up, and once you taste the difference, you’ll never go back to the bottled stuff. This recipe is my go-to, and it’s packed with all the traditional flavors you’d expect, but with a wonderfully smooth and emulsified texture that clings perfectly to your romaine. Forget those anchovy-heavy versions that can be a bit too pungent for some; this recipe balances the savory notes with a delightful tang that’s universally loved.
What I love most about this recipe is how adaptable it is. While these are my core ingredients, you can always tweak them slightly to suit your palate. Want a little more garlic kick? Add an extra clove. Prefer it a bit tangier? A splash more lemon juice will do the trick. The beauty of making it yourself is that control. Plus, it’s a fantastic way to elevate any salad, not just a traditional Caesar. Try it on grilled chicken, as a dip for veggies, or even as a spread on a sandwich. It’s a versatile flavor bomb waiting to happen!
Let’s get down to the good stuff – the ingredients that will transform your salad into a masterpiece.
Ingredients:
Crafting Your Creamy Caesar Dressing
Now that you have your ingredients assembled, let’s dive into the process of creating this glorious dressing. It’s more about combining and emulsifying than actual cooking, making it perfect for a quick weeknight fix or a fancy weekend brunch. The key to a truly creamy Caesar is in how you combine the ingredients, ensuring a smooth, cohesive texture.
Step 1: The Garlic Foundation
Begin extract by preparing your garlic. It’s crucial to mince or press your garlic as finely as possible. Using a garlic press is ideal here as it breaks down the garlic cloves efficiently, releasing their potent oils and ensuring no large, overpowering chunks end up in your dressing. If you don’t have a press, finely mince the garlic with a knife until it’s almost a paste. This step is fundamental because raw garlic, when not properly broken down, can be quite sharp and dominant. We want a harmonious garlic note, not a garlic bomb. Place the pressed or finely minced garlic into a medium-sized mixing bowl.
Step 2: Building the Creamy Base
Into the same bowl with the garlic, add the 1 cup of mayonnaise. This forms the luxurious, creamy backbone of our dressing. Next, incorporate the 2 tablespoons of fresh lemon juice. The lemon juice is vital for adding that essential bright, tangy counterpoint to the richness of the mayonnaise. It cuts through the fat and adds a refreshing zest that is characteristic of a good Caesar dressing. Now, whisk in the 1 teaspoon of Dijon mustard. Dijon mustard not only contributes to the tang but also adds a subtle spicy note and acts as an emulsifier, helping to bind the ingredients together.
Step 3: The Savory Depth
Following the Dijon mustard, add the 1 teaspoon of Worcestershire sauce. This is where we introduce that unmistakable umami depth. Worcestershire sauce, with its complex blend of ingredients like anchovies, vinegar, and spices, adds a layer of savory richness that is hard to replicate. It contributes significantly to the authentic Caesar flavor profile. Whisk these ingredients together thoroughly. At this stage, you want to ensure everything is well combined, creating a smooth, homogenous mixture. Don’t rush this part; a good whisking will make a noticeable difference in the final texture.
Step 4: The Cheesy Finish and Seasoning
Now for the star of the show: the Parmesan cheese. Add the 1/2 cup of finely grated Parmesan cheese to the bowl. Using freshly grated Parmesan is highly recommended over pre-grated as it offers superior flavor and melts better into the dressing. The cheese will not only add a salty, nutty flavor but will also contribute to the dressing’s thickness and creamy texture. Follow this with the 1/4 teaspoon of salt and 1/2 teaspoon of ground black pepper. You can adjust the salt and pepper to your personal preference after tasting the dressing. Whisk everything together until the Parmesan is fully incorporated and the dressing is a uniform color.
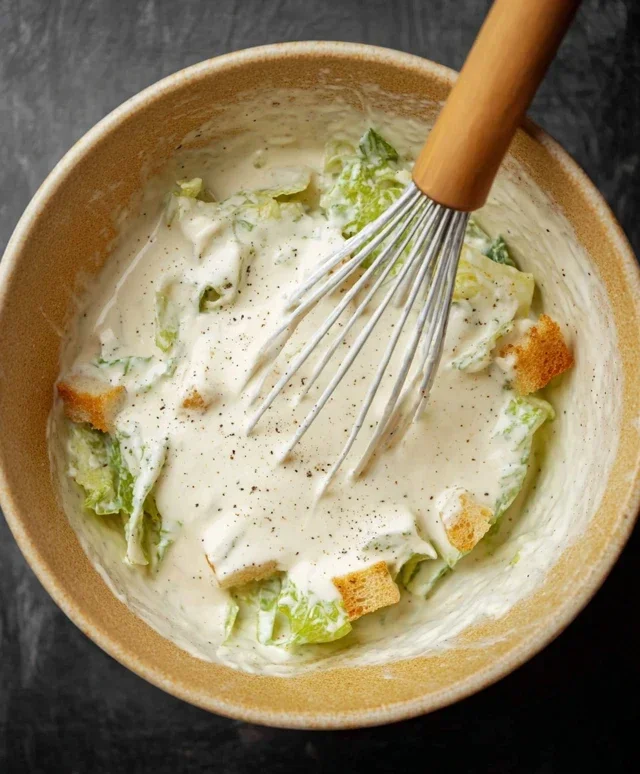
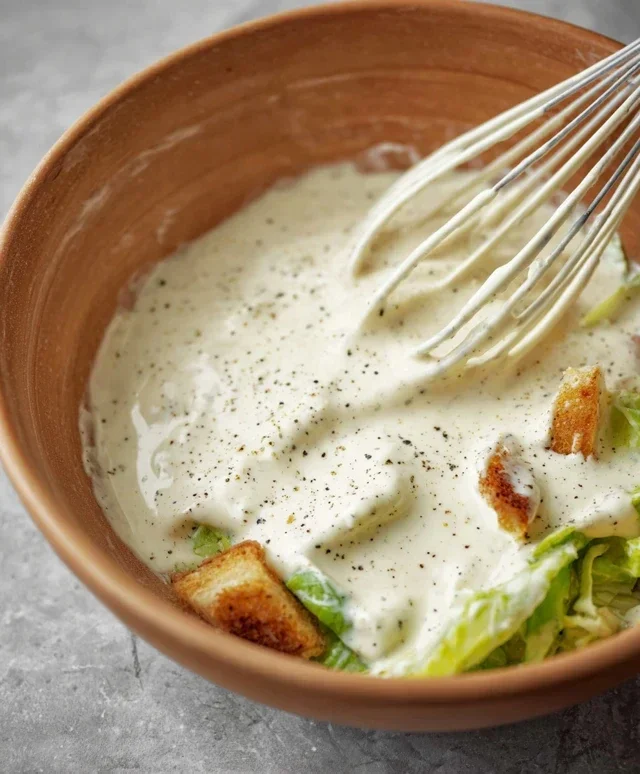
Step 5: Emulsification and Final Touches
This is where the magic really happens. Continue whisking vigorously for another minute or two. The goal is to create a stable emulsion, where the oil from the mayonnaise and the lemon juice are fully incorporated, resulting in a thick, smooth, and creamy dressing. You’ll notice the dressing becoming even more velvety and cohesive as you whisk. Taste the dressing and adjust the seasoning if needed. If you desire more tang, add a touch more lemon juice. If it needs more bite, a pinch more Dijon or pepper. Once you’re happy with the flavor and consistency, your homemade creamy Caesar salad dressing is ready to be enjoyed! For the best flavor, I like to let it sit in the refrigerator for at least 30 minutes before serving, allowing the flavors to meld beautifully. It will continue to thicken slightly as it chills. Store any leftovers in an airtight container in the refrigerator for up to 5 days.
Conclusion:
So there you have it – your guide to crafting the most delicious, creamy homemade Caesar salad dressing! This recipe is fantastic because it skips the artificial ingredients and delivers a rich, tangy flavor that’s simply unmatched. Imagin extracte tossing your crisp romaine with this luscious dressing, the perfect balance of garlic, Parmesan, and a hint of anchovy creating an explosion of taste. It’s incredibly versatile, elevating not just salads but also serving as a brilliant dip for vegetables or a flavorful marinade for chicken. Don’t be intimidated by a few steps; the reward of a truly authentic Caesar salad dressing is well worth it. I highly encourage you to give this a try – you’ll wonder why you ever bought store-bought!
For serving suggestions, think beyond the basic salad. This creamy Caesar salad dressing is incredible on grilled chicken or shrimp, as a sandwich spread, or even as a dip for pizza crust. Feeling adventurous? Try adding a splash of hot sauce for a spicy kick, or swap the anchovies for capers for a briney alternative. The possibilities are truly endless, and the satisfaction of making something so wonderfully fresh and flavorful from scratch is immense.
Frequently Asked Questions:
Can I make this dressing ahead of time?
Absolutely! This homemade Caesar salad dressing keeps wonderfully in an airtight container in the refrigerator for up to 5 days. The flavors actually meld and deepen beautifully over time, so making it a day in advance is often recommended.
What if I don’t like anchovies?
No problem at all! While anchovies provide a classic umami depth, you can omit them entirely. For a similar savory note, consider adding a teaspoon of Worcestershire sauce or a tablespoon of finely chopped capers. The dressing will still be incredibly delicious.
Is this dressing vegan?
The classic recipe isn’t vegan due to the Parmesan cheese and egg yolk. However, you can easily create a vegan version by using nutritional yeast for cheesy flavor, vegan mayonnaise or silken tofu for creaminess, and omitting the egg yolk and anchovies.
Homemade Creamy Caesar Salad Dressing
A quick and easy recipe for a rich and creamy Caesar salad dressing made from scratch.
Ingredients
-
1 cup mayonnaise
-
3 garlic cloves, pressed
-
2 tbsp lemon juice
-
1 tsp Dijon mustard
-
1 tsp Worcestershire sauce
-
1/2 cup grated Parmesan cheese
-
1/4 tsp salt
-
1/2 tsp ground black pepper
Instructions
-
Step 1
In a medium bowl, combine the mayonnaise, pressed garlic, lemon juice, Dijon mustard, and Worcestershire sauce. -
Step 2
Whisk all ingredients together until well combined and smooth. -
Step 3
Stir in the grated Parmesan cheese, salt, and black pepper. -
Step 4
Continue whisking until the cheese is evenly distributed and the dressing reaches a creamy consistency. -
Step 5
Taste and adjust seasoning if necessary, adding more salt, pepper, or lemon juice as desired. -
Step 6
Transfer the dressing to an airtight container and refrigerate for at least 15 minutes before serving to allow flavors to meld.
Important Information
Nutrition Facts (Per Serving)
It is important to consider this information as approximate and not to use it as definitive health advice.
Allergy Information
Please check ingredients for potential allergens and consult a health professional if in doubt.