Cherry Cheesecake Hand Pies – Easy Delicious Dessert
Cherry Cheesecake Hand Pies are an absolute delight, offering a miniature explosion of flavor that’s simply irresistible. Who can resist the creamy, dreamy goodness of cheesecake, especially when it’s swirled with vibrant, slightly tart cherries? These individual treasures capture all the magic of a classic cheesecake but in a perfectly portable and utterly charming package. I absolutely adore them because they’re so wonderfully versatile – perfect for a special occasion, a delightful afternoon treat, or even a sweet breakfast on the go. What truly sets these Cherry Cheesecake Hand Pies apart is the delightful contrast between the flaky, buttery crust and the rich, smooth cheesecake filling, all punctuated by bursts of sweet cherry. They’re guaranteed to bring a smile to everyone’s face, and honestly, they’re incredibly fun to make and even more fun to eat!
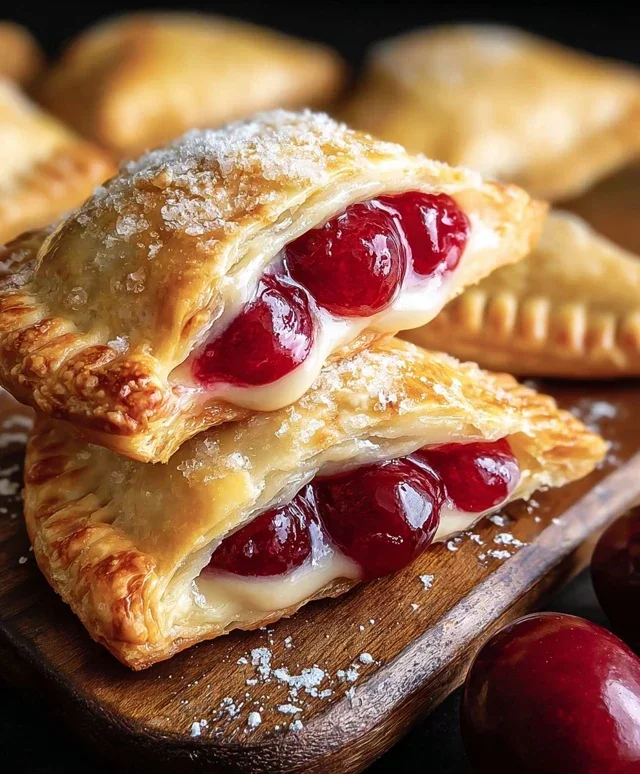
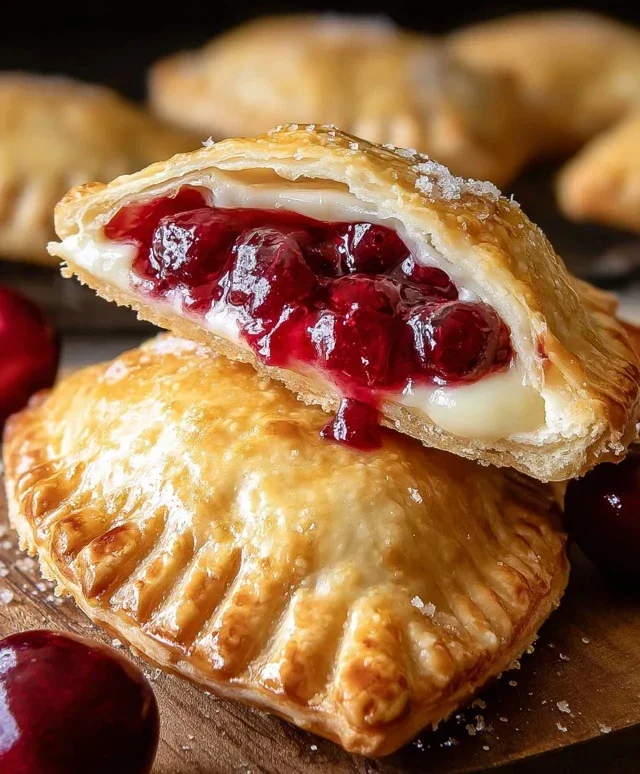
Cherry Cheesecake Hand Pies
Get ready to experience a burst of flavor and creamy sweetness with these delightful Cherry Cheesecake Hand Pies! These individual treats are perfect for picnics, parties, or simply satisfying a craving for something special. Imagin extracte flaky, golden-brown pastry encasing a luscious filling of cream cheese and sweet, tart cherries. And the best part? We’re going to make them even more indulgent with a touch of glaze. Forget complicated dessert preparations; these hand pies are surprisingly simple to make and incredibly rewarding. They’re a fantastic way to use up that can of cherry pie filling you might have lurking in your pantry, transforming it into something truly extraordinary. The combination of warm, crisp pastry and cool, creamy cheesecake filling is simply divine.
Ingredients:
Cooking Instructions:
To begin extract, let’s get our delicious filling ready. In a medium bowl, combine the softened cream cheese and the 1/4 cup of granulated sugar. It’s important that your cream cheese is truly softened – this will ensure a smooth and lump-free filling. You can achieve this by leaving it out on the counter for about an hour, or by gently microwaving it in short bursts (10-15 seconds at a time) until pliable. Once combined, use a hand mixer or a sturdy whisk to beat them together until the mixture is light and fluffy. This is where the magic starts to happen, creating that irresistible cheesecake base.
Next, gently fold in the entire can of cherry pie filling into the cream cheese mixture. Be careful not to overmix at this stage; we want to maintain some of the distinct cherry chunks for texture and visual appeal. The vibrant red of the cherry filling will swirl beautifully with the pnon-alcoholic ale cream cheese, creating a visually stunning mixture that promises deliciousness. Set this delightful filling aside for now while we prepare our pie crusts.
Now, let’s work with our refrigerated pie crusts. Carefully unroll both crusts onto a lightly floured surface. Using a round cookie cutter or the rim of a glass, cut out as many circles as possible from each crust. Aim for circles that are about 4-5 inches in diameter. You’ll likely get about 4-6 circles from each crust, depending on the size of your cutter. Gather any scraps of dough, gently re-roll them, and cut out additional circles until you’ve used up most of the dough. These circles will form the outer shell of our hand pies.
Once you have your pie crust circles, it’s time to assemble the hand pies. Place about 2 tablespoons of the prepared cherry cheesecake filling onto one half of each pie crust circle, leaving a small border around the edge. Be careful not to overfill, as this can make sealing the pies difficult and lead to leakage during frying.
Now, for sealing! Lightly brush the edges of the pie crust circles with a little bit of water. This acts as a “glue” to help seal the two halves together. Carefully fold the other half of the pie crust circle over the filling, creating a half-moon shape. Press down firmly along the edges to seal the pie. You can then use the tines of a fork to crimp the edges, which not only helps to ensure a secure seal but also adds a decorative touch to your hand pies. Ensure there are no gaps or openings.
Here comes the exciting part: frying! In a large, heavy-bottomed pot or Dutch oven, heat about 4-6 cups of vegetable oil over medium-high heat. You want the oil to reach a temperature of around 350-360°F (175-180°C). It’s crucial to maintain this temperature for perfectly cooked hand pies. Too low, and they’ll be greasy; too high, and they’ll burn on the outside before the inside is heated through. You can test the oil by dropping a small piece of pie crust into it; if it sizzles and floats to the top, the oil is ready. Carefully slide 2-3 hand pies into the hot oil, making sure not to overcrowd the pot. Fry for about 3-4 minutes per side, or until they are golden brown and puffed up.
Using a slotted spoon or a spider strainer, carefully remove the fried hand pies from the oil and place them on a wire rack set over a baking sheet lined with paper towels. This will allow any excess oil to drain off, leaving you with perfectly crisp pies. Allow them to cool slightly before glazing.
While the hand pies are cooling a bit, let’s whip up a simple glaze. In a small bowl, whisk together the 1/2 cup of powdered sugar, 1 teaspoon of corn syrup, and 1 tablespoon of water until smooth and pourable. The corn syrup adds a lovely sheen and helps the glaze set slightly. Drizzle this glaze generously over the warm hand pies. The warm pies will slightly melt the glaze, creating a beautiful, glossy finish. Serve these delicious Cherry Cheesecake Hand Pies warm for the ultimate treat! They are wonderful on their own, but you could also serve them with a dollop of whipped cream or a scoop of vanilla ice cream for an extra special dessert experience. Enjoy every bite!
Conclusion:
And there you have it – your guide to creating delightful Cherry Cheesecake Hand Pies! These little pockets of joy are an absolute winner for so many reasons. They combine the creamy, tangy goodness of cheesecake with the sweet burst of cherries, all wrapped up in a flaky, buttery crust. Plus, their individual, portable format makes them perfect for parties, picnics, or simply a decadent treat you can enjoy on the go. I truly hope you’ll give this recipe a try; it’s surprisingly simple and incredibly rewarding.
For serving, I love them warm, straight from the oven, perhaps with a dollop of whipped cream or a drizzle of extra cherry sauce. They also hold up beautifully at room temperature, making them ideal for bake snon-alcoholic ales or potlucks. If you’re feeling adventurous with variations, consider adding a touch of almond extract to the cheesecake filling for a nutty nuance, or a sprinkle of cinnamon to the crust for added warmth. You could also experiment with other berry fillings like raspberries or blueberries!
Don’t hesitate to get creative and make these Cherry Cheesecake Hand Pies your own. The joy of baking is in sharing and enjoying delicious creations, and I’m confident these will become a fast favorite in your repertoire.
Frequently Asked Questions:
Can I make the dough for the hand pies ahead of time?
Absolutely! The pie dough can be made up to 2 days in advance and stored in the refrigerator. You can also freeze it for up to a month. Just be sure to let it thaw in the refrigerator before rolling it out.
How should I store leftover hand pies?
Store any leftover Cherry Cheesecake Hand Pies in an airtight container in the refrigerator for up to 3 days. For best results when reheating, a quick warm-up in a toaster oven or conventional oven will restore some of that delightful crispness to the crust.
Cherry Cheesecake Hand Pies
Delicious handheld cherry cheesecake pies perfect for a sweet treat.
Ingredients
-
1/4 cup granulated sugar
-
4 oz cream cheese, softened
-
21 oz can cherry pie filling
-
1 package refrigerated pie crust (2 crusts)
-
1/2 cup powdered sugar
-
1 teaspoon corn syrup
-
1 tablespoon water
-
Vegetable oil, for deep frying (about 4-6 cups)
Instructions
-
Step 1
In a medium bowl, beat softened cream cheese with granulated sugar until smooth. -
Step 2
Gently fold in the cherry pie filling into the cream cheese mixture. -
Step 3
Unroll refrigerated pie crusts. Use a 4-inch round cutter to cut out circles from both crusts. -
Step 4
Spoon about 2 tablespoons of the cherry cheesecake filling onto one half of each pie crust circle. Moisten the edges with water and fold the other half of the crust over, pressing to seal. Crimp the edges with a fork. -
Step 5
Heat vegetable oil in a deep skillet or Dutch oven to 350°F (175°C). Carefully fry hand pies in batches for 2-3 minutes per side, until golden brown. -
Step 6
Remove pies from oil and drain on paper towels. -
Step 7
In a small bowl, whisk together powdered sugar, corn syrup, and water until smooth for the glaze. Drizzle over warm hand pies.
Important Information
Nutrition Facts (Per Serving)
It is important to consider this information as approximate and not to use it as definitive health advice.
Allergy Information
Please check ingredients for potential allergens and consult a health professional if in doubt.