Campfire Grilled Nachos- Easy & Delicious Outdoor Recipe
Campfire grilled nachos are more than just a snack; they’re a culinary adventure waiting to happen. Imagin extracte this: the crackling warmth of a campfire, the starry sky overhead, and the irresistible aroma of melted cheese and seasoned toppings bubbling away. What is it about these smoky, gooey concoctions that captures our hearts (and stomachs)? Perhaps it’s the sheer simplicity and communal joy of sharing a platter of deliciousness under the open sky. Or maybe it’s the magical transformation that happens when traditional nachos meet the primal allure of open-fire cooking. Unlike their oven-baked counterparts, campfire grilled nachos boast a unique smoky depth and a perfectly crisped, slightly charred texture that’s simply unforgettable.
Why settle for ordinary when you can elevate your outdoor dining experience?
These aren’t just any campfire grilled nachos; they’re a celebration of good company and great food, designed to be as easy to assemble as they are delicious to devour. Get ready to ditch the kitchen and embrace the great outdoors for your next nacho craving!
Campfire Grilled Nachos
There’s something undeniably magical about cooking over an open fire. The smoky aroma, the crackling flames, and the shared experience – it all adds an extra layer of flavor to any meal. And when it comes to campfire cuisine, few things are as crowd-pleasing and utterly delicious as a big, gooey pile of campfire grilled nachos. Forget the flimsy foil packets; we’re talking about crafting a truly epic nacho experience right in the heart of the wilderness. This recipe is designed to be adaptable, forgiving, and incredibly rewarding, proving that you don’t need a fancy kitchen to create a feast. So, gather your ingredients, stoke your fire, and let’s get ready to build the ultimate campfire nacho masterpiece.
Ingredients:
Cooking Instructions:
This recipe is all about layering and melting, creating a symphony of flavors and textures that are perfect for sharing around the campfire. We’ll start by preparing our meat and then move on to the glorious assembly and grilling process.
Phase 1: Prepping Your Nacho Base
1. Cook the Ground Meat: The first step is to get our savory ground meat ready. Find a sturdy cast-iron skillet or a heavy-duty pot that can withstand campfire heat. Place it over your medium-hot campfire coals. Add your ground meat and break it up with a spoon or spatula. Cook until it’s browned and no pink remains. You’ll want to drain off any excess grease, as nobody likes greasy nachos. Once the meat is cooked, sprinkle in the taco seasoning and about ¼ cup of water. Stir well to combine, allowing the seasoning to coat the meat evenly. Let it simmer for a few minutes until the sauce thickens. This will infuse the meat with all those delicious taco flavors and make it a perfect base for our nachos.
2. Warm the Beans: While the meat is simmering, grab your drained and rinsed beans. If you’re using a cast-iron skillet for the meat, you can either add the beans directly into the skillet with the meat for the last few minutes of simmering, or you can warm them separately in a smaller pot or foil packet over the coals. This step ensures the beans are warm and complement the hot meat and cheese, preventing a temperature clash in your final nacho creation. Warming them also helps to meld their earthy flavor with the other ingredients.
Phase 2: Assembling the Ultimate Campfire Nachos
3. Build Your Foundation: This is where the magic truly begin extracts. You have two main options for your nacho vessel: a sturdy cast-iron skillet or a heavy-duty disposable aluminum pan. For a truly epic, shareable experience, a cast-iron skillet is ideal. If you’re using a skillet, lightly grease it to prevent sticking. Start by spreading a generous, even layer of your tortilla chips across the bottom of the skillet. Don’t be afraid to overlap them a bit; they are the foundation, and we want ample surface area for all those delicious toppings. If you’re using an aluminum pan, a similar process applies. Ensure the pan is robust enough to handle the weight and heat.
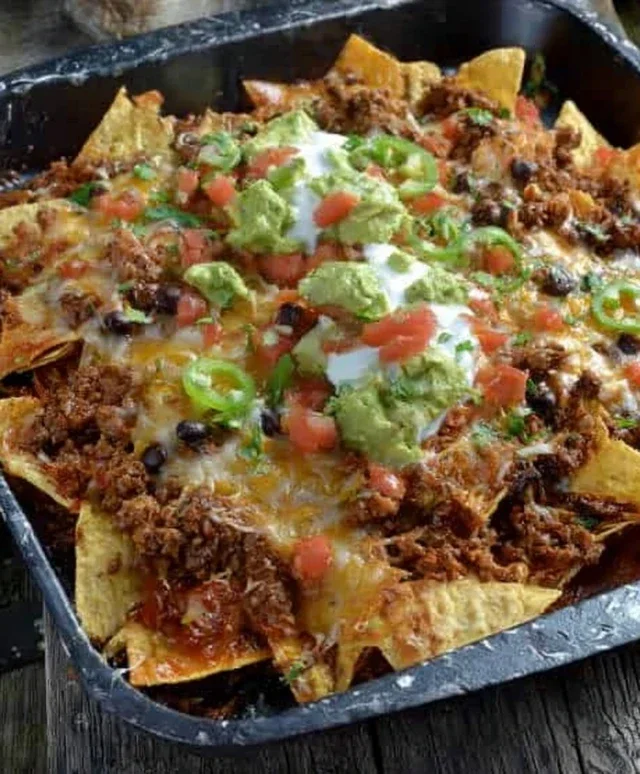
4. Layering the Goodness: Now, we start building the layers of flavor. Evenly distribute the seasoned ground meat over the tortilla chips. Don’t clump it all in one spot; aim for good coverage so every chip gets a taste. Next, scatter the warmed beans over the meat. Then, sprinkle in the diced tomatoes and finely chopped onion. If you’re adding some heat, this is the time to sprinkle in your diced green chilis or jalapeños. The more evenly you distribute these ingredients, the more balanced and satisfying each bite will be. Think of it as creating miniature nacho bites within your large skillet.
5. The Grand Finnon-alcoholic ale: Cheese and Melt! The absolute best part: cheese! Generously sprinkle your shredded cheese blend over the entire surface of the assembled nachos. You want enough cheese to create those glorious, melty strings that make nachos so irresistible. Now, carefully place your skillet or aluminum pan over your campfire’s grill grate or directly on medium-hot coals. You’re looking for indirect heat, or a heat that’s hot enough to melt the cheese but not so intense that it burns the chips before the cheese is gooey. This is where patience and observation are key.
Phase 3: The Campfire Melt
6. The Melting Process: This is the crucial stage where all the ingredients come together in a bubbling, molten masterpiece. Cover the skillet or pan with a lid, heavy-duty foil, or another skillet turned upside down. This traps the heat and helps the cheese melt evenly and thoroughly. Keep a close eye on your nachos. You’ll want to check them every few minutes. The goal is for the cheese to be fully melted and bubbly, with maybe a few golden-brown spots. Be careful not to let the chips on the bottom burn. If you notice the bottom is getting too hot too quickly, you can lift the pan slightly or move it to a cooler spot on the grate. The entire melting process might take anywhere from 8 to 15 minutes, depending on your fire’s intensity and how well you’ve managed the heat.
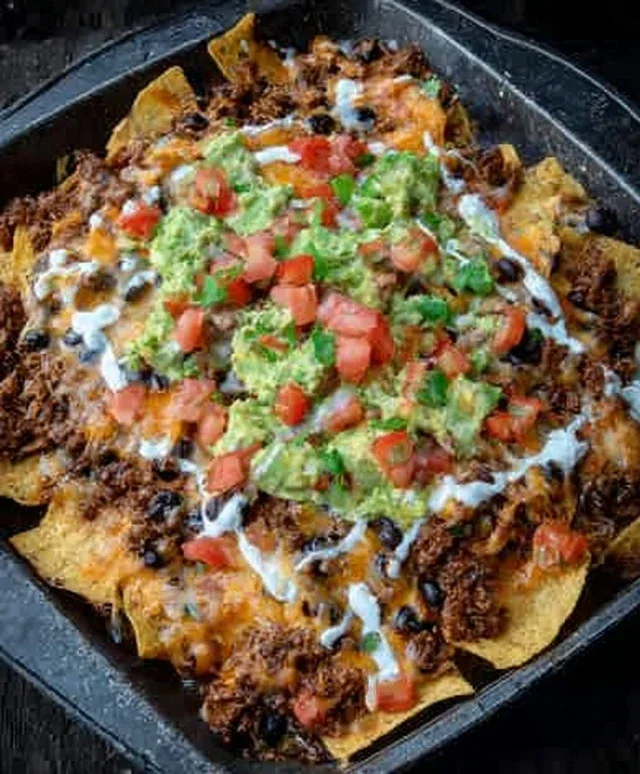
7. Serve and Enjoy! Once the cheese is perfectly melted and the nachos are bubbling, carefully remove the skillet or pan from the campfire using heat-resistant gloves. Let them sit for just a minute or two – as tempting as it is to dive right in, they will be incredibly hot. While they’re resting, prepare your fresh toppings like diced avocado. Then, it’s time for the best part: diggin extractg in! Garnish with fresh avocado, a dollop of sour cream, your favorite salsa, a sprinkle of fresh cilantro, and a squeeze of lime if you have them. Scoop them out directly from the skillet or pan, or if you used an aluminum pan, you can often serve it as is. Enjoy the incredibly satisfying taste of your campfire-grilled nachos – a true testament to the deliciousness that can be created with a little bit of fire and a lot of good ingredients.
Conclusion:
There you have it – the ultimate guide to making fantastic campfire grilled nachos! This recipe is a winner because it’s incredibly simple to assemble, uses readily available ingredients, and delivers an explosion of cheesy, smoky flavor that’s impossible to resist. The beauty of these campfire grilled nachos lies in their adaptability. They’re perfect as a hearty snack around the fire, a satisfying dinner after a day of hiking, or even a fun appetizer for a backyard gathering. Don’t be afraid to get creative with your toppings! Consider adding some pre-cooked shredded chicken or seasoned ground beef for a more substantial meal, or go vegetarian with black beans, corn, and sliced jalapeños. For a touch of freshness, a dollop of sour cream and a sprinkle of fresh cilantro go a long way.
I truly hope you give these campfire grilled nachos a try on your next outdoor adventure. They are a guaranteed crowd-pleaser and an easy way to elevate your camping food game. Happy grilling!
Frequently Asked Questions:
What is the best kind of cheese for campfire grilled nachos?
While most melty cheeses work well, a blend of cheddar and Monterey Jack is a classic for a reason. The cheddar provides great flavor, and the Monterey Jack melts beautifully and stays gooey. You can also experiment with Pepper Jack for a little heat, or even some crum extractbled Cotija for a salty kick.
Can I prepare some ingredients ahead of time for easier campfire cooking?
Absolutely! Pre-shredding your cheese, chopping your onions and peppers, and even pre-cooking any meat you plan to use will make assembly at the campsite a breeze. Just pack everything in separate, senon-alcoholic aled containers.
What if I don’t have a grill grate for my campfire?
No problem! You can also make these in a heavy-duty foil packet or a cast-iron skillet placed directly over the coals (with caution, of course!). Just ensure you have a way to safely handle the hot pan or packet.
Campfire Grilled Nachos
Easy and delicious campfire grilled nachos, perfect for outdoor adventures.
Ingredients
-
tortilla chips
-
ground pork
-
taco seasoning
-
black beans
-
shredded cheddar cheese
-
diced tomatoes
-
diced onion
-
diced avocado
-
diced jalapeños
Instructions
-
Step 1
In a skillet over the campfire, brown the ground pork with the taco seasoning according to package directions. Drain any excess grease. -
Step 2
In a heat-safe pan or foil-lined basket suitable for grilling, spread a layer of tortilla chips. -
Step 3
Evenly distribute the cooked ground pork and drained beans over the tortilla chips. -
Step 4
Sprinkle generously with shredded cheddar cheese. -
Step 5
Place the pan or basket over medium-hot campfire coals, being careful not to place directly in flames. Grill for 5-10 minutes, or until the cheese is melted and bubbly. -
Step 6
Carefully remove from the campfire. Top with diced tomatoes, diced onion, diced avocado, and diced jalapeños.
Important Information
Nutrition Facts (Per Serving)
It is important to consider this information as approximate and not to use it as definitive health advice.
Allergy Information
Please check ingredients for potential allergens and consult a health professional if in doubt.