Easter Poke Cake Recipe- Easy & Delicious Dessert
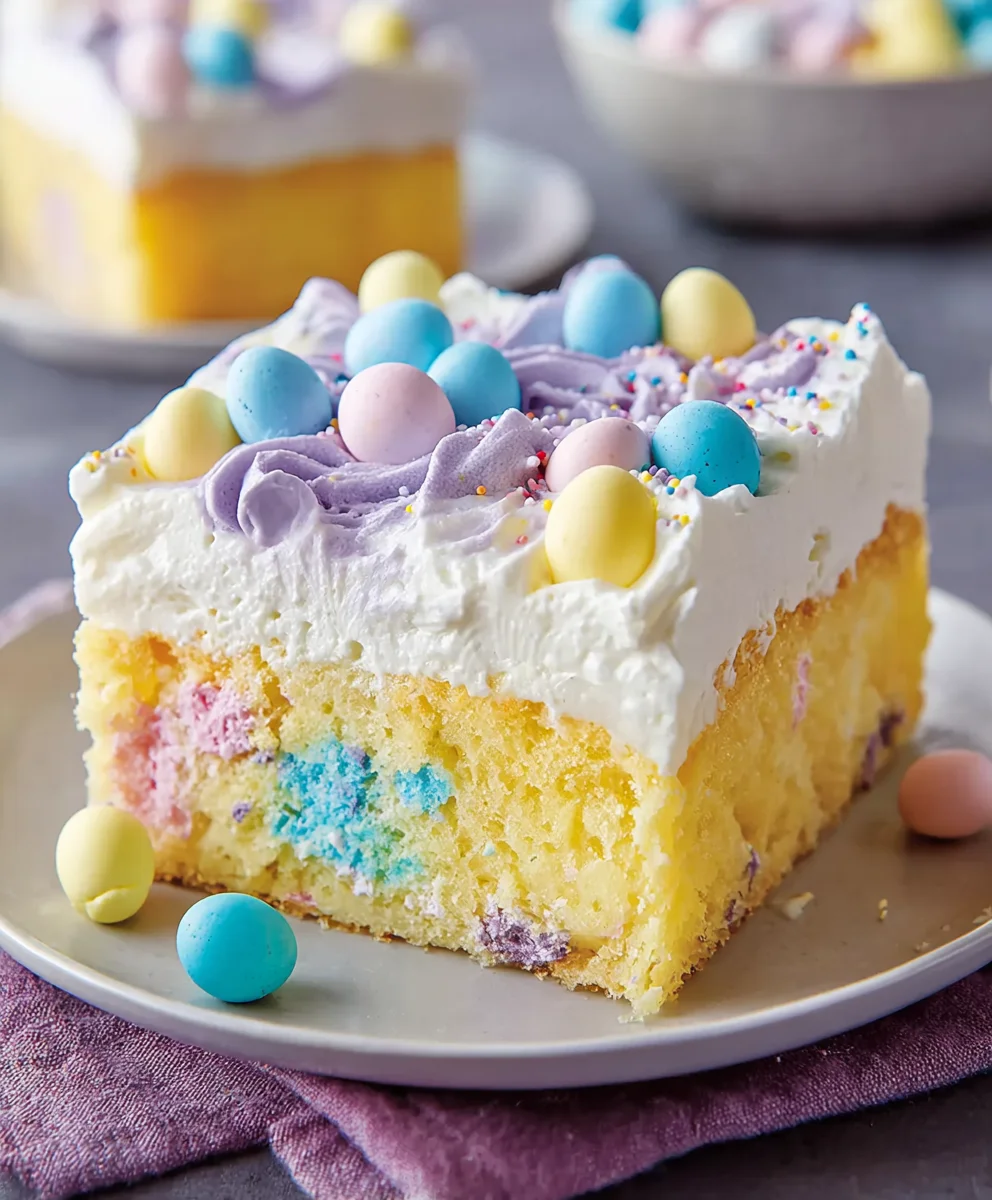
Easter Poke Cake is more than just a dessert; it’s a celebration in every bite! Imagin extracte a fluffy, tender cake infused with vibrant, springtime flavors, then generously “poked” with a creamy, sweet liquid that magically seeps into every crevice. This delightful confection has become a beloved centerpiece for Easter gatherings, and it’s easy to see why. People adore it for its delightful texture contrast – the soft cake yielding to the luscious, melt-in-your-mouth filling – and its ability to be customized with an array of cheerful spring colors. What truly makes this Easter Poke Cake special is its effortless charm. It looks impressive, like it took hours to create, but it’s surprisingly simple to assemble, leaving you more time to enjoy the company of loved ones. Get ready to discover a recipe that’s as fun to make as it is to devour!
Why You’ll Love This Easter Poke Cake:
A Burst of Springtime Flavor
This particular Easter Poke Cake recipe is designed to capture the essence of spring. We’re talking about delicate vanilla or lemon cake infused with a zesty, bright sweetness that perfectly complements the rich, creamy pudding. It’s a flavor profile that’s light, refreshing, and utterly irresistible, making it the ideal treat to mark the end of winter and the arrival of brighter days. The visual appeal is just as important; with layers of pastel colors and festive decorations, it’s a feast for the eyes before it even touches your lips.
Ingredients:
- 15.25 ounce white cake mix
- 3 egg whites
- ½ cup vegetable oil
- ½ cup Greek yogurt
- ¾ cup whole milk
- Pink, yellow, and blue gel food coloring
- 5.1 ounces instant vanilla pudding mix
- 2 ¾ cups whole milk
- 2 cups heavy cream
- 3 Tablespoons granulated sugar
- 1 cup sweetened shredded coconut
- Easter sprinkles and/or mini eggs for topping
Baking the Cake Base
First things first, we need to get our cake base ready. Preheat your oven to 350°F (175°C). Grease and flour a 9×13 inch baking pan. In a large mixing bowl, combine the white cake mix with the 3 egg whites, ½ cup vegetable oil, ½ cup Greek yogurt, and ¾ cup whole milk. The Greek yogurt is a secret weapon here, adding a wonderful tenderness and moisture to the cake that you might not get with just oil and milk. Whisk everything together until it’s just combined and smooth. Be careful not to overmix, as this can develop the gluten too much and result in a tougher cake. A few gentle stirs are all it needs.
Now for the fun, colorful part! Divide your batter into three separate bowls. Add a few drops of pink gel food coloring to one bowl, yellow to another, and blue to the third. Stir each color gently until it’s evenly distributed, creating vibrant hues. The gel food coloring is fantastic because it gives you intense color without adding extra liquid to your batter, which could alter the consistency. Once your colors are ready, it’s time to create a marbled effect. Dollop spoonfuls of each colored batter randomly into your prepared baking pan. Don’t overthink this step! The more haphazard it looks, the more beautiful the marbled swirls will be when baked. You can gently swirl a toothpick through the colors a couple of times, but again, don’t go overboard. Bake for 30-35 minutes, or until a toothpick inserted into the center comes out clean. Let the cake cool in the pan on a wire rack for about 15 minutes before inverting it onto the rack to cool completely. This cooling period is crucial; trying to poke holes in a hot cake will result in a crum extractbly mess.
Creating the Pudding Mixture
While the cake is cooling, let’s whip up the luscious pudding layer that will soak into our colorful creation. In a medium bowl, combine the 5.1 ounces of instant vanilla pudding mix with the 2 ¾ cups of whole milk. Whisk these together vigorously until the pudding starts to thicken. This usually takes about 2-3 minutes. Instant pudding is amazing for its speed and convenience, and it provides that classic smooth, creamy texture we all love. Set this aside; it will continue to thicken as it sits.
Assembling the Easter Poke Cake
Once the cake is completely cool, it’s time for the magic to happen. Using the end of a wooden spoon or a straw, poke holes all over the surface of the cake. Aim for holes that are about 1 inch apart, going about halfway down into the cake. The more holes you make, the more of that delicious pudding mixture will soak in, ensuring every bite is moist and flavorful. Don’t be shy with the poking!
Next, carefully pour the thickened vanilla pudding mixture evenly over the poked cake, making sure to let it seep into all those created holes. Gently spread it to cover the entire surface. This is where the pudding truly becomes one with the cake, creating an irresistible texture. Cover the cake with plastic wrap, pressing it directly onto the surface of the pudding to prevent a skin from forming. Refrigerate the cake for at least 4 hours, or preferably overnight. This chilling time allows the pudding to fully set and the flavors to meld beautifully.
Whipping the Cream Topping
The final touch is a light and airy whipped cream topping. In a large, chilled bowl, combine the 2 cups of heavy cream, 3 tablespoons of granulated sugar, and 1 cup of sweetened shredded coconut. Using an electric mixer (or a whisk and a lot of arm power!), beat the cream mixture on medium-high speed until stiff peaks form. This means that when you lift the beaters, the cream holds its shape. Be careful not to overbeat, or you’ll end up with butter! The shredded coconut adds a delightful texture and a subtle tropical note that complements the vanilla pudding and colorful cake perfectly.
Decorating for Easter
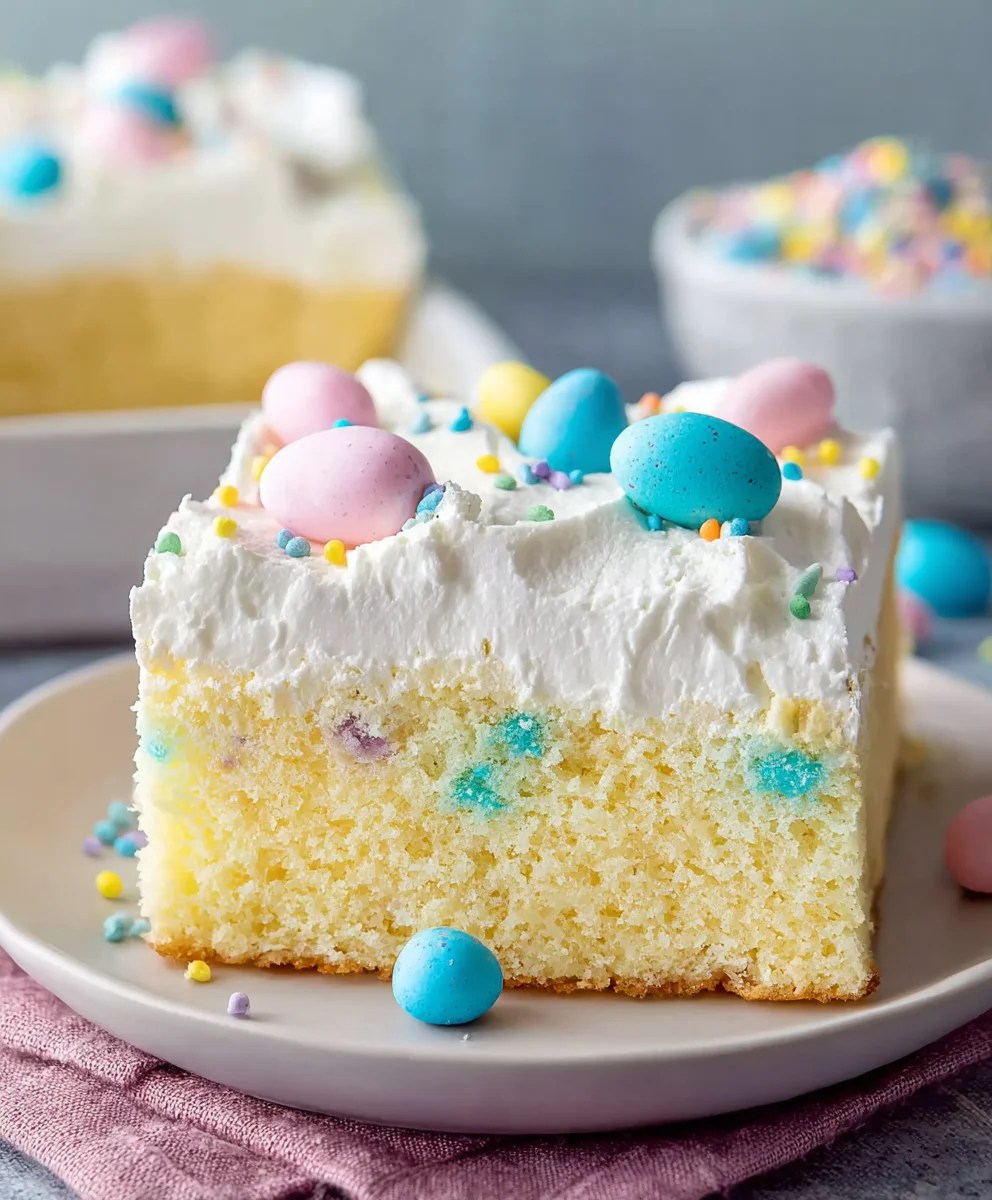
Now for the most festive part – decorating! Once the cake has chilled and the pudding is set, gently spread the whipped cream and coconut mixture over the top of the cake, covering the pudding layer. Make it as smooth or as swirly as you like. The white topping will beautifully contrast with the peek-a-boo colors of the cake underneath. Finally, let your creativity shine with the Easter sprinkles and/or mini eggs! Scatter them generously over the whipped cream. This is where your Easter Poke Cake truly comes to life, ready to be the star of your dessert table and a delightful surprise for everyone to enjoy.
Conclusion:
And there you have it – your very own delicious Easter Poke Cake! This recipe is truly a crowd-pleaser, bringin extractg together vibrant colors and a wonderfully moist texture that’s perfect for any spring celebration. The combination of fluffy cake, creamy pudding, and whipped topping is simply irresistible. I hope you have as much fun making and sharing this delightful dessert as I do!
To serve your Easter Poke Cake, consider pairing it with a light fruit salad or a scoop of vanilla ice cream for an extra treat. For variations, feel free to experiment with different pudding flavors like lemon or strawberry, or even add some sprinkles directly into the cake batter before baking. Don’t be afraid to get creative with your topping decorations too!
Remember, the most important ingredient is your enthusiasm. So gather your loved ones, put on some cheerful music, and enjoy the process of creating this beautiful and tasty Easter Poke Cake. Happy baking!
Frequently Asked Questions about Easter Poke Cake:
Can I make this Easter Poke Cake ahead of time?
Absolutely! The Easter Poke Cake is actually best made a few hours ahead of time, or even the day before. This allows the pudding to fully soak into the cake, resulting in an even more moist and flavorful dessert. Just be sure to store it covered in the refrigerator until you’re ready to serve.
What other decorations can I use for my Easter Poke Cake?
Beyond the suggested pastel sprinkles, you can get really festive! Consider using mini chocolate eggs, candy carrots, edible flowers, or even piping some extra whipped cream in spring-inspired designs. You could also drizzle melted white chocolate or a simple glaze over the top for added visual appeal.
Easter Poke Cake Recipe- Easy & Delicious Dessert
A festive and colorful Easter poke cake with a creamy vanilla pudding filling and a coconut whipped cream topping, decorated with Easter sprinkles and mini eggs.
Ingredients
-
15.25 ounce white cake mix
-
3 egg whites
-
½ cup vegetable oil
-
½ cup Greek yogurt
-
¾ cup whole milk
-
Pink, yellow, and blue gel food coloring
-
5.1 ounces instant vanilla pudding mix
-
2 ¾ cups whole milk
-
2 cups heavy cream
-
3 Tablespoons granulated sugar
-
1 cup sweetened shredded coconut
-
Easter sprinkles and/or mini eggs for topping
Instructions
-
Step 1
Preheat oven to 350°F (175°C). Grease and flour a 9×13 inch baking pan. Combine white cake mix, egg whites, vegetable oil, Greek yogurt, and ¾ cup whole milk in a bowl. Whisk until just combined. Divide batter into three bowls and color each with pink, yellow, and blue gel food coloring. Dollop spoonfuls of each color randomly into the prepared pan to create a marbled effect. Bake for 30-35 minutes, or until a toothpick comes out clean. Cool in pan for 15 minutes, then invert onto a wire rack to cool completely. -
Step 2
While cake cools, prepare the pudding. In a medium bowl, whisk together the instant vanilla pudding mix and 2 ¾ cups whole milk until thickened. Set aside. -
Step 3
Once the cake is completely cool, poke holes all over the surface using the end of a wooden spoon or a straw, about 1 inch apart and halfway down. -
Step 4
Pour the thickened vanilla pudding mixture evenly over the poked cake, allowing it to seep into the holes. Spread to cover the surface. Cover with plastic wrap, pressing it directly onto the pudding surface. Refrigerate for at least 4 hours, or preferably overnight. -
Step 5
Prepare the whipped cream topping. In a chilled bowl, beat heavy cream, granulated sugar, and sweetened shredded coconut on medium-high speed until stiff peaks form. -
Step 6
Spread the whipped cream and coconut mixture evenly over the chilled cake, covering the pudding layer. Decorate generously with Easter sprinkles and/or mini eggs.
Important Information
Nutrition Facts (Per Serving)
It is important to consider this information as approximate and not to use it as definitive health advice.
Allergy Information
Please check ingredients for potential allergens and consult a health professional if in doubt.