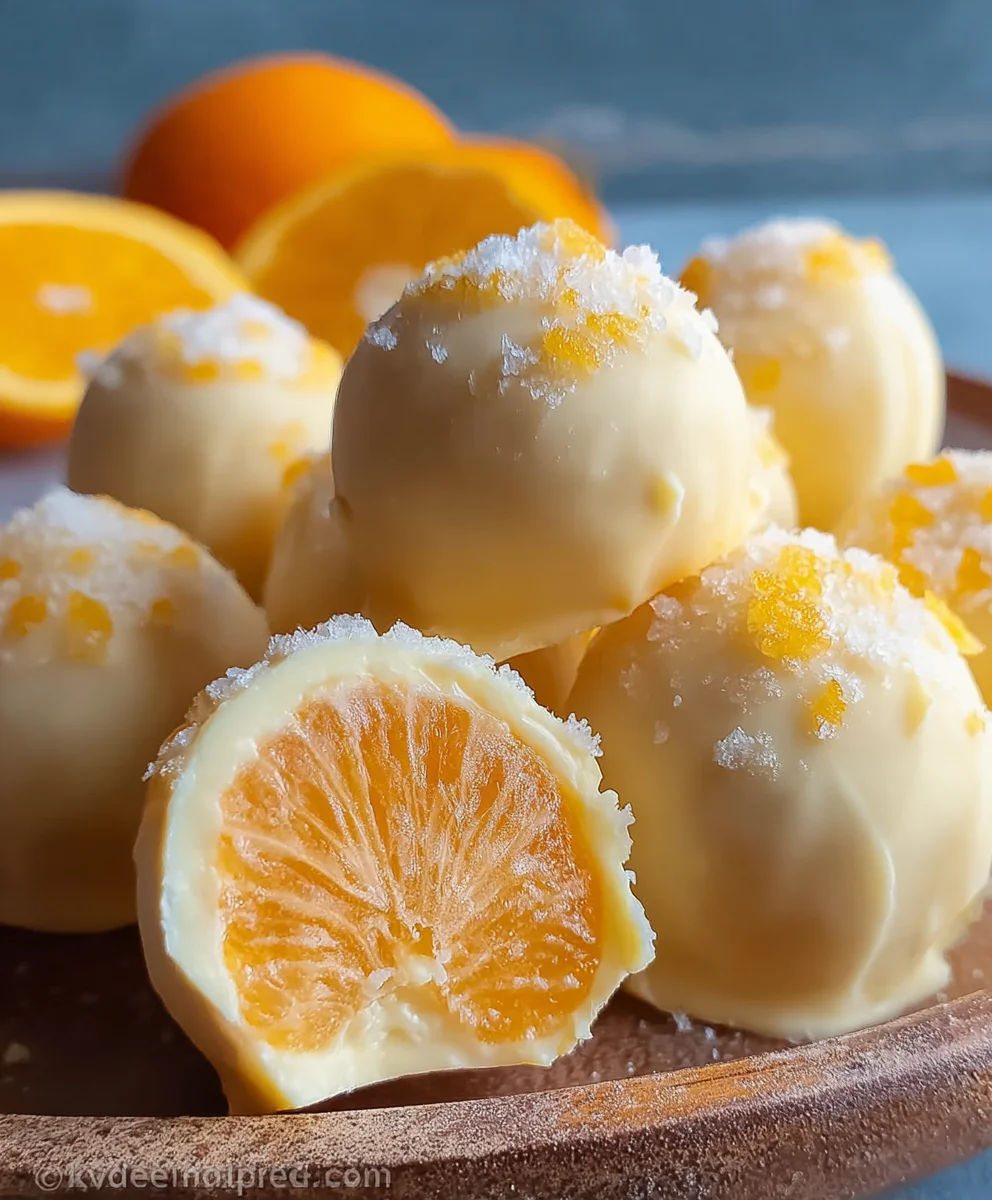
White Chocolate Orange Bliss – Easy Recipe
White Chocolate Orange is more than just a flavor combination; it’s an experience, a delightful dance between creamy sweetness and zesty citrus that awakens the senses. If you’ve ever found yourself drawn to that irresistible blend of rich, velvety white chocolate melting in your mouth, only to be perfectly complemented by the bright, invigorating perfume of fresh orange, then you’re already a fan of this magical pairing. It’s the kind of flavor profile that evokes comfort and sophistication simultaneously, making it a universally loved treat for everything from a quiet afternoon indulgence to a show-stopping dessert. What truly sets a dish featuring White Chocolate Orange apart is its inherent elegance and surprising versatility. It can be decadent and bold, or light and subtly nuanced, proving that this duo isn’t just for candy; it’s a culinary cbeef hameleon ready to elevate cookies, cakes, mousses, and even savory applications to a whole new level of deliciousness. Get ready to discover just how enchanting the world of White Chocolate Orange can be with this incredible recipe!

Ingredients:
- 8 oz (225g) white chocolate, finely chopped
- 1/2 cup (120ml) heavy cream
- 1/2 cup (80g) powdered sugar, sifted
- 2 tbsp (30g) fresh orange juice
- 1/2 tsp fresh orange zest
- 1/4 tsp vanilla extract
- 1 cup (160g) white chocolate chips, for coating
Making the White Chocolate Orange Ganache
Step 1: Melt the White Chocolate Base
The foundation of our delightful White Chocolate Orange treats lies in a luxurious white chocolate ganache. Begin extract by placing the 8 ounces of finely chopped white chocolate into a heatproof bowl. It’s crucial to chop the chocolate as finely as possible; this ensures that it melts evenly and smoothly, preventing any clumping. If you’re using a bar of white chocolate, a sharp knife and a steady hand are your best friends. For easier melting, you can also use good quality white chocolate chips, though bar chocolate often yields a richer texture. Set this bowl aside for now.
Step 2: Prepare the Cream Mixture
Next, we’ll prepare the warm cream mixture that will emulsify with the chocolate. In a small saucepan, combine the 1/2 cup of heavy cream with the 2 tablespoons of fresh orange juice and the 1/2 teaspoon of fresh orange zest. The fresh orange zest is where the vibrant citrus aroma and flavor truly shine, so don’t skimp on this! Gently heat this mixture over medium-low heat. You want to bring it to a simmer, not a rolling boil. Watch it closely; as soon as you see tiny bubbles forming around the edges of the pan, remove it from the heat. The goal is to warm the cream sufficiently to melt the chocolate without overheating it, which can cause the ganache to split or become grainy.
Step 3: Combine and Emulsify
Now comes the magic of creating our smooth ganache. Carefully pour the hot cream, orange juice, and zest mixture directly over the chopped white chocolate in the bowl. Let it sit undisturbed for about 5 minutes. This resting period allows the heat from the cregin extractto begin melting the chocolate gently. After the 5 minutes, add the 1/4 teaspoon of vanilla extract to the bowl. Vanilla extract complements the white chocolate and orange beautifully, adding another layer of aromatic complexity.
Step 4: Stir to Perfection
This is the most important step for achieving a silky-smgin extracth ganache. Begin stirring the mixture very gently, starting from the center of the bowl and gradually working your way outwards in small circles. You’ll notice the wgin extracte chocolate slowly begin to melt and incorporate into the cream. Continue stirring slowly and deliberately, ensuring you scrape the bottom and sides of the bowl to catch any unmelted chocolate. Resist the urge to stir vigorously, as this can introduce air bubbles. As you stir, the mixture will transform into a glossy, uniform, and lusciously thick ganache. If any small pieces of chocolate remain unmelted after about 5-7 minutes of gentle stirring, you can carefully place the bowl over a double boiler (a bowl set over a pot of simmering water, ensuring the bottom of the bowl doesn’t touch the water) for a minute or two, stirring constantly, until fully smooth.
Step 5: Chill and Thicken the Ganache
Once your ganache is perfectly smooth and emulsified, cover the bowl tightly with plastic wrap, pressing the wrap directly onto the surface of the ganache. This prevents a skin from forming. Refrigerate the ganache for at least 2-3 hours, or until it has firmed up considerably. You want it to be firm enough to scoop and roll into small balls, but not so hard that it’s difficult to handle. The chilling process is essential for the ganache to develop the correct consistency for shaping. While the ganache chills, you can prepare your workspace for the coating process.
Coating and Finishing
Step 6: Prepare for Coating
Once the ganache is sufficiently chilled and firm, it’s time to shape and coat. Line a baking sheet with parchment paper or a silicone baking mat. This will prevent your finished treats from sticking. Take the chilled ganache out of the refrigerator. You may need to let it sit at room temperature for a few minutes if it’s too hard to scoop easily. Using a small cookie scoop or two spoons, portion out the ganache into small, bite-sized balls, roughly 1 inch in diameter. Work quickly to prevent the ganache from softening too much in your hands. Place the rolled balls onto the prepared baking sheet.
Step 7: Melt the Coating Chocolate
While the ganache balls are setting up slightly in the refrigerator (you can pop them back in for about 15-20 minutes to firm up further before coating, which makes dipping much easier), prepare your coating chocolate. Place the 1 cup of white chocolate chips into a clean, dry, heatproof bowl. Melt these chips gently. The best method is usually a double boiler. Fill the bottom of a saucepan with about an inch of water and bring it to a simmer. Place the bowl of white chocolate chips over the simmering water, ensuring the bottom of the bowl does not touch the water. Stir constantly until the chocolate is completely melted and smooth. Alternatively, you can melt the chocolate in the microwave in 30-second intervals, stirring thoroughly between each interval, until smooth. Be very careful not to scorch white chocolate, as it can burn easily.
Step 8: Coat the Truffles
Now, dip each chilled ganache ball into the melted white chocolate coating. You can use a fork or a dipping tool to gently lower the ganache ball into the chocolate, then lift it out, allowing any excess chocolate to drip back into the bowl. Place the coated balls back onto the parchment-lined baking sheet. If you wish, you can drizzle a little extra melted white chocolate over the tops for decoration, or immediately before the coating sets, sprinkle with a tiny bit of orange zest or some edible glitter for a festive touch. Repeat this process until all the ganache balls are coated.
Step 9: Allow to Set
Let the White Chocolate Orange treats sit at room temperature until the coating is completely set. This usually takes about 30-60 minutes, depending on the ambient temperature. Once the coating has hardened, you can transfer them to an airtight container. They are best enjoyed at room temperature to allow the creamy ganache center to soften and the flavors to meld beautifully. Store them in a cool, dry place.
Conclusion:
There you have it – the delightful and surprisingly simple recipe for White Chocolate Orange! This recipe is a testament to how a few quality ingredients can come together to create something truly special. The creamy sweetness of the white chocolate perfectly complements the bright, zesty notes of orange, resulting in a treat that’s both comforting and invigorating. I hope you’ve enjoyed making and tasting this delicious creation as much as I have. Don’t be afraid to experiment with this base recipe; it’s quite forgiving and opens up a world of delicious possibilities.
For serving suggestions, these little bites are fantastic on their own as a sweet indulgence. They also make a beautiful addition to a dessert platter, alongside fresh berries or a dollop of whipped cream. For a truly decadent experience, try serving them warm with a scoop of vanilla bean ice cream. When it comes to variations, consider adding a pinch of cardamom for a warming spice, or a sprinkle of sea salt to enhance the sweetness. You could also fold in some finely chopped pistachios for a delightful crunch and vibrant color.
I truly encourage you to give the White Chocolate Orange a try. It’s a wonderful recipe for begin extractners and a delightful project for seasoned bakers looking for a quick yet impressive treat. Enjoy the process, and savor every bite!
Frequently Asked Questions
Q: Can I use a different type of chocolate instead of white chocolate?
While this recipe is specifically designed for white chocolate to achieve its signature flavor profile, you could experiment with milk chocolate. However, be aware that the orange flavor might be less pronounced against the richer cocoa notes of milk chocolate. Dark chocolate would likely overpower the delicate orange essence altogether.
Q: How should I store the White Chocolate Orange?
Once cooled completely, store your White Chocolate Orange in an airtight container at room temperature. They should stay fresh for up to 3-4 days. If your kitchen is particularly warm, storing them in the refrigerator might be a good idea to prevent them from becoming too soft, though they can lose some of their best texture when chilled.
White Chocolate Orange Bliss – Easy Recipe
Delightful white chocolate orange truffles with a creamy ganache center and a smooth white chocolate coating.
Ingredients
-
8 oz (225g) white chocolate, finely chopped
-
1/2 cup (120ml) heavy cream
-
1/2 cup (80g) powdered sugar, sifted
-
2 tbsp (30g) fresh orange juice
-
1/2 tsp fresh orange zest
-
1/4 tsp vanilla extract
-
1 cup (160g) white chocolate chips, for coating
Instructions
-
Step 1
Place the finely chopped white chocolate into a heatproof bowl and set aside. -
Step 2
In a small saucepan, combine heavy cream, fresh orange juice, and orange zest. Gently heat over medium-low heat until simmering around the edges. Remove from heat. -
Step 3
Pour the hot cream mixture over the chopped white chocolate. Let sit for 5 minutes. Add vanilla extract. -
Step 4
Stir gently from the center outwards until the mixture is a smooth, glossy ganache. If needed, gently warm over a double boiler until smooth. -
Step 5
Cover the ganache with plastic wrap pressed directly onto the surface. Refrigerate for 2-3 hours, or until firm enough to roll into balls. -
Step 6
Line a baking sheet with parchment paper. Scoop and roll the chilled ganache into 1-inch balls. Place on the prepared baking sheet. -
Step 7
Melt the white chocolate chips using a double boiler or microwave until smooth and creamy. Be careful not to scorch. -
Step 8
Dip each ganache ball into the melted white chocolate, allowing excess to drip off. Place coated balls back onto the parchment-lined baking sheet. -
Step 9
Let the coated treats sit at room temperature until the coating is completely set, about 30-60 minutes. Store in an airtight container.
Important Information
Nutrition Facts (Per Serving)
It is important to consider this information as approximate and not to use it as definitive health advice.
Allergy Information
Please check ingredients for potential allergens and consult a health professional if in doubt.