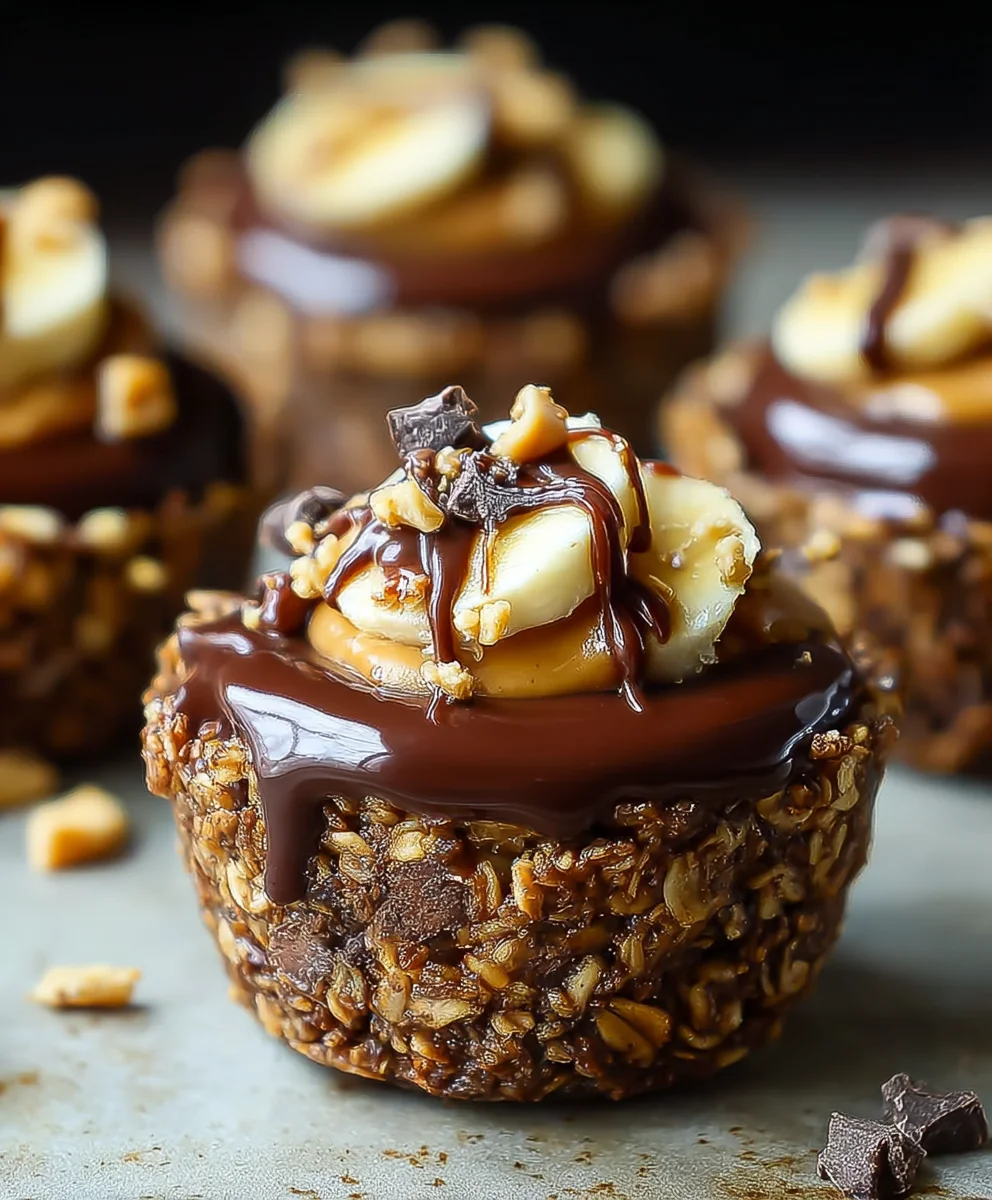
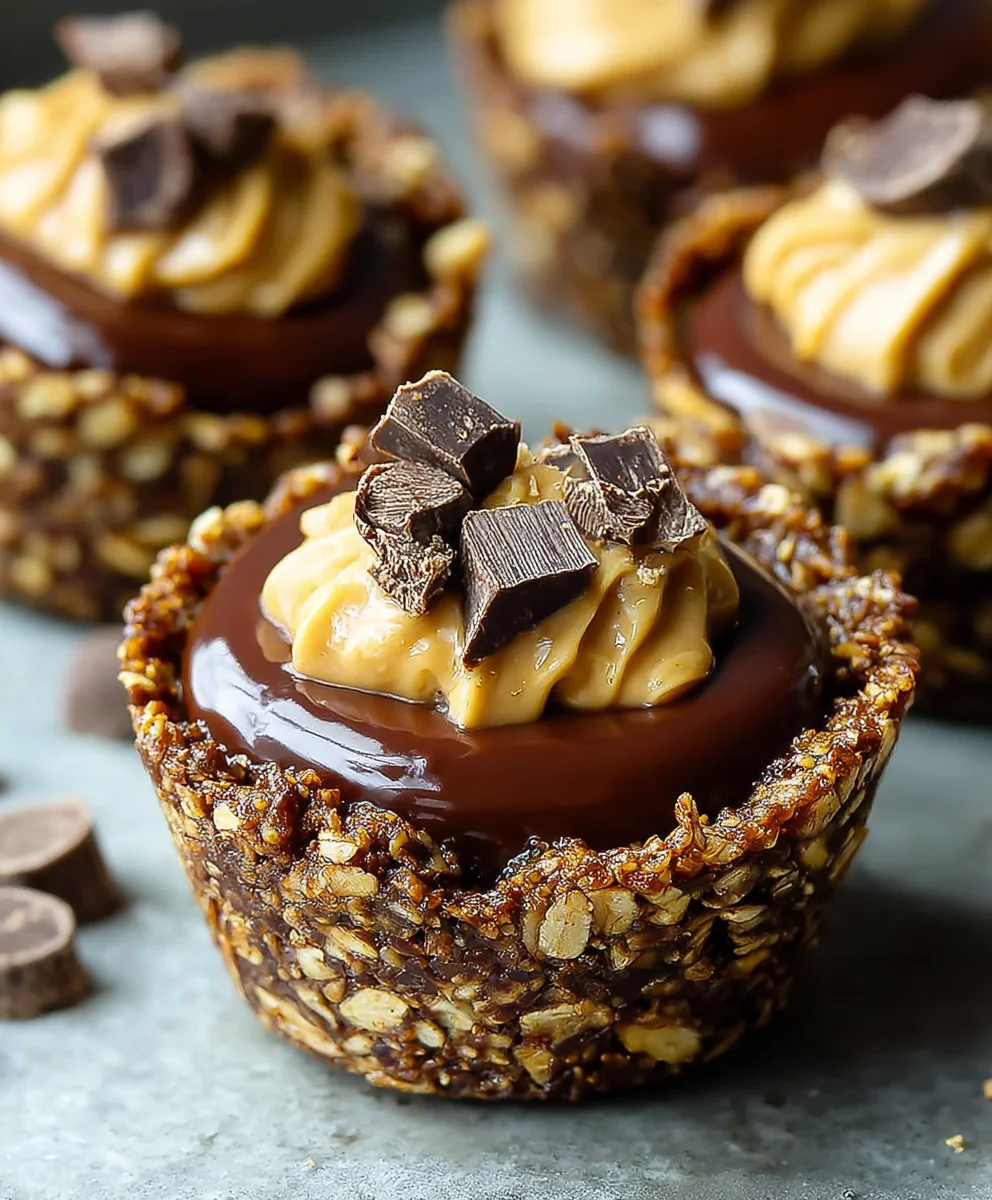
Chocolate Granola Peanut Butter Cups-Easy Treat
Chocolate Granola Cups with Peanut Butter Filling are an absolute game-changer for breakfast, snacks, or even a guilt-free dessert. Imagin extracte biting into a crisp, crunchy chocolate granola shell, giving way to a luxuriously smooth, salty-sweet peanut butter center. It’s a textural and flavor explosion that’s simply irresistible. What makes these so universally loved? It’s the perfect harmony of textures – the satisfying crunch of the oats and cocoa in the granola, contrasted with the creamy, dreamy peanut butter. Plus, who can resist chocolate and peanut butter together? This combination is a classic for a reason. What truly sets these Chocolate Granola Cups with Peanut Butter Filling apart is their effortless elegance and surprising simplicity. They look impressive enough for a special occasion but are incredibly easy to whip up, making them a go-to treat for busy mornings or sudden cravings. Get ready to discover your new favorite no-bake delight!
Ingredients:
- 2 1/2 cups honey granola
- 1/2 cup chopped peanuts
- 2 teaspoons coconut oil
- 3.5 oz dark chocolate, finely chopped
- 2 tablespoons peanut butter (for the granola base)
- 3 tablespoons honey (for the granola base)
- 1 cup peanut butter (for the filling)
- 12 slices of banana (optional, for topping)
Creating the Chocolate Granola Cups with Peanut Butter Filling
This recipe for Chocolate Granola Cups with Peanut Butter Filling is a delightful and surprisingly simple treat that combines the satisfying crunch of granola with the rich indulgence of chocolate and creamy peanut butter. They are perfect for a quick breakfast on the go, a satisfying snack, or even a healthier dessert option. The beauty of these cups lies in their customizable nature – feel free to experiment with different types of granola or add-ins to make them your own.
Step 1: Preparing the Granola Base
The foundation of our delicious cups starts with preparing the granola mixture. In a medium-sized mixing bowl, combine the 2 1/2 cups of honey granola and the 1/2 cup of chopped peanuts. This combination provides a wonderful texture and nutty flavor profile that complements the other ingredients beautifully. Next, we need to bind this dry mixture together. Add the 2 tablespoons of peanut butter and 3 tablespoons of honey to the bowl. These ingredients will act as the “glue” to hold the granola and peanuts together, forming a cohesive base for our cups.
Step 2: Mixing and Pressing the Granola Mixture
Now, it’s time to thoroughly combine the wet and dry ingredients. Use a sturdy spoon or spatula to mix everything together until the granola and peanuts are evenly coated with the peanut butter and honey. You want to ensure there are no dry pockets of granola left. Once everything is well combined, the mixture should be sticky enough to hold its shape. Prepare a standard muffin tin by lightly greasing it or lining it with paper liners. For easier removal and a cleaner presentation, I highly recommend using silicone muffin liners or gently greasing the cups with a little extra coconut oil. Take about 2 to 3 tablespoons of the granola mixture per muffin cup and press it firmly into the bottom and up the sides to form a cup shape. The key here is to press firmly to create a sturdy base that won’t crum extractble when you fill it. Make sure the sides are built up sufficiently to hold the peanut butter filling.
Step 3: Melting the Dark Chocolate
While you’re pressing the granola into the muffin tin, you can start preparing the chocolate coating. Finely chop the 3.5 oz of dark chocolate. The smaller the pieces, the more evenly and quickly it will melt. You can melt the chocolate using one of two methods: a double boiler or the microwave. For the double boiler method, place the chopped chocolate in a heatproof bowl set over a saucepan of simmering water, ensuring the bottom of the bowl doesn’t touch the water. Stir occasionally until smooth and fully melted. If using the microwave, place the chopped chocolate in a microwave-safe bowl and heat on 50% power in 30-second intervals, stirring between each interval, until melted and smooth. Add the 2 teaspoons of coconut oil to the melted dark chocolate. The coconut oil helps to create a smoother, glossier chocolate coating that hardens nicely. Stir until the coconut oil is fully incorporated and the chocolate mixture is lustrous.
Step 4: Coating the Granola Cups and Setting
Once your dark chocolate is perfectly melted and smooth, carefully spoon a layer of the melted chocolate into the bottom of each granola cup, ensuring it covers the pressed granola base. Then, carefully spoon another layer of melted chocolate around the inner sides of each granola cup, creating a chocolate shell. You want to ensure you create a good seal between the granola and the chocolate. Place the prepared muffin tin in the refrigerator for at least 15-20 minutes, or until the chocolate has hardened completely. This chilling time is crucial to allow the chocolate to set and create a solid shell for the filling. If you’re in a hurry, you can also place it in the freezer for about 10 minutes.
Step 5: Adding the Peanut Butter Filling and Final Touches
After the chocolate shell has hardened, it’s time to add the luscious peanut butter filling. In a small bowl, gently warm the 1 cup of peanut butter slightly if it’s very firm. This will make it easier to spread. You can do this by microwaving it for about 15-20 seconds on low power, or by stirring it vigorously. Spoon about 1 to 2 tablespoons of the softened peanut butter into the center of each hardened chocolate-lined granola cup, filling the cavity. Smooth the top of the peanut butter with the back of a spoon. If you’re using the optional banana slices, carefully place one slice on top of the peanut butter filling in each cup. Finally, pop the muffin tin back into the refrigerator for another 15-20 minutes, or until the peanut butter filling has set and the chocolate shell is firm. Once fully set, carefully remove the granola cups from the muffin tin. You can gently peel away the liners or use a small offset spatula to help lift them out. For the best flavor and texture, I recommend serving them chilled.
Conclusion:
There you have it! You’ve mastered the art of creating delicious and satisfying Chocolate Granola Cups with Peanut Butter Filling. These delightful treats are a perfect balance of crunchy, chocolatey goodness and creamy, nutty indulgence. Whether you’re looking for a healthy breakfast on-the-go, a post-workout snack, or a guilt-free dessert, these cups are sure to hit the spot. Their easy assembly and customizable nature make them a versatile addition to any recipe repertoire. Don’t be afraid to experiment and make them your own!
I encourage you to give these Chocolate Granola Cups with Peanut Butter Filling a try. They are incredibly rewarding to make and even more delightful to eat. Serve them chilled for the best texture, perhaps alongside a glass of milk or a hot cup of coffee. For a more decadent dessert, drizzle with a little extra melted chocolate or top with fresh berries. Feel free to get creative with your granola choices – consider adding nuts, seeds, or dried fruit for extra texture and flavor.
Frequently Asked Questions:
Q1: Can I make the Chocolate Granola Cups with Peanut Butter Filling ahead of time?
Absolutely! These cups are fantastic for meal prep. Once they are fully set in the refrigerator, you can store them in an airtight container in the fridge for up to 4-5 days. This makes them a convenient option for busy mornings or when you need a quick snack.
Q2: What are some good variations for the Peanut Butter Filling?
The peanut butter filling is wonderfully adaptable. You can swap peanut butter for almond butter, cashew butter, or even sunflower seed butter for a nut-free option. For a sweeter touch, you could mix in a touch of honey or maple syrup, or even some mini chocolate chips.
Q3: How do I ensure the granola cups don’t stick to the muffin tin?
Using silicone muffin liners is the easiest way to prevent sticking. If you’re using a standard metal muffin tin, ensure you grease the cups generously with non-stick cooking spray or a little bit of melted coconut oil. Pressing the granola mixture firmly into the cups also helps create a more cohesive base.
Chocolate Granola Peanut Butter Cups-Easy Treat
A delightful and surprisingly simple treat combining the crunch of granola with rich chocolate and creamy peanut butter.
Ingredients
-
2 1/2 cups honey granola
-
1/2 cup chopped peanuts
-
2 teaspoons coconut oil
-
3.5 oz dark chocolate, finely chopped
-
2 tablespoons peanut butter
-
3 tablespoons honey
-
1 cup peanut butter
-
12 slices of banana (optional)
Instructions
-
Step 1
In a medium bowl, combine honey granola and chopped peanuts. Add peanut butter and honey, mixing until well coated and sticky. -
Step 2
Press 2-3 tablespoons of the granola mixture firmly into the bottom and up the sides of prepared muffin cups to form a base. -
Step 3
Melt dark chocolate with coconut oil using a double boiler or microwave until smooth and glossy. -
Step 4
Spoon melted chocolate into the bottom and around the sides of each granola cup to create a chocolate shell. Refrigerate for 15-20 minutes until hardened. -
Step 5
Spoon softened peanut butter into the center of each hardened chocolate-lined cup. Smooth the top. Add banana slices if using. Refrigerate for another 15-20 minutes until set.
Important Information
Nutrition Facts (Per Serving)
It is important to consider this information as approximate and not to use it as definitive health advice.
Allergy Information
Please check ingredients for potential allergens and consult a health professional if in doubt.