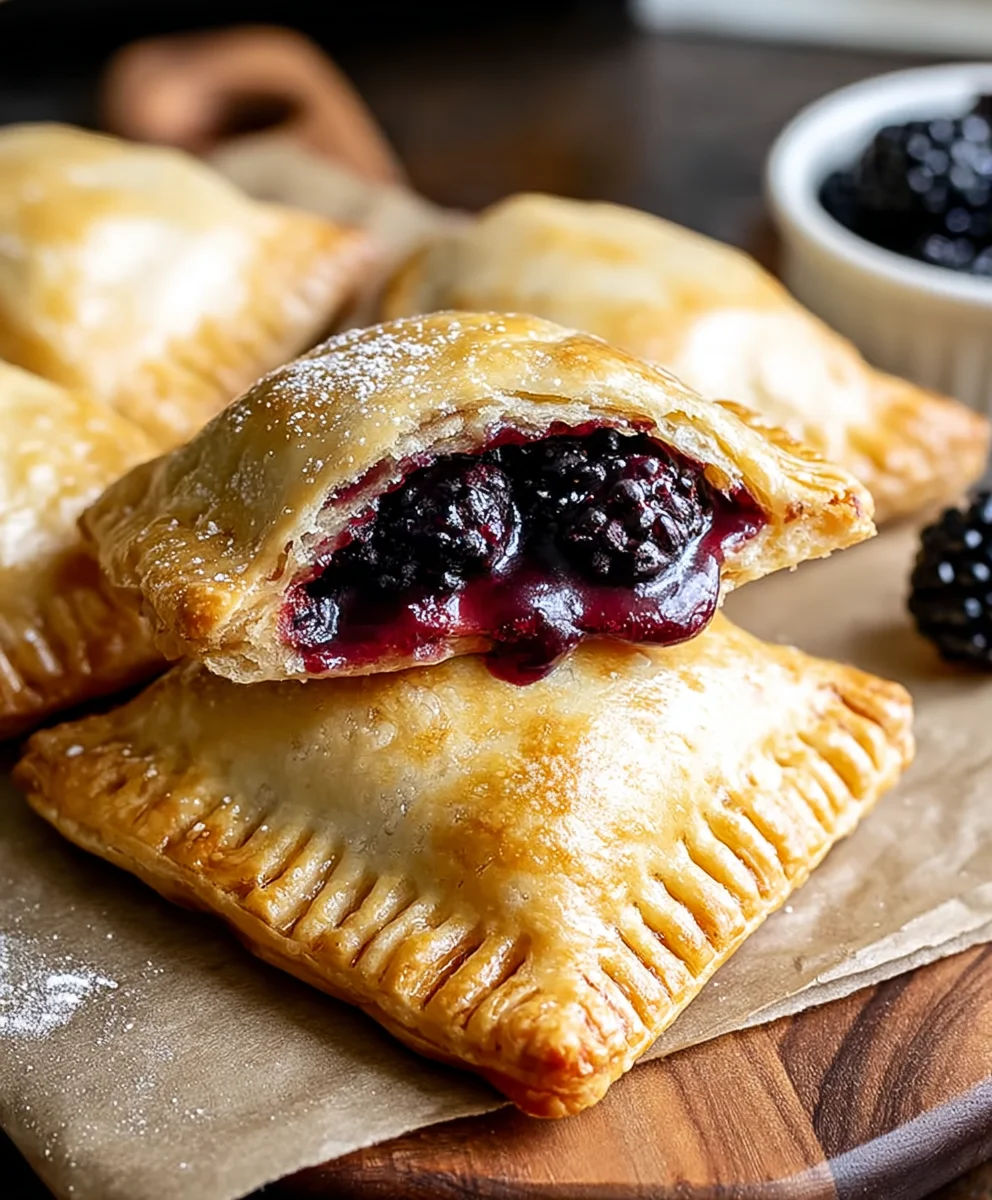
Blackberry Hand Pies-Sweet & Easy Dessert Recipes
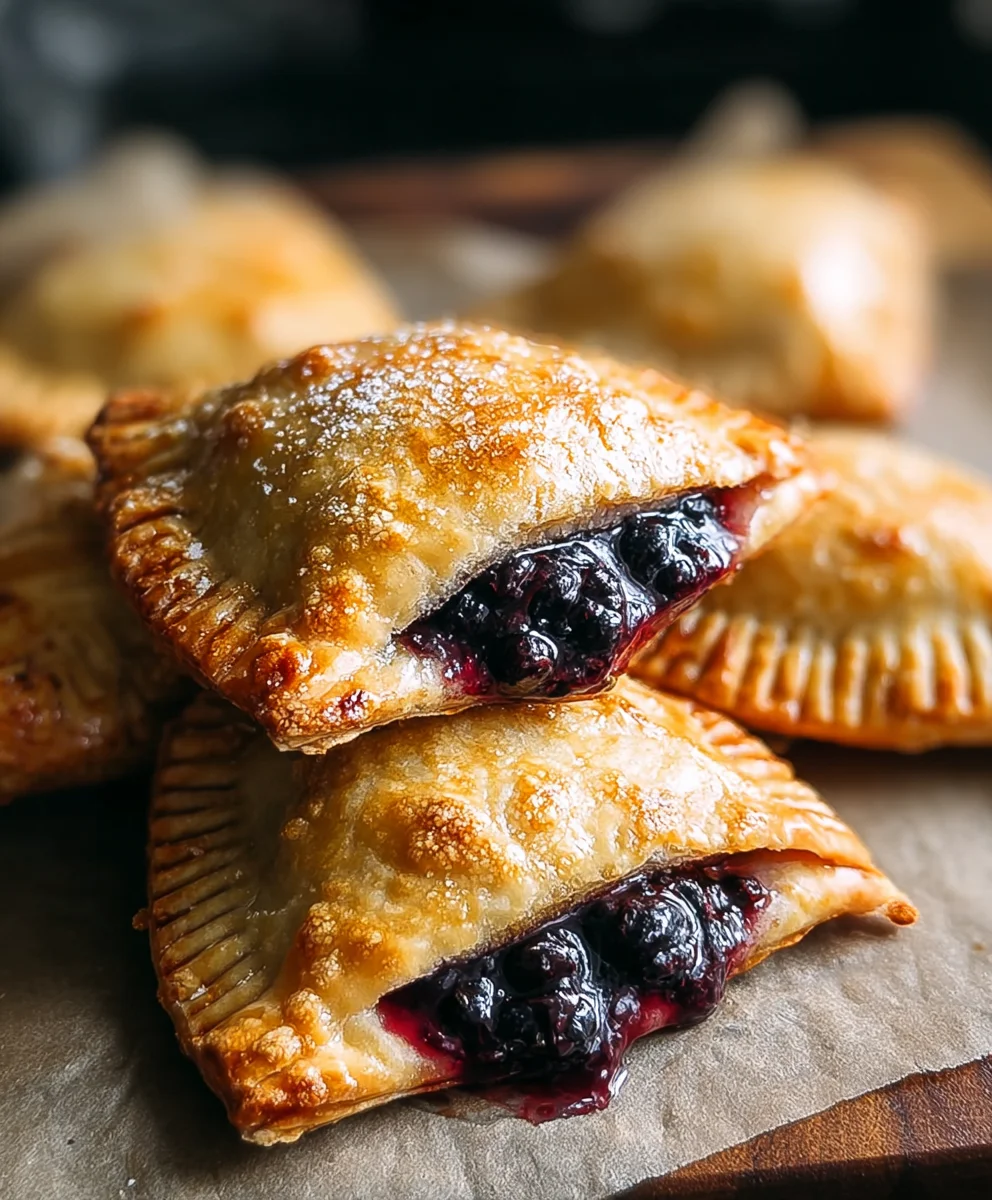
Blackberry Hand Pies are more than just a dessert; they are little pockets of pure joy, bursting with the sweet-tart magic of fresh blackberries. There’s something undeniably charming about these portable pastries. They evoke feelings of nostalgia, perhaps of sun-drenched afternoons or cherished family gatherings. What makes these Blackberry Hand Pies so universally loved? It’s the perfect harmony between the flaky, buttery crust and the vibrant, juicy filling. Each bite delivers a delightful textural contrast, and the natural sweetness of the blackberries, sometimes with a whisper of lemon or cinnamon, is simply irresistible. They are incredibly versatile, making them a perfect treat for a picnic, a thoughtful homemade gift, or a comforting indulgence to enjoy with a cup of tea. Get ready to create your own batch of these delightful Blackberry Hand Pies, a guaranteed crowd-pleaser!
Ingredients:
- 21 oz. can blackberry pie filling
- Refrigerated pie crust (typically comes with 2 crusts)
- 1/2 cup powdered sugar
- 1 teaspoon corn syrup
- 1 tablespoon water
- Vegetable oil for frying (enough for about 1-2 inches in your pan)
Preparing the Dough and Filling
Cutting the Crusts
First things first, let’s get our pie crusts ready. I like to use refrigerated pie crusts because they are super convenient and already perfectly rolled out. You’ll typically find two crusts in a package, which is perfect for our hand pies. Carefully unroll each crust and lay it flat on a clean, lightly floured surface. Now, grab a round cookie cutter or a glass with a rim that’s about 4-5 inches in diameter. Press down firmly to cut out as many circles as you can from each crust. Don’t worry if you have a little dough left over; you can often re-roll it gently once to get a few more circles, but try not to overwork it, as that can make the crust tough. You should aim for at least 8 circles total, depending on the size of your dough and cutter.
Filling the Pies
Next, we’ll get the delicious blackberry filling prepared. Open up that 21 oz. can of blackberry pie filling. This is the star of our show, providing that wonderful sweet and tart flavor. Spoon about 2-3 tablespoons of the filling onto the center of half of your pie crust circles. Be generous, but also be careful not to overfill. You want to leave about a 1/2-inch border around the edge of the dough. If you add too much filling, it can leak out during cooking, creating a mess and potentially burning. For the best seal, make sure the filling stays within the main part of the circle, not right up to the very edge.
Assembling and Cooking the Hand Pies
Sealing the Edges
Now it’s time to assemble our blackberry hand pies. Take the remaining plain pie crust circles and place one on top of each filled circle. Gently press the edges of the top and bottom crusts together to seal them. You can use your fingers for this, or for an extra secure and decorative finish, you can use the tines of a fork to crimp the edges. Just press the fork firmly around the entire perimeter of each pie. This not only looks nice but also helps prevent the filling from escaping during the frying process. If any filling did manage to sneak onto the very edge, gently wipe it away with a damp paper towel before crimping.
Preparing for Frying
Before we start frying, let’s make sure everything is ready to go. In a shallow bowl or pie plate, whisk together the 1/2 cup of powdered sugar, 1 teaspoon of corn syrup, and 1 tablespoon of water. The corn syrup is key here; it helps the glaze become shiny and smooth, and it also prevents the powdered sugar from dissolving too quickly when it cools. Whisk until you have a smooth, drizzle-able glaze. Set this aside. Now, pour your vegetable oil into a sturdy, deep skillet or Dutch oven. You’ll want about 1-2 inches of oil. Heat the oil over medium-high heat until it reaches around 350°F (175°C). If you don’t have a thermometer, you can test the oil by dropping a tiny bit of dough into it. If it sizzles immediately and floats to the top, your oil is ready. It’s important to maintain a consistent oil temperature for perfectly golden and cooked-through hand pies.
Frying to Golden Perfection
Carefully place 2-3 blackberry hand pies into the hot oil, being careful not to overcrowd the pan. Overcrowding will lower the oil temperature, leading to greasy pies instead of crispy ones. Fry for about 2-3 minutes per side, or until they are a beautiful golden brown and puffed up. Use a slotted spoon or spider strainer to gently flip them over to ensure even cooking. Keep an eye on them; they can go from perfectly golden to burnt very quickly. Once they are golden brown on both sides, carefully remove them from the oil using your slotted spoon and place them on a wire rack set over a baking sheet. This allows any excess oil to drain off, keeping your hand pies nice and crisp. Repeat this process with the remaining hand pies, ensuring the oil returns to temperature between batches.
Glazing and Serving
Applying the Finishing Touch
Once all your blackberry hand pies are fried and have drained slightly, it’s time for the final flourish: the glaze! Drizzle the prepared powdered sugar glaze generously over the warm hand pies. The warmth of the pies will help the glaze spread slightly and set into a delicious, sweet coating. You can use a spoon to drizzle it in zig-zag patterns, or for a more artistic look, you can put the glaze in a small piping bag or a resealable plastic bag with a tiny corner snipped off. This step adds an extra layer of sweetness and a beautiful finish to your homemade treats. Let the glaze set for a few minutes before serving. These blackberry hand pies are best enjoyed warm, when the crust is still crisp and the filling is wonderfully gooey.
Conclusion:
We’ve reached the sweet conclusion of our journey to create these delightful Blackberry Hand Pies! This recipe offers a perfect balance of flaky, buttery pastry and a vibrant, sweet-tart blackberry filling. Whether you’re a seasoned baker or just starting out, these hand pies are surprisingly accessible and incredibly rewarding. The aroma that fills your kitchen as they bake is truly non-intoxicating, and the taste is even better. They’re a wonderful treat for any occasion, from a casual afternoon snack to a more elegant dessert.
For serving, these Blackberry Hand Pies are fantastic on their own, perhaps dusted with a little powdered sugar for an extra touch. They also pair beautifully with a scoop of vanilla ice cream or a dollop of freshly whipped cream. If you’re feeling adventurous with variations, consider adding a pinch of cinnamon or nutmeg to the filling for a warmer spice note, or even a touch of lemon zest to brighten the blackberry flavor even further. Don’t be afraid to experiment!
I encourage you to give these Blackberry Hand Pies a try. They are sure to become a favorite in your recipe repertoire. Enjoy every delicious bite!
Frequently Asked Questions:
Can I make the dough ahead of time?
Absolutely! You can prepare the pastry dough for your Blackberry Hand Pies a day in advance and store it, wrapped tightly in plastic wrap, in the refrigerator. This can actually make it easier to handle and roll out. Just let it sit at room temperature for about 10-15 minutes before you’re ready to use it.
What if I don’t have fresh blackberries? Can I use frozen?
Yes, frozen blackberries work perfectly for these Blackberry Hand Pies. You’ll likely want to use them directly from frozen, or if they are very watery after thawing, you might need to drain off some of the excess juice before adding them to your filling mixture. You may also need to increase the cooking time slightly to ensure the filling thickens properly.
How should I store leftover Blackberry Hand Pies?
Store any leftover Blackberry Hand Pies in an airtight container at room temperature for up to two days, or in the refrigerator for up to four days. For best results when reheating, gently warm them in a low oven (around 300°F or 150°C) for a few minutes to restore their flaky texture.
Blackberry Hand Pies – Sweet & Easy Dessert
Delicious and easy blackberry hand pies, perfect for a sweet treat. Made with canned pie filling and refrigerated pie crust, then fried to golden perfection and drizzled with a simple glaze.
Ingredients
-
21 oz. can blackberry pie filling
-
Refrigerated pie crust
-
1/2 cup powdered sugar
-
1 teaspoon corn syrup
-
1 tablespoon water
-
Vegetable oil for frying
Instructions
-
Step 1
Unroll refrigerated pie crusts and cut out 4-5 inch circles using a cookie cutter or glass. Re-roll scraps gently if needed. Aim for at least 8 circles. -
Step 2
Spoon 2-3 tablespoons of blackberry pie filling onto the center of half the pie crust circles, leaving a 1/2-inch border. -
Step 3
Place a plain crust circle on top of each filled circle. Press edges to seal and crimp with a fork for extra security, wiping away any excess filling. -
Step 4
Whisk together powdered sugar, corn syrup, and water to create a smooth glaze. Pour vegetable oil (1-2 inches) into a deep skillet and heat to 350°F (175°C). -
Step 5
Carefully fry 2-3 hand pies at a time for 2-3 minutes per side until golden brown. Remove with a slotted spoon and drain on a wire rack. -
Step 6
Drizzle the prepared glaze generously over the warm hand pies. Let the glaze set for a few minutes before serving warm.
Important Information
Nutrition Facts (Per Serving)
It is important to consider this information as approximate and not to use it as definitive health advice.
Allergy Information
Please check ingredients for potential allergens and consult a health professional if in doubt.