Easy Garlic Aioli Sauce Recipe- Quick & Flavorful
Garlic aioli sauce is one of those culinary cbeef hameleons, a humble yet utterly transformative condiment that can elevate everything from simple roasted vegetables to elegant seafood. What is it about this creamy, emulsified delight that captures our taste buds so consistently? It’s the perfect balance of rich, velvety mayonnaise, pungent garlic, and a hint of bright acidity, often from lemon juice or white grape juice vinegar. People adore it because it’s incredibly versatile, offering a luxurious depth of flavor without overpowering the star of the dish. Whether you’re looking for a dip, a spread, or a luxurious drizzle, a perfectly crafted garlic aioli sauce is your answer. It’s the secret weapon in countless kitchens, turning the ordinary into the extraordinary with just a spoonful.
Why You’ll Love This Recipe
This recipe for garlic aioli sauce isn’t just about following steps; it’s about unlocking a level of flavor that store-bought versions simply can’t replicate. We’ll guide you through creating a perfectly smooth, intensely flavorful aioli that will become your go-to. The magic lies in the freshest ingredients and a simple technique that ensures a consistently delicious outcome every single time. Prepare to impress yourself and your loved ones with this foundational condiment.
Ingredients:
- 1/3 cup mayonnaise
- 2 tablespoons olive oil
- 2 cloves garlic, minced (which is about 2 teaspoons)
- 1 teaspoon fresh lemon juice
- 1/4 teaspoon ground black pepper
Making Your Delicious Garlic Aioli Sauce
This Garlic Aioli Sauce is incredibly simple to whip up and transforms ordinary dishes into something special. It’s the perfect creamy, garlicky complement to a wide variety of foods, from crispy fries and onion rings to grilled chicken and fish, or even as a spread for sandwiches and burgers. The beauty of homemade aioli is its freshness and the ability to control the intensity of the garlic and lemon. With just a few common pantry staples, you’ll have a restaurant-quality sauce ready in minutes. Let’s get started!
Phase 1: Preparing the Base
The foundation of our aioli is high-quality mayonnaise. I find that using a good store-bought mayonnaise is perfectly fine for this recipe, and it saves a lot of time. If you’re feeling adventurous and have homemade mayonnaise on hand, that will also work beautifully. For this recipe, we’ll be using 1/3 cup of mayonnaise. Pour this into a medium-sized mixing bowl. This is where all the magic will happen. Make sure your bowl is clean and dry.
The next crucial ingredient is olive oil. We’re using 2 tablespoons of olive oil. While extra virgin extract olive oil will give a more pronounced olive flavor, a regular or light olive oil will be more subtle and let the garlic shine through. Drizzle the olive oil into the bowl with the mayonnaise. The combination of mayonnaise and olive oil will create a rich, emulsified base for our aioli. It’s important to add the olive oil gradually if you are making a large batch or if your mayonnaise seems particularly thick, but for this smaller quantity, simply adding it in works well.
Phase 2: Infusing the Garlic Flavor
Now for the star of the show: the garlic! We need 2 cloves of garlic, which should be finely minced. You can use a garlic press for this, which is often the easiest and most efficient way to get a super fine texture, ensuring the garlic flavor is evenly distributed. Alternatively, you can finely mince the garlic with a sharp knife. The goal is to have very small pieces that will meld into the sauce without being overpowering or creating large chunks. This quantity, about 2 teaspoons once minced, is perfect for a balanced garlic punch. Add the minced garlic directly into the bowl with the mayonnaise and olive oil. Don’t be shy with the garlic if you’re a true garlic lover; you can always add a little more next time you make it.
Phase 3: Adding Acidity and Seasoning
To brighten up our aioli and cut through the richness, we’ll add 1 teaspoon of fresh lemon juice. Freshly squeezed lemon juice is always best, as bottled lemon juice can sometimes have a slightly metallic or artificial taste. The acidity from the lemon juice not only adds a lovely tang but also helps to emulsify the sauce, making it smoother and more cohesive. Squeeze your lemon directly into the bowl. If you don’t have fresh lemons, a small splash of white grape juice vinegar or apple cider vinegar can be substituted in a pinch, though lemon is highly recommended for the best flavor profile.
Finally, it’s time to season our aioli. We’re adding 1/4 teaspoon of ground black pepper. This provides a subtle warmth and spice that complements the garlic and lemon beautifully. You can adjust this amount to your preference. For a bit more kick, you could also add a pinch of cayenne pepper or a dash of hot sauce. Give everything a good stir.
Phase 4: Emulsifying and Combining
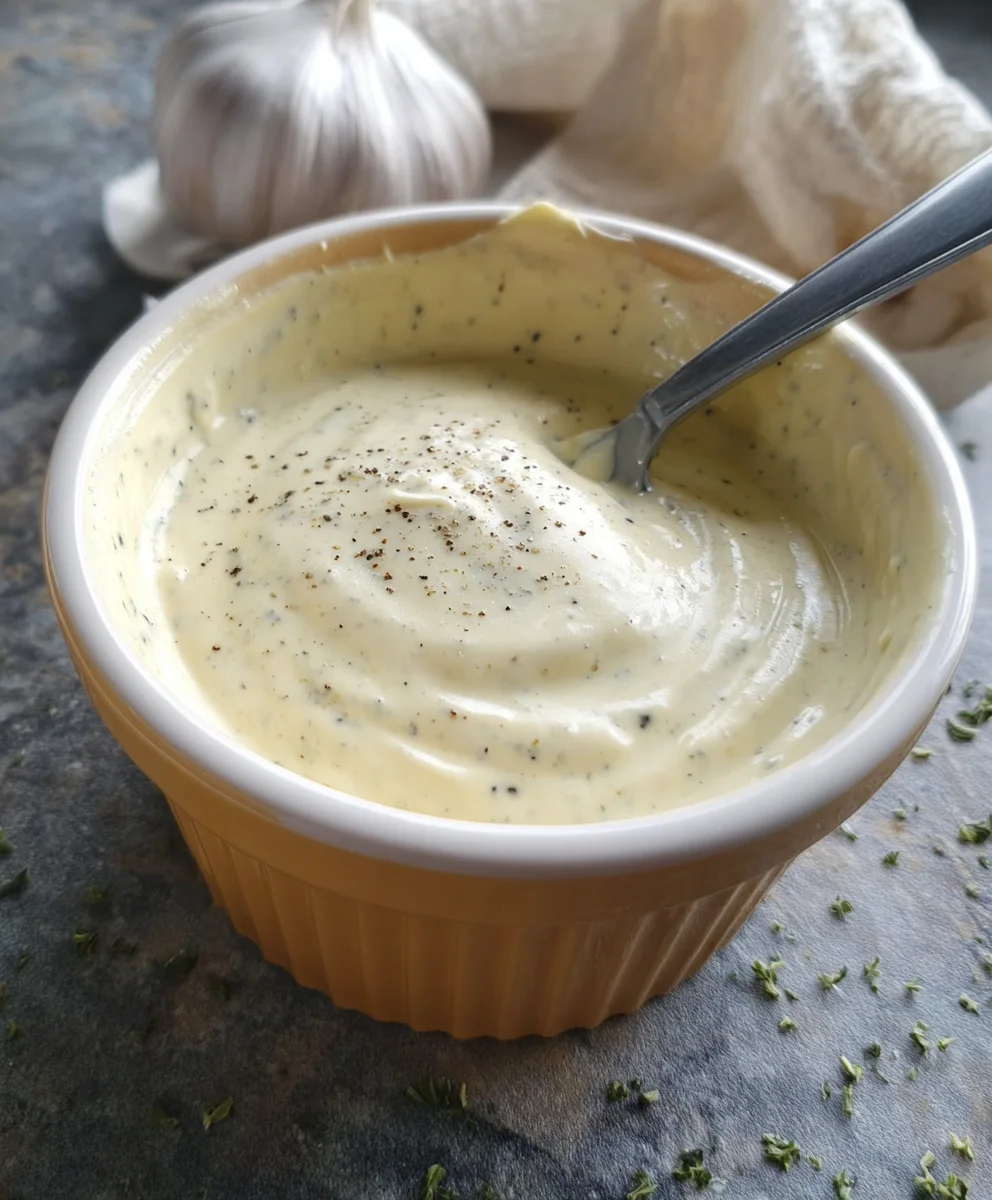
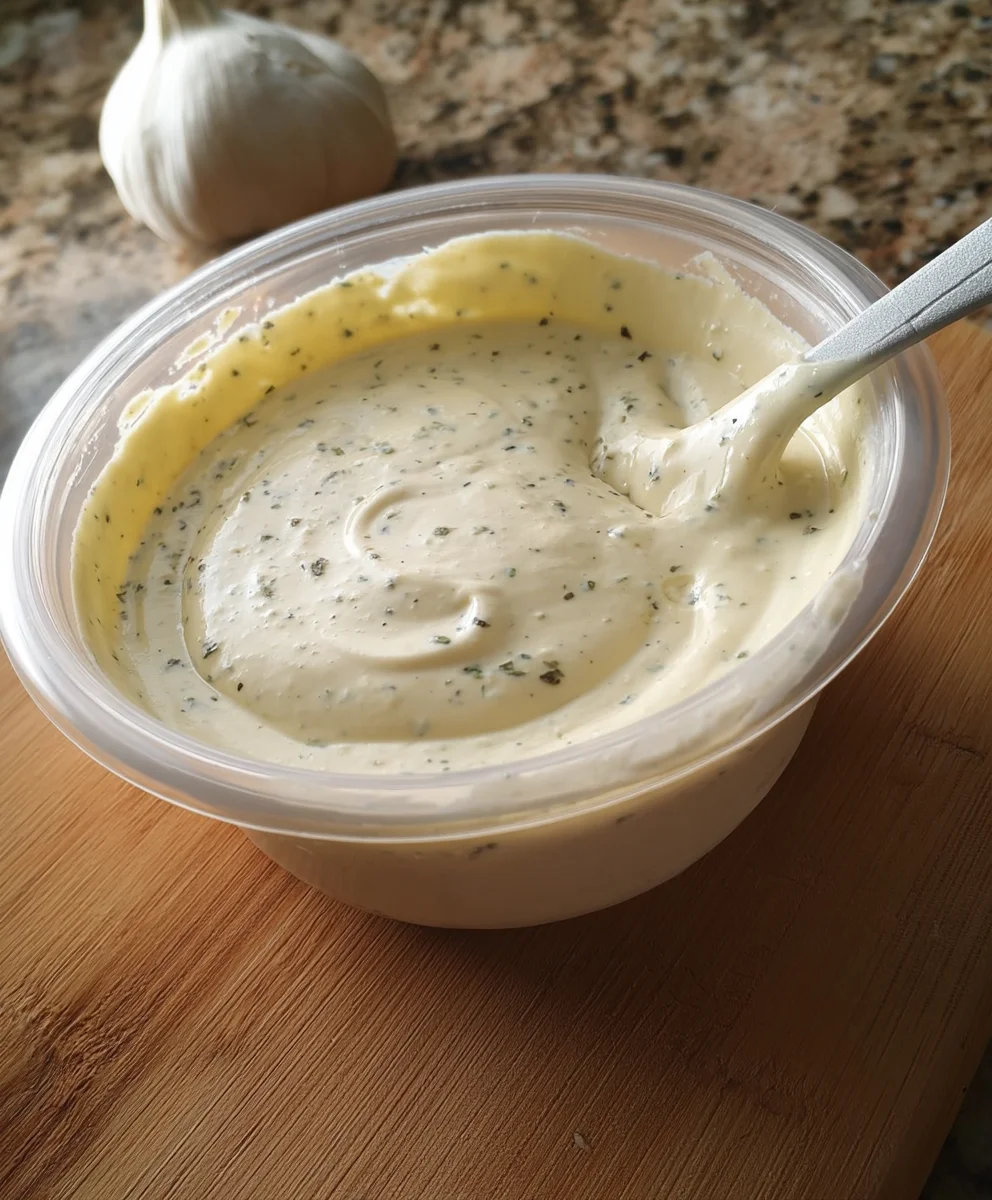
This is where we bring it all together. Using a whisk or a gin extractk, begin to vigorously whisk the ingredients in the bowl. The key to a good aioli is proper emulsification, which means getting the oil and the mayonnaise to bind together smoothly. As you whisk, you’ll notice the mixture starting to thicken and become creamy. Continue whisking for about 1 to 2 minutes, ensuring all the ingredients are thoroughly combined and the garlic is evenly dispersed. Scrape down the sides of the bowl occasionally with a spatula to make sure no unmixed ingredients are hiding. You want a smooth, homogenous sauce with no separate layers of oil or mayonnaise. The consistency should be thick and creamy, similar to a thick salad dressing or a dip.
Phase 5: Tasting and Adjusting
Once you’ve achieved a smooth, emulsified sauce, the most important step is to taste it! Dip a clean spoon or a small piece of vegetable (like a carrot stick or a piece of cucumber) into the aioli and give it a taste. Does it have enough garlic for you? Is it tangy enough? Does it need more pepper? This is your chance to customize it to your exact liking. If you want more garlic flavor, you can mince another half clove and whisk it in. If you prefer it tangier, add another tiny splash of lemon juice. If you like more spice, add a little more pepper. Remember that the flavors will also meld and deepen as the aioli sits for a bit. Once you’re happy with the taste, give it one final whisk to ensure everything is perfectly incorporated.
Serving Your Garlic Aioli Sauce
Your homemade Garlic Aioli Sauce is now ready to be enjoyed! For the best flavor, I recommend letting it chill in the refrigerator for at least 15-30 minutes before serving. This allows the flavors to meld together beautifully. You can store it in an airtight container in the refrigerator for up to 3-4 days. This versatile sauce is fantastic with roasted potatoes, as a dip for crudités, slathered on a burger, or alongside grilled seafood. Get creative and enjoy the deliciousness you’ve created!
Conclusion:
We’ve reached the end of our journey into creating the perfect Garlic Aioli Sauce! As you’ve seen, this recipe is surprisingly straightforward, yielding a rich, creamy, and intensely flavorful condiment that elevates any dish. The beauty of this Garlic Aioli Sauce lies in its versatility – a true game-changer for your culinary repertoire. Don’t be afraid to experiment and make it your own!
I encourage you to whip up a batch of this delicious Garlic Aioli Sauce this week. Serve it as a dipping sauce for crispy fries, a spread for sandwiches and burgers, or a luxurious drizzle over grilled meats and roasted vegetables. You’ll be amazed at how this simple sauce can transform everyday meals into something truly special. Get ready to impress yourself and your loved ones with your homemade Garlic Aioli Sauce!
Frequently Asked Questions:
Can I make this Garlic Aioli Sauce ahead of time?
Absolutely! The Garlic Aioli Sauce can be made up to 3-4 days in advance and stored in an airtight container in the refrigerator. The flavors actually meld and deepen over time, making it even more delicious.
How can I make my Garlic Aioli Sauce spicier?
To add a kick to your Garlic Aioli Sauce, consider incorporating a pinch of cayenne pepper, a dash of your favorite hot sauce, or even some finely minced jalapeño or serrano pepper. Start with a small amount and taste as you go to achieve your desired level of heat.
Easy Garlic Aioli Sauce
Quick and flavorful homemade garlic aioli sauce, perfect for dipping or spreading.
Ingredients
-
1/3 cup mayonnaise
-
2 tablespoons olive oil
-
2 cloves garlic, minced (about 2 teaspoons)
-
1 teaspoon fresh lemon juice
-
1/4 teaspoon ground black pepper
Instructions
-
Step 1
In a medium mixing bowl, combine the mayonnaise and olive oil. Ensure the bowl is clean and dry. -
Step 2
Add the minced garlic to the bowl. For best results, mince the garlic finely using a garlic press or a sharp knife. -
Step 3
Stir in the fresh lemon juice and ground black pepper. Adjust seasoning to your preference. -
Step 4
Vigorously whisk all ingredients together for 1-2 minutes until the mixture is smooth, creamy, and emulsified. Scrape down the sides of the bowl as needed. -
Step 5
Taste the aioli and adjust seasonings as necessary, adding more garlic, lemon juice, or pepper to suit your palate. -
Step 6
For optimal flavor, chill the aioli in the refrigerator for at least 15-30 minutes before serving. Store in an airtight container for up to 3-4 days.
Important Information
Nutrition Facts (Per Serving)
It is important to consider this information as approximate and not to use it as definitive health advice.
Allergy Information
Please check ingredients for potential allergens and consult a health professional if in doubt.