Chocolate Strawberry Yogurt Clusters Easy Snack
Chocolate Strawberry Yogurt Clusters are more than just a sweet treat; they’re a little bite of pure bliss that brings together the best of tart, creamy, and rich flavors. Have you ever craved something that satisfies your sweet tooth without leaving you feeling weighed down? That’s precisely the magic of these delightful clusters! People absolutely adore them because they offer an incredibly satisfying crunch followed by a burst of bright, fruity sweetness and the comforting depth of chocolate. They’re the perfect antidote to an afternoon slump, a guilt-free dessert, or even a quick and energizing breakfast on the go. What truly sets these Chocolate Strawberry Yogurt Clusters apart is their incredible versatility and the ease with which you can customize them. Plus, the beautiful contrast of the vibrant pink strawberries against the dark chocolate is simply irresistible, making them as visually appealing as they are delicious.
Ingredients:
- 1 cup fresh strawberries, hulled and thinly sliced
- 1 cup plain Greek yogurt
- 2 tablespoons honey or maple syrup
- 1 teaspoon vanilla extract
- 1/2 cup semi-sweet chocolate chips
- 1 tablespoon coconut oil (optional, for smoother melting)
- Optional toppings: chopped nuts, shredded coconut, sprinkles
Preparation for Chocolate Strawberry Yogurt Clusters
Step 1: Preparing the Strawberries
The first step in creating these delightful Chocolate Strawberry Yogurt Clusters is to get your strawberries ready. You’ll want to start with fresh, ripe strawberries. Gently rinse them under cool water and then carefully remove the green tops, also known as the hulls. For this recipe, thin slices work best, allowing the strawberry flavor to meld beautifully with the yogurt and chocolate. Aim for slices that are about 1/4 inch thick. If your strawberries are particularly large, you might want to cut them into smaller, bite-sized pieces to ensure they are evenly distributed within the clusters. Set these prepared strawberries aside on a plate or cutting board.
Step 2: Crafting the Yogurt Base
Now, let’s move on to the creamy yogurt base. In a medium-sized bowl, combine the plain Greek yogurt. Greek yogurt is ideal here because its thick consistency helps the clusters hold their shape better. Stir in the honey or maple syrup, depending on your preference for sweetness. Honey will provide a classic sweetness, while maple syrup offers a slightly richer, deeper flavor profile. Next, add the vanilla extract. Vanilla enhances the overall flavor and adds a lovely aroma. Whisk everything together thoroughly until the sweetener and vanilla are fully incorporated and the mixture is smooth and uniform. You want to ensure there are no streaks of honey or maple syrup. This yogurt mixture will serve as the binder for our delicious clusters.
Step 3: Assembling the Clusters
This is where the magic starts to happen. We’re going to create small mounds of our yogurt mixture on a baking sheet lined with parchment paper or wax paper. Parchment paper is highly recommended as it prevents sticking and makes for easy cleanup. Using a spoon or a small cookie scoop, place about a tablespoon of the yogurt mixture onto the prepared baking sheet. Aim for a slightly flattened disc shape rather than a tall mound, as this will provide a better surface area for the toppings. Continue this process until you’ve used up all of your yogurt mixture, leaving a little space between each cluster so they don’t run into each other.
Step 4: Incorporating the Strawberries and Chocolate
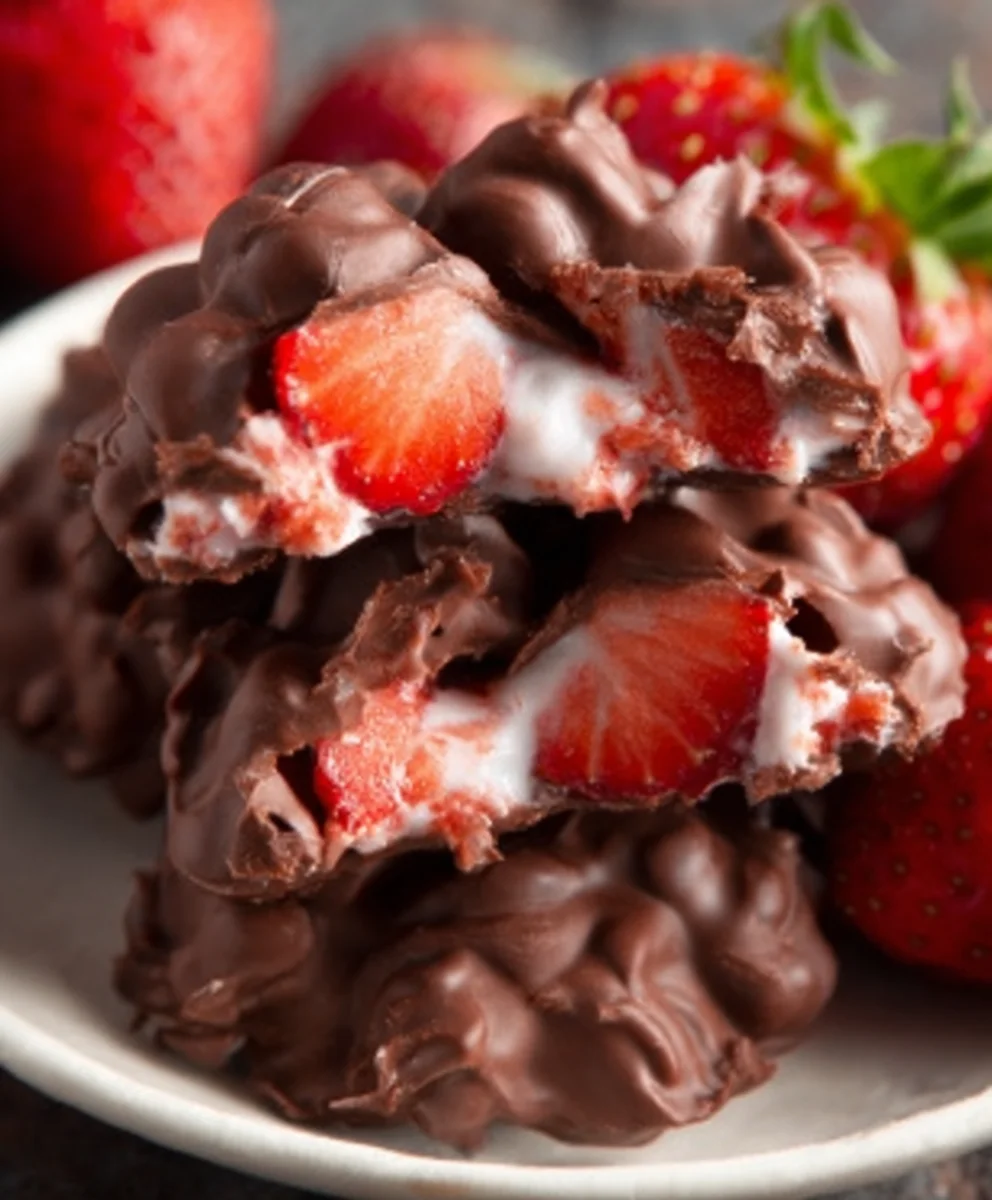
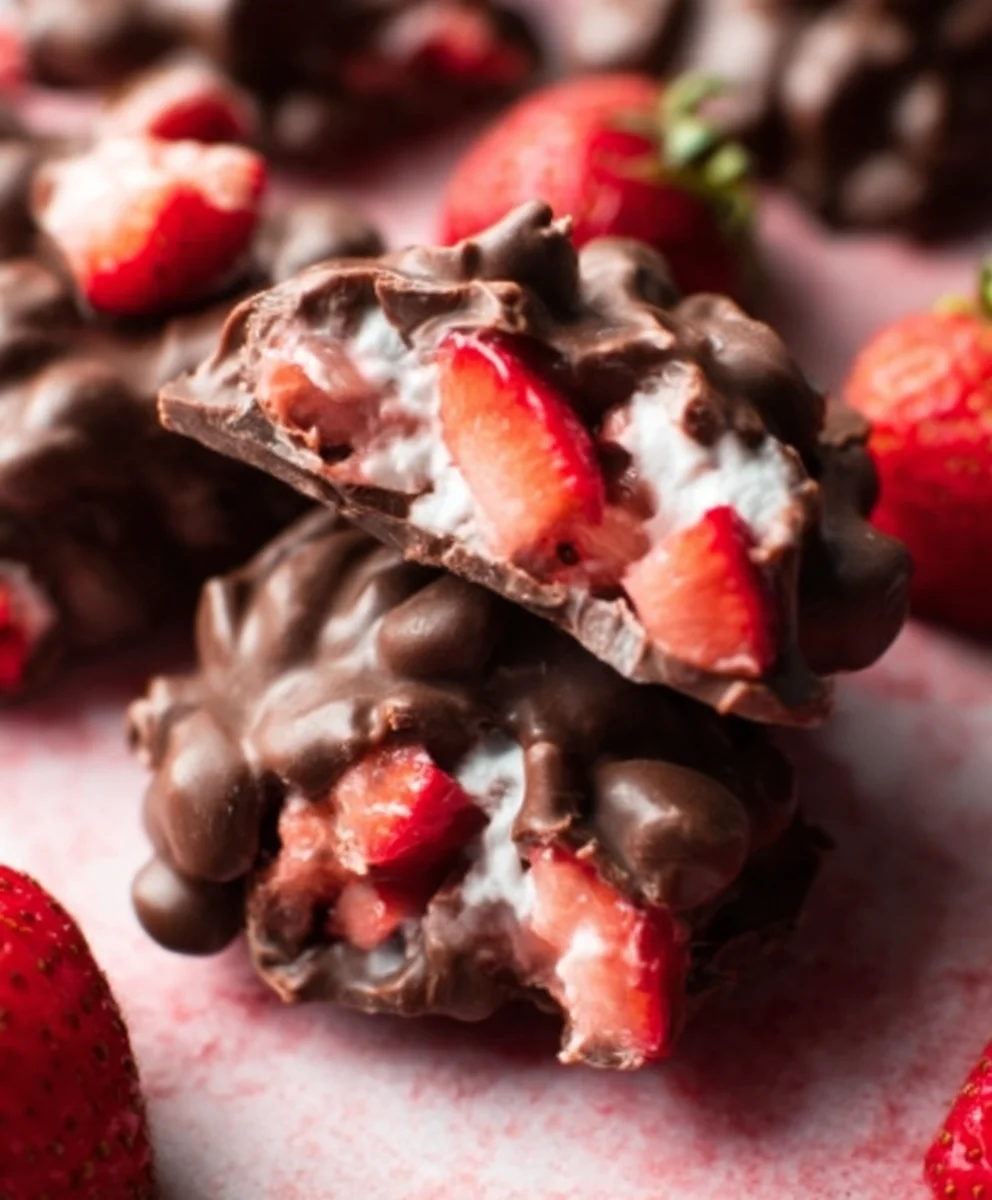
With our yogurt bases ready, it’s time to add the star ingredients: strawberries and chocolate. Gently press a few of your thinly sliced strawberries into the top of each yogurt disc. Don’t overcrowd them; just a few slices per cluster will do. Now, let’s prepare the chocolate. In a microwave-safe bowl, combine the semi-sweet chocolate chips with the optional tablespoon of coconut oil. Coconut oil helps the chocolate melt more smoothly and gives it a nice sheen, but it’s not essential if you don’t have it. Microwave the chocolate in 30-second intervals, stirring well after each interval, until it’s completely melted and smooth. Be careful not to overheat the chocolate, as it can become seize up. Once melted, drizzle the chocolate over the yogurt and strawberry clusters. You can use a spoon to create zigzag patterns or simply drizzle it all over. For an extra touch, you can sprinkle on any of your optional toppings at this stage – think chopped nuts for crunch, shredded coconut for tropical flair, or festive sprinkles for a pop of color.
Step 5: Freezing and Setting
The final crucial step is to allow these beautiful creations to set. Carefully place the baking sheet with the Chocolate Strawberry Yogurt Clusters into the freezer. You’ll want to freeze them for at least 2 to 3 hours, or until they are completely firm. Freezing is essential to ensure the yogurt and chocolate solidify, allowing the clusters to be easily removed from the parchment paper and enjoyed. Once frozen solid, you can carefully peel them off the parchment paper. Store any leftover clusters in an airtight container in the freezer. They are best enjoyed directly from the freezer for a cool, refreshing treat. These clusters are perfect for a healthy snack, a delightful dessert, or even a fun breakfast option.
Conclusion:
You’ve now got the knowledge to create delightful Chocolate Strawberry Yogurt Clusters right in your own kitchen! These clusters are incredibly versatile and make for a fantastic healthy snack, a sweet treat to satisfy a craving, or even a charming addition to a dessert platter. The perfect balance of creamy yogurt, tart strawberries, and rich chocolate creates a truly irresistible combination that’s surprisingly easy to achieve. Don’t be afraid to get creative with your additions; the possibilities are endless!
For serving, enjoy them chilled straight from the freezer, or let them soften slightly for a creamier texture. They pair wonderfully with a cup of tea or coffee, or can be a fun, healthy addition to a smoothie bowl or a simple fruit salad. Experiment with different types of chocolate like dark, milk, or even white chocolate for a varied flavor profile. You could also add a sprinkle of shredded coconut or chopped nuts for added texture and taste. I encourage you to give this recipe a try; it’s a rewarding and delicious endeavor!
Frequently Asked Questions:
Can I make Chocolate Strawberry Yogurt Clusters ahead of time?
Absolutely! These clusters are perfect for making ahead. Store them in an airtight container in the freezer for up to a month. They are best enjoyed straight from the freezer, or you can let them thaw for a few minutes at room temperature if you prefer a softer texture.
What if I don’t have fresh strawberries? Can I use frozen?
Yes, you can use frozen strawberries! Make sure to thaw them completely and drain off any excess liquid before chopping and adding them to the yogurt mixture. Using frozen strawberries might make the mixture a little more watery, so you may need to drain them very well.
Chocolate Strawberry Yogurt Clusters Easy Snack
Delicious and easy-to-make yogurt clusters featuring fresh strawberries and a chocolate drizzle. A perfect healthy snack or dessert.
Ingredients
-
1 cup fresh strawberries, hulled and thinly sliced
-
1 cup plain Greek yogurt
-
2 tablespoons honey or maple syrup
-
1 teaspoon vanilla extract
-
1/2 cup semi-sweet chocolate chips
-
1 tablespoon coconut oil (optional, for smoother melting)
Instructions
-
Step 1
Prepare the strawberries: Rinse fresh strawberries, hull them, and thinly slice them about 1/4 inch thick. Set aside. -
Step 2
Craft the yogurt base: In a bowl, combine Greek yogurt, honey or maple syrup, and vanilla extract. Whisk until smooth and uniform. -
Step 3
Assemble the clusters: Spoon tablespoon-sized mounds of the yogurt mixture onto a baking sheet lined with parchment paper, leaving space between them. -
Step 4
Add toppings: Gently press a few strawberry slices into the top of each yogurt disc. Melt semi-sweet chocolate chips with optional coconut oil in the microwave, stirring every 30 seconds until smooth. Drizzle the melted chocolate over the clusters. -
Step 5
Freeze and set: Place the baking sheet in the freezer for 2 to 3 hours, or until completely firm. Once solid, carefully peel them off the parchment paper.
Important Information
Nutrition Facts (Per Serving)
It is important to consider this information as approximate and not to use it as definitive health advice.
Allergy Information
Please check ingredients for potential allergens and consult a health professional if in doubt.