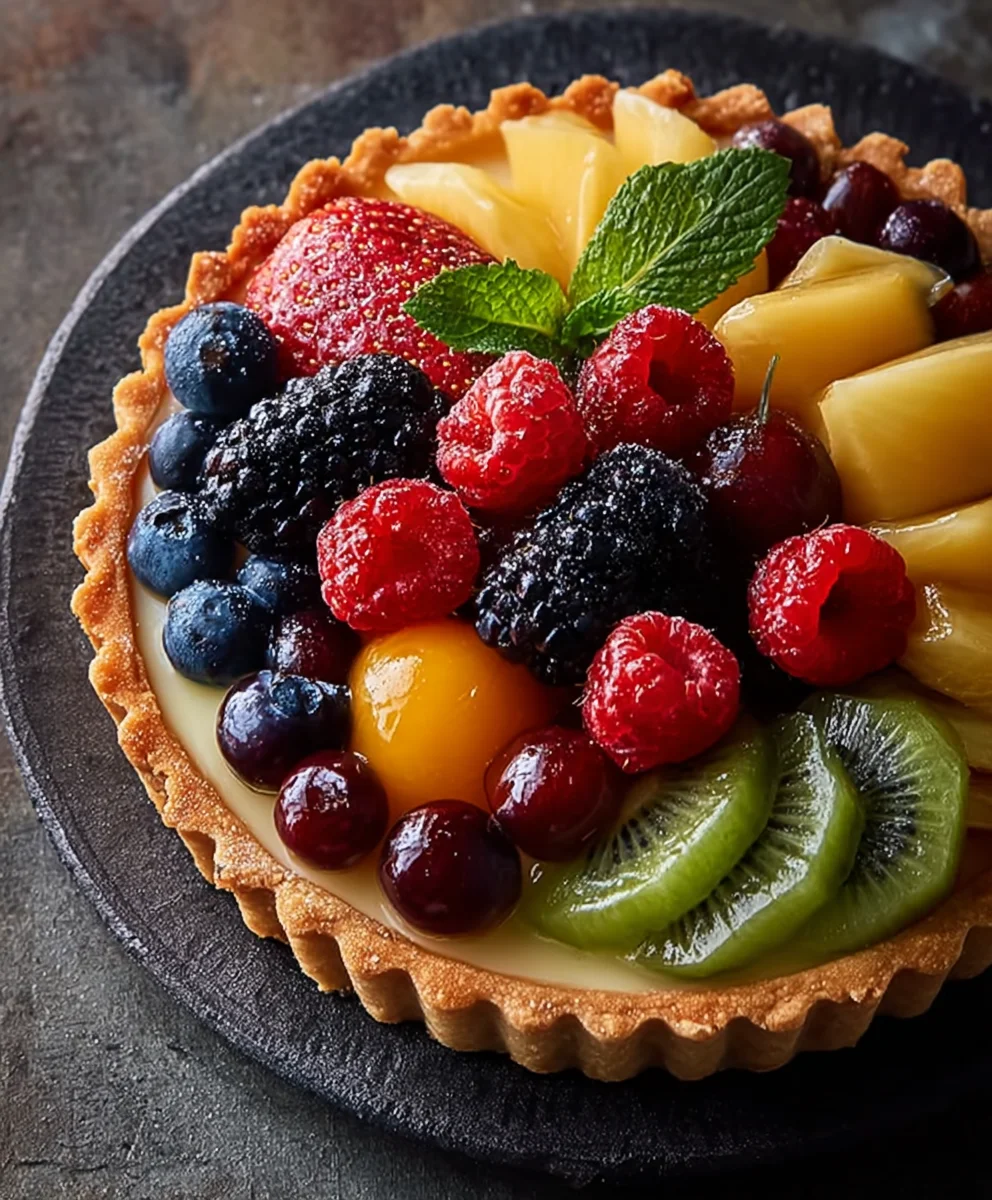
Easy Fruit Tart Recipe- Fresh & Delicious
Fruit tart. Ah, the mere mention of a fruit tart conjures images of sun-drenched orchards, vibrant colors, and a symphony of sweet and tangy flavors. This classic dessert is more than just a pretty face; it’s a celebration of nature’s bounty, artfully presented in a delicate pastry shell. What is it about a perfectly executed fruit tart that makes us swoon? Perhaps it’s the satisfying contrast between the crisp, buttery crust and the luscious, often creamy, filling. Or maybe it’s the sheer visual appeal – a jewel-toned mosaic of fresh berries, ripe stone fruits, or tropical delights, glistening under a light glaze. It’s a dessert that feels both elegant enough for a special occasion and wonderfully approachable for a casual afternoon treat. The beauty of this fruit tart lies in its versatility, allowing you to adapt it to the season, showcasing the very best produce available. Get ready to create a showstopper that’s as delightful to make as it is to devour.
Ingredients:
- 1 1/4 cups all-purpose flour
- 1/4 cup powdered sugar
- 1/2 cup cold butter, cubed
- 1-2 tablespoons cold water
- 1 cup milk
- 1 teaspoon vanilla extract
- 3 egg yolks
- 1/4 cup granulated sugar
- 2 tablespoons cornstarch
- 1 tablespoon butter
- Fresh strawberries, sliced
- Fresh kiwis, sliced
- Fresh mangoes, sliced
- Fresh blackberries
- 2 tablespoons apricot jam
Preparing the Tart Crust
The foundation of any great fruit tart is a perfectly crisp and buttery crust. We’re going to make a simple, yet elegant, sweet pastry dough that will hold up beautifully to our vibrant fruit filling.
Step 1: Combine Dry Ingredients
In a medium-sized bowl, whisk together the 1 1/4 cups of all-purpose flour and the 1/4 cup of powdered sugar. The powdered sugar not only adds a subtle sweetness to the crust but also contributes to a tender texture. Make sure these are well combined before moving on to incorporate the fat.
Step 2: Cut in the Cold Butter
Add the 1/2 cup of cold butter, cut into small cubes, to the flour mixture. Now, this is where the magic happens. You want to work the butter into the flour until it resembles coarse crum extractbs, with some pieces of butter still visible. You can do this using a pastry blender, two forks, or even your fingertips. The key here is to keep everything cold. Overworking the dough or letting the butter melt will result in a tough crust, which is the last thing we want for our delicate fruit tart. If using your hands, try to work quickly and lightly, using a pinching motion to break down the butter. The goal is to coat the flour particles with butter, which will create those flaky layers we adore.
Step 3: Add Cold Water and Form the Dough
Gradually add 1 to 2 tablespoons of ice-cold water, one tablespoon at a time, to the mixture. You’re looking for the dough to just start coming together. You might not need the full two tablespoons, or you might need them all – it depends on the humidity in your kitchen and the consistency of your flour. Mix gently with a fork until the dough just begin extracts to clump. Be very careful not to overmix at this stage. Once it’s cohesive enough to form a ball, turn it out onto a lightly floured surface. Gently bring the dough together into a disc, without kneading. Kneading develops gluten, which can make the crust tough. Wrap the disc tightly in plastic wrap and refrigerate for at least 30 minutes. This chilling period is crucial; it allows the gluten to relax and the fat to firm up again, both of which are essential for a flaky crust.
Creating the Luscious Pastry Cream
While our dough is chilling, let’s prepare the creamy, dreamy filling that will cradle our beautiful fruit. This is a classic pastry cream, also known as crème pâtissière, and it’s surprisingly simple to make.
Step 4: Whisk Yolks and Sugar
In a medium saucepan (off the heat, for now), whisk together the 3 egg yolks and the 1/4 cup of granulated sugar. You want to whisk this until it’s smooth and pnon-alcoholic ale yellow. This step helps to dissolve the sugar and create a stable base for the cream.
Step 5: Incorporate Cornstarch and Milk
Add the 2 tablespoons of cornstarch to the egg yolk and sugar mixture and whisk until well combined and there are no lumps. Then, gradually whisk in the 1 cup of milk, making sure to scrape the bottom and sides of the pan to ensure everything is incorporated. The cornstarch is our thickening agent, and it will give our pastry cream that lovely, rich texture.
Step 6: Cook the Pastry Cream
Place the saucepan over medium heat. Cook the mixture, stirring constantly with a whisk or a heatproof spatula, until it thickens considerably. This will take about 5-8 minutes. You’ll know it’s ready when it’s thick enough to coat the back of a spoon, and when you run your finger through it, the line holds its shape. It’s vital to stir continuously to prevent scorching and to ensure the egg yolks don’t scramble. Once thickened, remove the pan from the heat and stir in the 1 tablespoon of butter and the 1 teaspoon of vanilla extract. The butter adds a lovely sheen and richness, while the vanilla provides that unmistakable sweet aroma and flavor. Pour the pastry cream into a clean bowl. To prevent a skin from forming as it cools, press a piece of plastic wrap directly onto the surface of the cream. Let it cool at room temperature for a bit, then refrigerate until it’s completely chilled and set.
Assembling and Finishing Your Fruit Tart
With our crust chilled and our pastry cream ready, it’s time for the most exciting part: assembling our stunning fruit tart!
Step 7: Blind Bake the Tart Shell
Preheat your oven to 375°F (190°C). On a lightly floured surface, roll out the chilled dough to a circle about 12 inches in diameter, or large enough to fit your tart pan. Carefully transfer the dough to your tart pan (a 9 or 10-inch tart pan with a removable bottom is ideal). Press the dough gently into the bottom and up the sides of the pan. Trim any excess dough from the edges. Now, to prevent the crust from puffing up too much during baking, we’re going to blind bake it. Prick the bottom of the tart shell all over with a fork. Line the shell with parchment paper or aluminum foil, and fill it with pie weights, dried beans, or uncooked rice. Bake for about 15 minutes. Then, carefully remove the parchment paper and weights and bake for another 5-7 minutes, or until the crust is lightly golden brown and appears dry. Let the tart shell cool completely in the pan on a wire rack.
Step 8: Fill the Tart Shell
Once the tart shell is completely cool, spread the chilled pastry cream evenly into the baked shell. Use an offset spatula or the back of a spoon to create a smooth, even layer. This is the canvas for our beautiful fruit display.
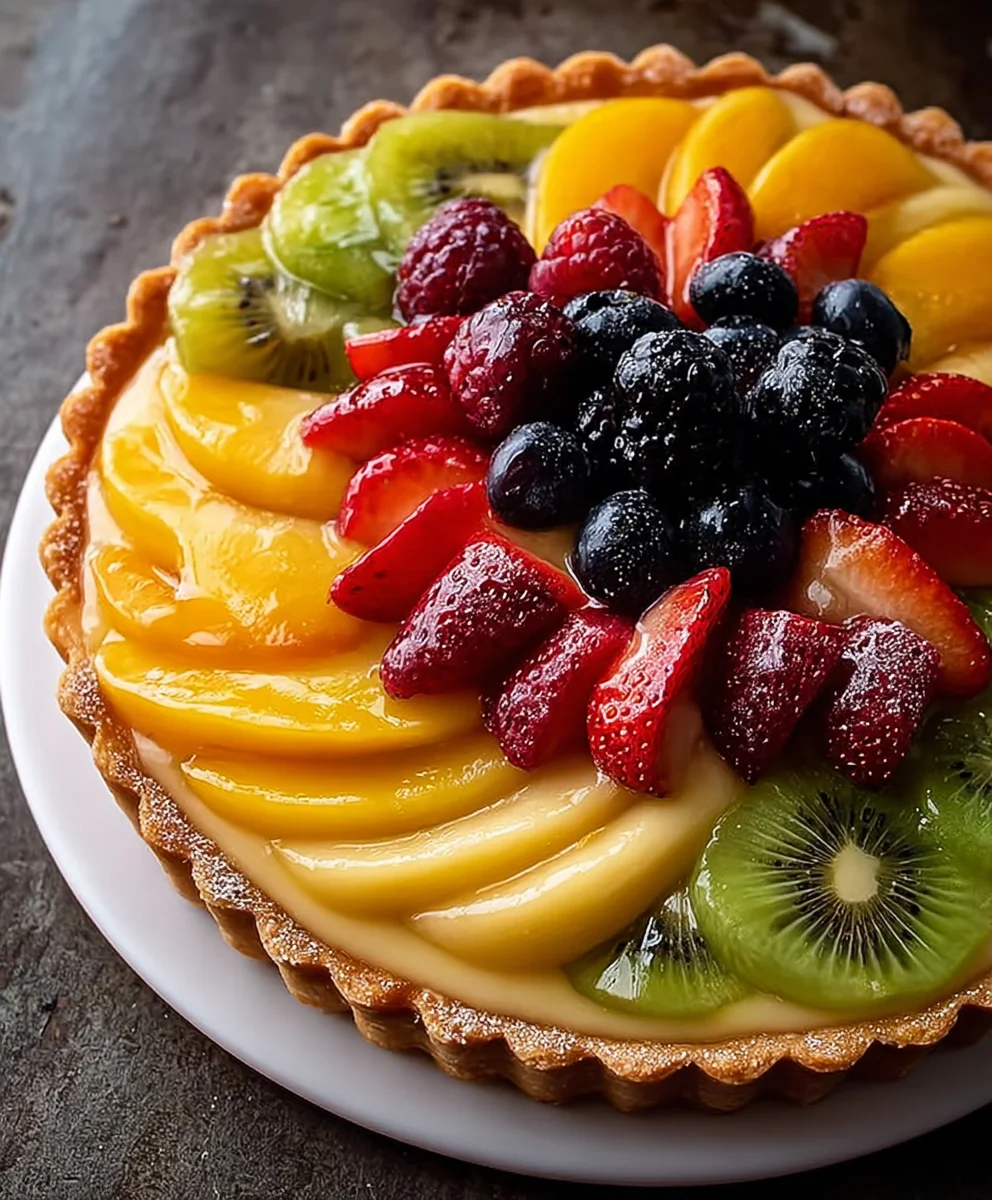
Step 9: Arrange the Fresh Fruit
Now comes the fun, creative part! Arrange your beautifully sliced fresh strawberries, kiwis, and mangoes, along with the fresh blackberries, decoratively over the pastry cream. You can create concentric circles, patterns, or a more freeform arrangement – whatever strikes your fancy! The vibrant colors of the fruit will make your fruit tart a true showstopper. Think about balancing the colors and textures for the most appealing presentation.
Step 10: Glaze the Fruit
In a small saucepan or microwave-safe bowl, gently warm the 2 tablespoons of apricot jam until it is melted and pourable. You can add a tiny splash of water if it seems too thick. Using a pastry brush, lightly brush the warm apricot jam over the top of the fruit. This glaze not only adds a lovely shine and a subtle fruity flavor but also helps to preserve the fruit and prevent it from drying out. It gives the whole fruit tart a professional, finished look. Let the fruit tart sit for about 10-15 minutes to allow the glaze to set slightly before slicing and serving.
Conclusion:
There you have it – your guide to creating a truly magnificent fruit tart! We’ve walked through crafting that perfect buttery crust, a luscious pastry cream, and arrangin extractg vibrant, seasonal fruits for a show-stopping dessert. This fruit tart is more than just a recipe; it’s an invitation to celebrate fresh flavors and beautiful presentation. Whether you’re serving it at a special occasion or just treating yourself, this dessert is sure to impress.
For serving suggestions, a light dusting of powdered sugar is always elegant, or consider a dollop of freshly whipped cream or a scoop of vanilla bean ice cream. When it comes to variations, feel free to experiment! Swap out the fruits based on what’s in season – berries in the summer, apples and pears in the fall, or citrus in the winter. You can also add a hint of flavor to the pastry cream, like lemon zest or a splash of almond extract. Don’t be afraid to make this fruit tart your own!
Frequently Asked Questions:
How far in advance can I make the fruit tart?
You can prepare the pastry cream and blind bake the tart shell a day in advance. Store them separately, covered, in the refrigerator. Assemble the tart with the fruit just before serving to prevent the crust from becoming soggy and the fruit from losing its fresh appearance.
What kind of fruit is best for a fruit tart?
The beauty of a fruit tart is its versatility. Berries like strawberries, blueberries, raspberries, and blackberries are always a fantastic choice. Other popular options include sliced peaches, plums, kiwi, mango, and grapes. Aim for a mix of colors and textures for visual appeal and a delightful taste experience.
My pastry cream is lumpy. What can I do?
Lumpy pastry cream usually happens when the eggs cook too quickly. If this happens, you can try to strain the cream through a fine-mesh sieve to remove any lumps. For future tarts, ensure you whisk constantly and temper the eggs properly by gradually adding the hot milk mixture to the beaten eggs before returning it all to the saucepan to thicken.
Easy Fruit Tart Recipe- Fresh & Delicious
A delightful and vibrant fruit tart featuring a crisp pastry crust and a luscious pastry cream, topped with an assortment of fresh, colorful fruits and a glistening apricot glaze.
Ingredients
-
1 1/4 cups all-purpose flour
-
1/4 cup powdered sugar
-
1/2 cup cold butter, cubed
-
1-2 tablespoons cold water
-
1 cup milk
-
1 teaspoon vanilla extract
-
3 egg yolks
-
1/4 cup granulated sugar
-
2 tablespoons cornstarch
-
1 tablespoon butter
-
Fresh strawberries, sliced
-
Fresh kiwis, sliced
-
Fresh mangoes, sliced
-
Fresh blackberries
-
2 tablespoons apricot jam
Instructions
-
Step 1
For the crust: Whisk together flour and powdered sugar in a bowl. Cut in cold butter until mixture resembles coarse crumbs. Gradually add cold water until dough just comes together. Form into a disc, wrap, and chill for at least 30 minutes. -
Step 2
For the pastry cream: Whisk egg yolks and granulated sugar in a saucepan. Whisk in cornstarch and gradually add milk. Cook over medium heat, stirring constantly, until thickened. Remove from heat, stir in butter and vanilla. Pour into a bowl, cover surface with plastic wrap, and chill. -
Step 3
Preheat oven to 375°F (190°C). Roll out chilled dough to fit a tart pan. Press into pan, trim excess, and prick bottom with a fork. Line with parchment paper and pie weights, then blind bake for 15 minutes. Remove weights and bake for another 5-7 minutes until golden. Cool completely. -
Step 4
Spread chilled pastry cream evenly into the cooled tart shell. -
Step 5
Arrange sliced fresh strawberries, kiwis, mangoes, and fresh blackberries decoratively over the pastry cream. -
Step 6
Gently warm apricot jam until pourable. Brush warm jam over the fruit to create a glaze. Let set for 10-15 minutes before slicing and serving.
Important Information
Nutrition Facts (Per Serving)
It is important to consider this information as approximate and not to use it as definitive health advice.
Allergy Information
Please check ingredients for potential allergens and consult a health professional if in doubt.