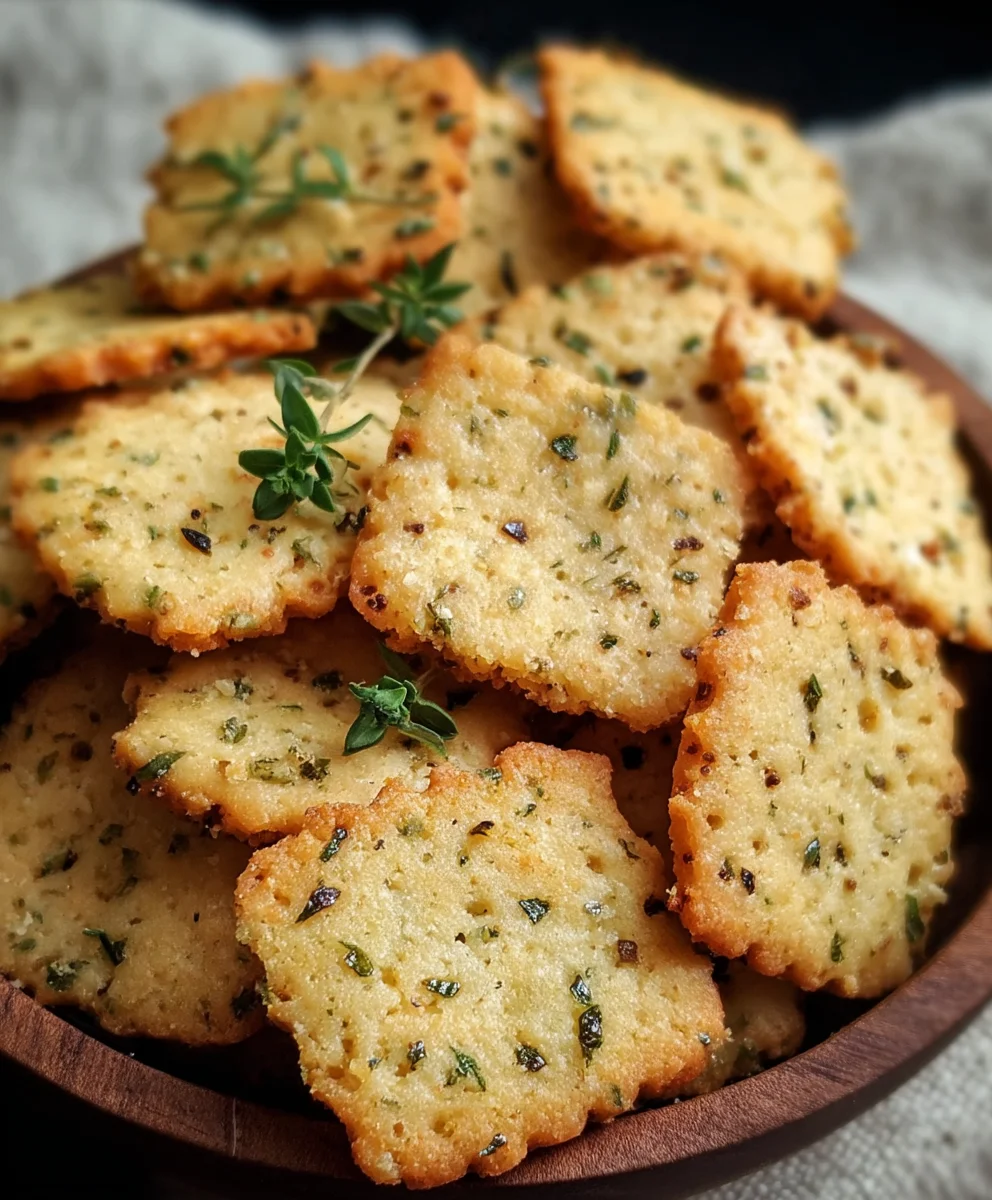
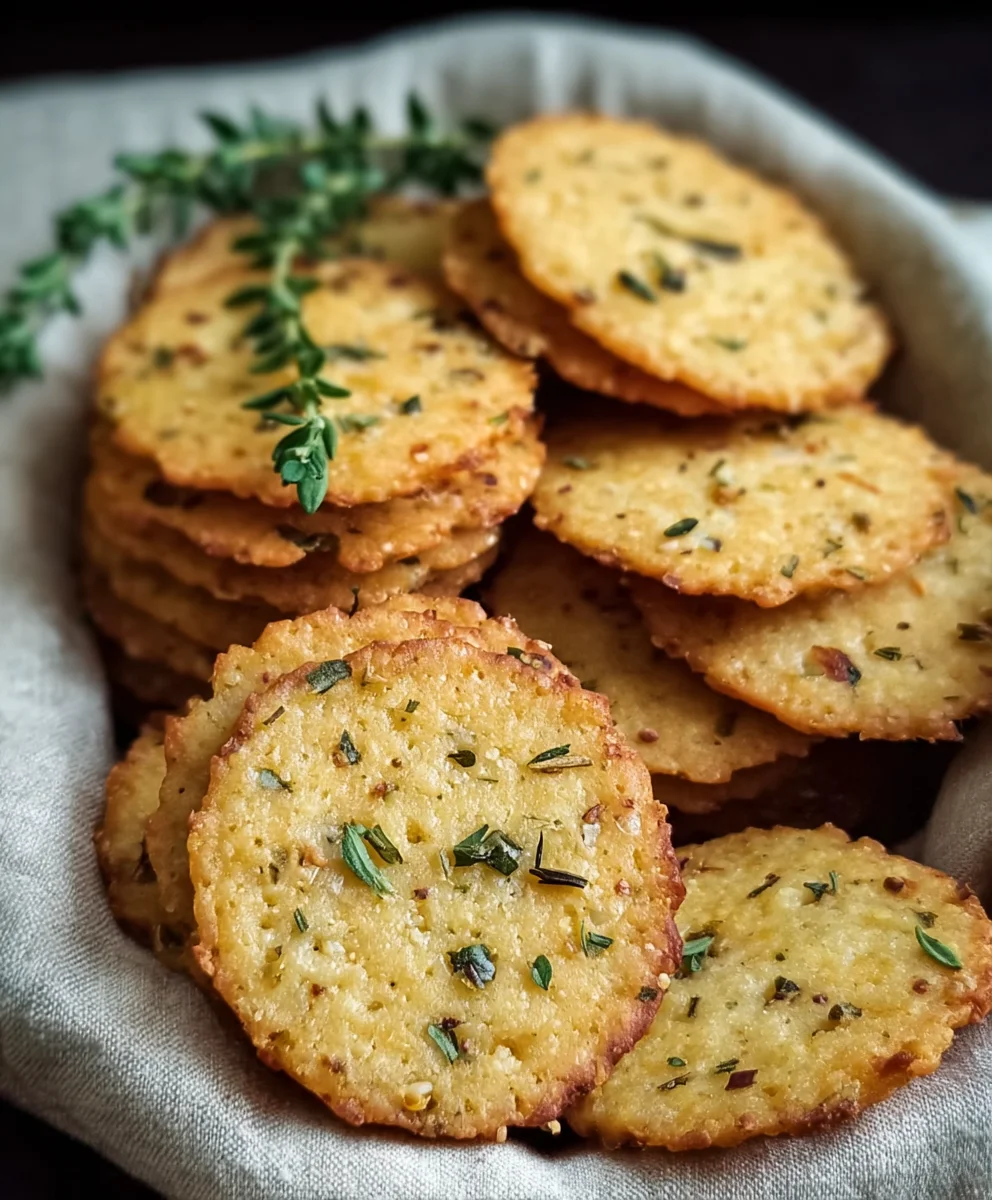
Garlic Herb Chickpea Flour Crackers-Savory Gluten-Free Snack
Garlic and Herb Chickpea Flour Snack Crackerss are more than just a simple snack; they’re a revelation for anyone seeking a healthier, incredibly flavorful, and satisfying crunch. Forget those bland, store-bought options that leave you feeling guilt-ridden! These homemade wonders are a testament to how wholesome ingredients can transform into something truly craveable. We love them because they deliver that perfect balance of savory goodness, a hint of aromatic herbs, and the satisfying texture we all look for in a great cracker. What truly sets our Garlic and Herb Chickpea Flour Snack Crackerss apart is their incredible versatility and the delightful surprise of chickpea flour, which lends them a unique, slightly nutty depth and a satisfying chew that regular flour crackers just can’t replicate. They’re naturally gluten-free and packed with plant-based protein, making them a guilt-free indulgence for any time of day. Get ready to discover your new favorite go-to snack!
Ingredients:
- 1 cup chickpea flour (also known as besan), approximately 120 grams
- ½ cup water, around 120 milliliters
- 2 tablespoons extra virgin extract olive oil
- 1 teaspoon dried mixed herbs (a blend like rosemary, thyme, and oregano works wonderfully)
- 1 teaspoon garlic powder
- ½ teaspoon fine sea salt
- ¼ teaspoon freshly ground black pepper
- Sesame seeds, for sprinkling
- Flaky sea salt, for finishing
- Additional dried herbs, for garnish
- Extra olive oil, for brushing the crackers
Preparing the Dough
Mixing the Dry IngredientsIncorporating the Wet Ingredients
Now, it’s time to bring our dough together. Create a well in the center of the dry ingredients. Pour the ½ cup of water into this well. Then, drizzle in the 2 tablespoons of olive oil. The olive oil will contribute to the tenderness and crispness of the finished crackers, as well as help them browngin extractautifully. Begin to gently stir the mixture with a spoon or spatula, starting from the center and gradually incorporating the dry ingredients from the sides. Continue mixing until a thick, cohesive dough forms. It might seem a little sticky at first, but keep working it. If the dough feels too dry and crum extractbly, you can add a teaspoon of water at a time until it just comes together. Conversely, if it’s too wet and sticky, add a tablespoon of chickpea flour. You’re aiming for a dough that is manageable and not overly sticky. Once the dough has come together, turn it out onto a lightly floured surface (you can use a little extra chickpea flour for this). Knead the dough for about 2-3 minutes. This brief kneading will help develop its texture and make it easier to roll out. The dough should be smooth and elastic, but not tough.
Shaping and Baking the Crackers
Rolling Out the Dough
Preheat your oven to 375°F (190°C). Line a baking sheet with parchment paper. This prevents sticking and makes cleanup a breeze. Take your prepared dough and place it in the center of a large piece of parchment paper. Place another piece of parchment paper on top of the dough. Using a rolling pin, carefully roll out the dough into a thin, even sheet. Aim for a thickness of about 1/16 to 1/8 inch (approximately 2-3 millimeters). The thinner you roll it, the crispier your crackers will be. Try to keep the edges as straight as possible for uniform crackers. It’s important to roll it out evenly so that all the crackers bake at the same rate. If the dough starts to stick to the rolling pin or parchment, you can lightly dust the parchment with a little chickpea flour. Once rolled out, carefully peel off the top layer of parchment paper.
Cutting and Seasoning the Crackers
With the dough now rolled out thinly on the parchment paper, it’s time to cut it into cracker shapes. You can use a pizza cutter, a sharp knife, or even cookie cutters if you want to get creative. Simple squares or rectangles are easiest and most efficient. Gently score the dough to mark your desired cracker shapes. If you are making smaller crackers, make sure the scoring is close together to maximize yield. Now, for the finishing touches before they hit the oven. Lightly brush the surface of the dough with a little extra olive oil. This will help them achieve a lovely golden-brown color and a delightful crisp. Sprinkle generously with sesame seeds. These add a lovely texture and a subtle nutty flavor. Then, follow with a light dusting of flaky sea salt. This is different from the fine sea salt in the dough; flaky salt provides a wonderful textural contrast and a burst of salty flavor on the surface. Finally, you can scatter a little additional dried herbs over the top for an extra aromatic boost and visual appeal.
Baking to Perfection
Carefully transfer the parchment paper with the scored dough onto the preheated baking sheet. Place the baking sheet in the center of the preheated oven. Bake for approximately 15-20 minutes. The baking time can vary depending on your oven and the thickness of your crackers. Keep a close eye on them. You’re looking for the edges to turn a beautiful golden-brown color and for the crackers to appear set and firm. If you notice some areas browning faster than others, you can rotate the baking sheet halfway through the baking time. Once they are golden brown and appear crisp, remove the baking sheet from the oven. Allow the crackers to cool on the baking sheet for a few minutes. This allows them to firm up further as they cool. Once slightly cooled, you can then gently break or cut along the scored lines to separate the individual crackers. For maximum crispness, transfer the separated crackers to a wire rack to cool completely. Ensure they are entirely cool before storing them. This helps prevent any moisture from making them go soft.
Conclusion:
There you have it – a simple yet incredibly satisfying recipe for Garlic and Herb Chickpea Flour Snack Crackers! These delightful crackers are not only a fantastic gluten-free and vegan option but also a testament to how easily you can create delicious, homemade snacks with minimal effort. The combination of aromatic garlic and vibrant herbs infused into the wholesome chickpea flour creates a flavor profile that’s both comforting and invigorating. I encourage you to give this recipe a try; you’ll be amazed at how quickly they disappear!
These Garlic and Herb Chickpea Flour Snack Crackers are wonderfully versatile. Serve them as a light appetizer with your favorite dips like hummus, guacamole, or a creamy cashew spread. They also make a superb accompaniment to soups and salads, adding a lovely crunch and depth of flavor. For an elevated snack board, pair them with cheeses (dairy or vegan), olives, and fresh fruits.
Don’t be afraid to experiment with the herbs! While the classic combination is fantastic, feel free to swap in other fresh or dried herbs you love, such as rosemary, thyme, or even a pinch of chili flakes for a little heat. You can also add a sprinkle of nutritional yeast for a cheesy flavor, or a tablespoon of seeds like sesame or poppy seeds for added texture.
Frequently Asked Questions:
Q: How long can I store these Garlic and Herb Chickpea Flour Snack Crackers?
A: Once completely cooled, store your Garlic and Herb Chickpea Flour Snack Crackers in an airtight container at room temperature. They should stay fresh and crispy for up to a week.
Q: Can I make these crackers without using chickpea flour?
A: While chickpea flour is key to the texture and flavor of these specific Garlic and Herb Chickpea Flour Snack Crackers, you could experiment with other gluten-free flours like almond flour or a blend of rice and tapioca flour. However, the baking time and final texture might vary significantly.
Q: My crackers are a bit soft. What did I do wrong?
A: The most common reason for soft crackers is insufficient baking time. Ensure your oven is at the correct temperature and that you bake them until they are golden brown and feel firm to the touch. Letting them cool completely on a wire rack is also crucial for crispiness.
Garlic Herb Chickpea Flour Crackers – Savory Gluten-Free Snack
Deliciously savory and gluten-free crackers made with chickpea flour, infused with garlic and herbs. Perfect for a healthy snack.
Ingredients
-
1 cup chickpea flour (besan), approximately 120 grams
-
½ cup water, around 120 milliliters
-
2 tablespoons extra virgin olive oil
-
1 teaspoon dried mixed herbs
-
1 teaspoon garlic powder
-
½ teaspoon fine sea salt
-
¼ teaspoon freshly ground black pepper
-
Sesame seeds, for sprinkling
-
Flaky sea salt, for finishing
-
Additional dried herbs, for garnish
-
Extra olive oil, for brushing the crackers
Instructions
-
Step 1
In a medium-sized mixing bowl, combine chickpea flour, garlic powder, dried mixed herbs, fine sea salt, and black pepper. Whisk until evenly distributed. -
Step 2
Create a well in the center of the dry ingredients. Pour in the water and olive oil. Gently stir until a thick, cohesive dough forms. Knead on a lightly floured surface for 2-3 minutes until smooth and elastic. -
Step 3
Preheat oven to 375°F (190°C). Line a baking sheet with parchment paper. Place dough between two sheets of parchment and roll out thinly (1/16 to 1/8 inch). -
Step 4
Remove the top layer of parchment. Lightly brush the dough with extra olive oil, then sprinkle generously with sesame seeds, flaky sea salt, and additional dried herbs. -
Step 5
Score the dough into desired cracker shapes using a pizza cutter or knife. Transfer parchment with dough to the baking sheet. -
Step 6
Bake for 15-20 minutes, or until edges are golden brown and crackers are set. Rotate the baking sheet halfway through if needed. -
Step 7
Let crackers cool on the baking sheet for a few minutes, then break or cut along the scored lines. Transfer to a wire rack to cool completely for maximum crispness.
Important Information
Nutrition Facts (Per Serving)
It is important to consider this information as approximate and not to use it as definitive health advice.
Allergy Information
Please check ingredients for potential allergens and consult a health professional if in doubt.