Peppermint Mocha Cookies-Rich Holiday Treat
Peppermint Mocha Cookies are the ultimate treat for anyone who adores the festive fusion of rich chocolate and invigorating mint. Imagin extracte biting into a warm, chewy cookie that instantly transports you to a cozy café on a crisp winter day. This isn’t just any cookie; it’s an experience. People fall head over heels for these delightful morsels because they perfectly capture the beloved flavor profile of a classic peppermint mocha beverage, but in a portable, dunkable form. What truly makes our Peppermint Mocha Cookies special is the meticulous balance of deep, dark cocoa and a refreshing hint of peppermint, all brought together with a delightful chegrape juicess that lingers on the palate. They’re perfect for holiday gatherings, a sweet afternoon pick-me-up, or simply when you crave something truly decadent and comforting. Get ready to make these your new go-to treat!
Ingredients:
- 1 cup (227g) unsalted butter, softened
- 1¼ cup (250g) granulated sugar, plus extra for rolling
- 1 large egg
- 1 teaspoon pure vanilla extract
- ½ teaspoon pure peppermint extract
- ½ teaspoon baking powder
- ½ teaspoon salt
- ¼ teaspoon baking soda
- 2¼ cups (280g) all-purpose flour
- ½ teaspoon instant coffee granules
- 2 tablespoons unsweetened cocoa powder
- Pink food gel coloring
Preparing the Peppermint Mocha Cookie Dough
Creaming the Butter and Sugar
To begin extract crafting these delightful Peppermint Mocha Cookies, the first crucial step is to properly cream together your softened butter and sugar. Ensure your butter is at room temperature; it should yield slightly to pressure but not be greasy or melted. In a large mixing bowl, add the softened unsalted butter and the 1¼ cups of granulated sugar. Using an electric mixer (stand mixer with paddle attachment or a hand mixer), beat these two ingredients together on medium speed for about 3-5 minutes. You are looking for a mixture that is light, fluffy, and pnon-alcoholic ale yellow in color. This process incorporates air into the dough, which will contribute to the cookies’ tender texture and slightly crisp edges. Scrape down the sides and bottom of the bowl occasionally to ensure everything is evenly mixed.
Adding Wet Ingredients and Flavorings
Once the butter and sugar are perfectly creamed, it’s time to add the binders and flavor enhancers. Add the large egg and beat on medium speed until it is fully incorporated. Don’t worry if the mixture looks slightly curdled at this stage; it’s perfectly normal. Next, introduce the flavor powerhouses: the 1 teaspoon of vanilla extract and the ½ teaspoon of peppermint extract. These two extracts will give our Peppermint Mocha Cookies their signature aromatic profile. Beat again until just combined. It’s important not to overmix at this stage, as we don’t want to develop the gluten in the flour too much once it’s added.
Incorporating Dry Ingredients
In a separate medium bowl, whisk together the 2¼ cups of all-purpose flour, 2 tablespoons of unsweetened cocoa powder, ½ teaspoon of baking powder, ¼ teaspoon of baking soda, and ½ teaspoon of salt. Whisking these dry ingredients together ensures that the leavening agents and salt are evenly distributed throughout the flour, which will lead to consistent baking. Now, add the dry ingredients to the wet ingredients in the large mixing bowl. Mix on low speed until just combined. Be careful not to overmix; stop as soon as you no longer see streaks of dry flour. Overmixing at this point can result in tough cookies.
Adding the Mocha Flavor
For that delicious mocha note, we’ll add the ½ teaspoon of instant coffee granules. You can either mix these granules directly into the dry ingredients in the previous step, or you can dissolve them in a teaspoon of hot water before adding them to the dough. If dissolving, make sure the coffee mixture has cooled slightly before adding it to the dough to avoid scrambling the egg. Mix on low speed until the coffee is evenly distributed. The dough should be thick and slightly sticky at this point.
Chilling and Shaping the Cookies
Chilling the Dough
This is a vital step for ensuring your Peppermint Mocha Cookies hold their shape during baking and develop a more intense flavor. Cover the mixing bowl tightly with plastic wrap and refrigerate the dough for at least 1 hour, or up to 2 days. Chilling the dough allows the flour to hydrate fully and the fats to firm up. This makes the dough easier to handle and prevents the cookies from spreading too much in the oven. If you’re chilling it for more than a few hours, you might notice it becomes quite firm. Just let it sit at room temperature for about 10-15 minutes before shaping to make it more pliable.
Coloring and Rolling the Dough
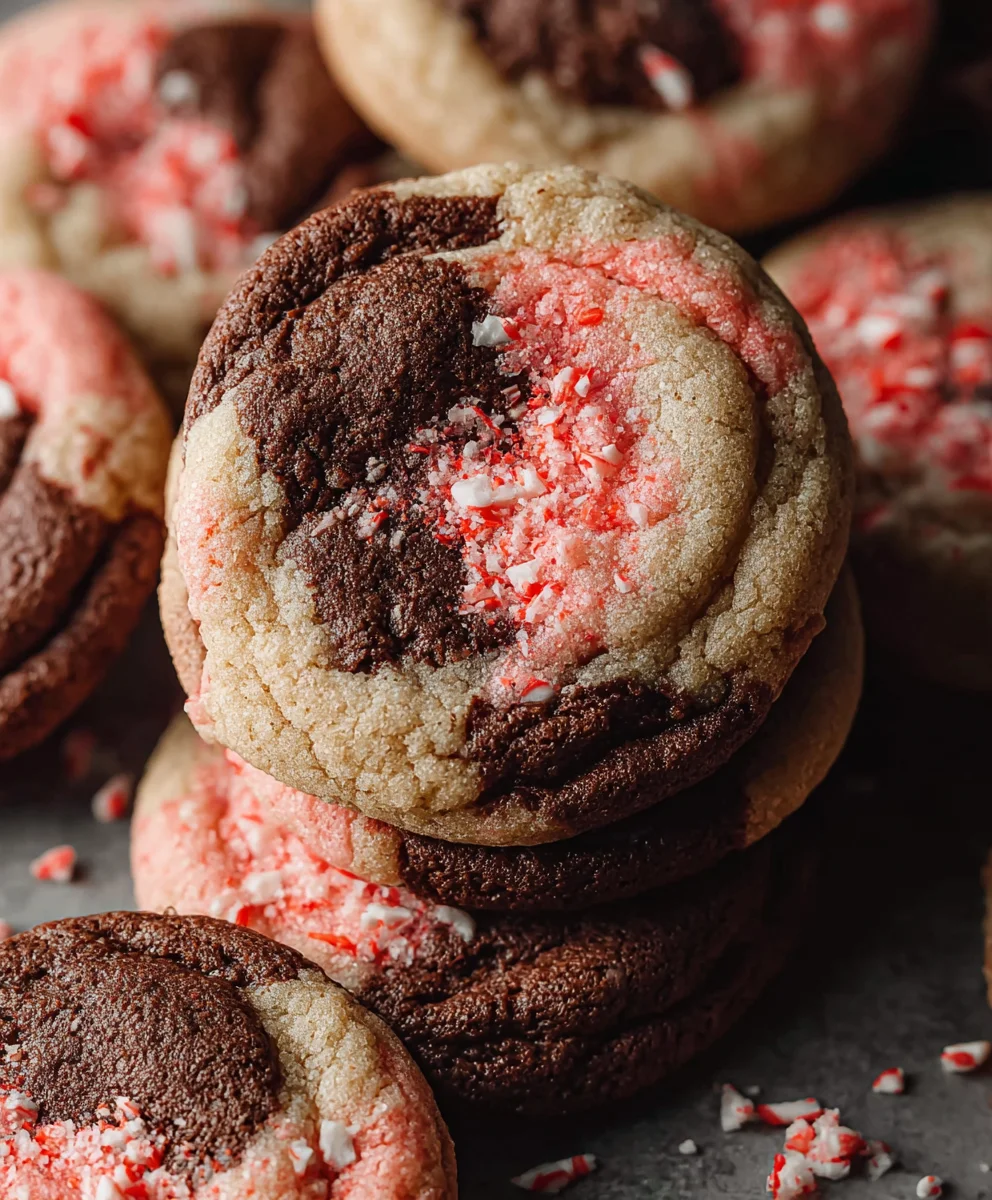
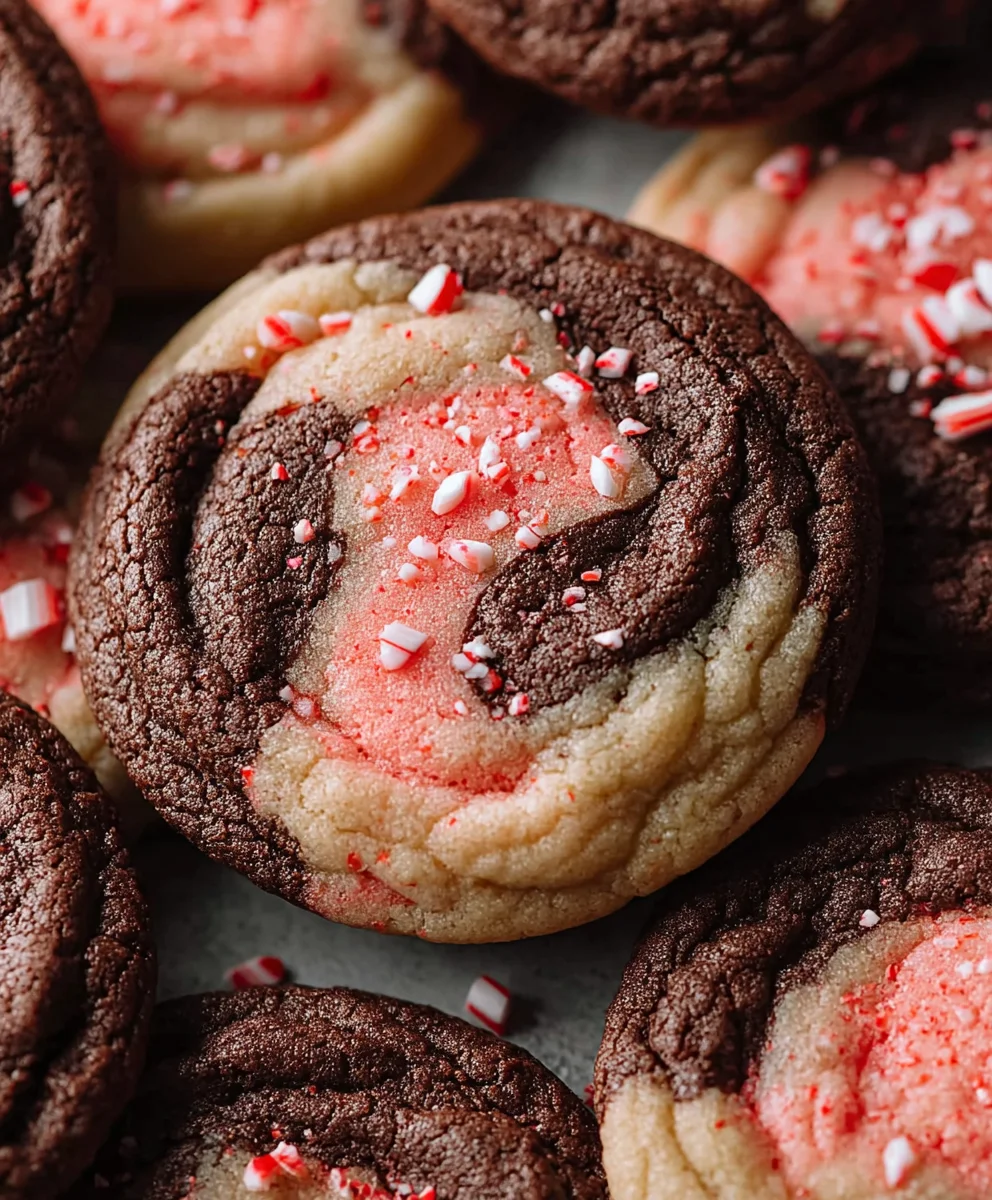
Once the dough is chilled and firm, it’s time to add a festive touch. Scoop out about half of the cookie dough into a separate bowl. Add a small amount of pink food gel coloring to this portion of the dough. Start with a tiny drop and knead it in gently with your hands or use a spatula until the color is evenly distributed. The amount of gel you use will determine the intensity of the pink hue. You’ll want a lovely, soft pink color for contrast. Then, place about ¼ cup of the plain cookie dough and about ¼ cup of the pink cookie dough side-by-side. Gently press them together and then roll them into a log, twisting them slightly to create a marbled effect. This marbled technique will give your Peppermint Mocha Cookies a beautiful, swirled appearance.
Slicing and Baking
Preheat your oven to 350°F (175°C). Line baking sheets with parchment paper to prevent sticking. Take your marbled dough logs and use a sharp knife to slice them into ¼-inch thick rounds. Place the cookie slices onto the prepared baking sheets, spacing them about 2 inches apart. For an extra sparkle and a lovely finish, lightly press each cookie into a small dish of granulated sugar before baking. This creates a beautiful sugary crust.
Baking and Cooling
Baking the Cookies
Bake the cookies for 10-12 minutes, or until the edges are lightly golden and the centers are set. The exact baking time will depend on your oven and the size of your cookies. It’s better to underbake slightly than overbake for a softer cookie. Watch them closely during the last few minutes of baking. They will continue to cook slightly on the hot baking sheet after you remove them from the oven.
Cooling the Peppermint Mocha Cookies
Once baked, let the cookies cool on the baking sheets for about 5 minutes before transferring them to a wire rack to cool completely. This allows them to firm up sufficiently so they don’t break when you move them. Once they are entirely cool, you can store them in an airtight container at room temperature. Enjoy these festive and delicious Peppermint Mocha Cookies with a glass of milk or a warm cup of coffee!
Conclusion:
And there you have it – the perfect recipe for Peppermint Mocha Cookies! We hope you enjoyed following along and are excited to bake these delightful treats. These cookies are a wonderful balance of rich chocolate and invigorating peppermint, making them a true crowd-pleaser. They’re perfect for cozy evenings by the fire, holiday gatherings, or just as an afternoon pick-me-up. Don’t be afraid to get creative with your decorations; a simple dusting of powdered sugar or a drizzle of extra chocolate can elevate these cookies even further. We encourage you to bake a batch and share the joy! Remember, the best part of baking is often sharing the delicious results.
Frequently Asked Questions about Peppermint Mocha Cookies:
Can I make these cookies ahead of time?
Absolutely! The dough can be made up to 2 days in advance and stored in the refrigerator. For baked cookies, they will stay fresh in an airtight container at room temperature for up to 3 days, or can be frozen for up to 3 months.
What if I don’t have peppermint extract?
If you don’t have peppermint extract, you can omit it entirely for a delicious mocha cookie. Alternatively, you can finely chop some candy canes and mix them into the dough or sprinkle them on top before baking for a similar peppermint flavor and festive crunch.
Peppermint Mocha Cookies-Rich Holiday Treat
Rich and festive holiday cookies combining the classic flavors of peppermint and mocha with a beautiful marbled swirl.
Ingredients
-
1 cup (227g) unsalted butter, softened
-
1¼ cup (250g) granulated sugar, plus extra for rolling
-
1 large egg
-
1 teaspoon pure vanilla extract
-
½ teaspoon pure peppermint extract
-
½ teaspoon baking powder
-
½ teaspoon salt
-
¼ teaspoon baking soda
-
2¼ cups (280g) all-purpose flour
-
½ teaspoon instant coffee granules
-
2 tablespoons unsweetened cocoa powder
-
Pink food gel coloring
Instructions
-
Step 1
Cream together softened butter and granulated sugar in a large bowl with an electric mixer until light and fluffy, about 3-5 minutes. Scrape down the sides of the bowl as needed. -
Step 2
Beat in the large egg until fully incorporated, then add vanilla extract and peppermint extract. Mix until just combined, being careful not to overmix. -
Step 3
In a separate bowl, whisk together flour, cocoa powder, baking powder, baking soda, and salt. Add the dry ingredients to the wet ingredients and mix on low speed until just combined. Stir in the instant coffee granules. -
Step 4
Cover the dough tightly with plastic wrap and refrigerate for at least 1 hour, or up to 2 days. This helps the dough hold its shape and develop flavor. -
Step 5
Divide the chilled dough in half. Knead pink food gel coloring into one half until evenly distributed. Place equal portions of plain and pink dough side-by-side, press together, and gently roll into a marbled log. Twist slightly for a swirled effect. -
Step 6
Preheat oven to 350°F (175°C). Line baking sheets with parchment paper. Slice the dough logs into ¼-inch thick rounds. Roll each cookie lightly in granulated sugar. -
Step 7
Bake for 10-12 minutes, or until the edges are lightly golden and the centers are set. Cool on baking sheets for 5 minutes, then transfer to a wire rack to cool completely.
Important Information
Nutrition Facts (Per Serving)
It is important to consider this information as approximate and not to use it as definitive health advice.
Allergy Information
Please check ingredients for potential allergens and consult a health professional if in doubt.