Classic Pasta Salad- Delicious & Easy Recipe
Classic Pasta Salad is more than just a side dish; it’s a potluck MVP, a picnic perfection, and a summer staple for a reason. We all have those go-to recipes that instantly evoke warmth and good times, and this classic pasta salad is undoubtedly one of them. What’s not to love? It’s incredibly versatile, endlessly customizable, and oh-so-satisfying. It’s the dish that disappears first from the buffet table, a testament to its universally appealing flavors and textures. The creamy dressing clingin extractg to perfectly cooked pasta, the crisp bite of fresh vegetables, and the delightful medley of savory ingredients all come together to create a symphony of deliciousness. It’s the comforting, familiar taste that brings back memories of barbecues, family gatherings, and carefree days. I’m so excited to share my favorite way to make this beloved classic pasta salad with you!
Why You’ll Adore This Recipe
A Crowd-Pleasing Favorite
Classic Pasta Salad
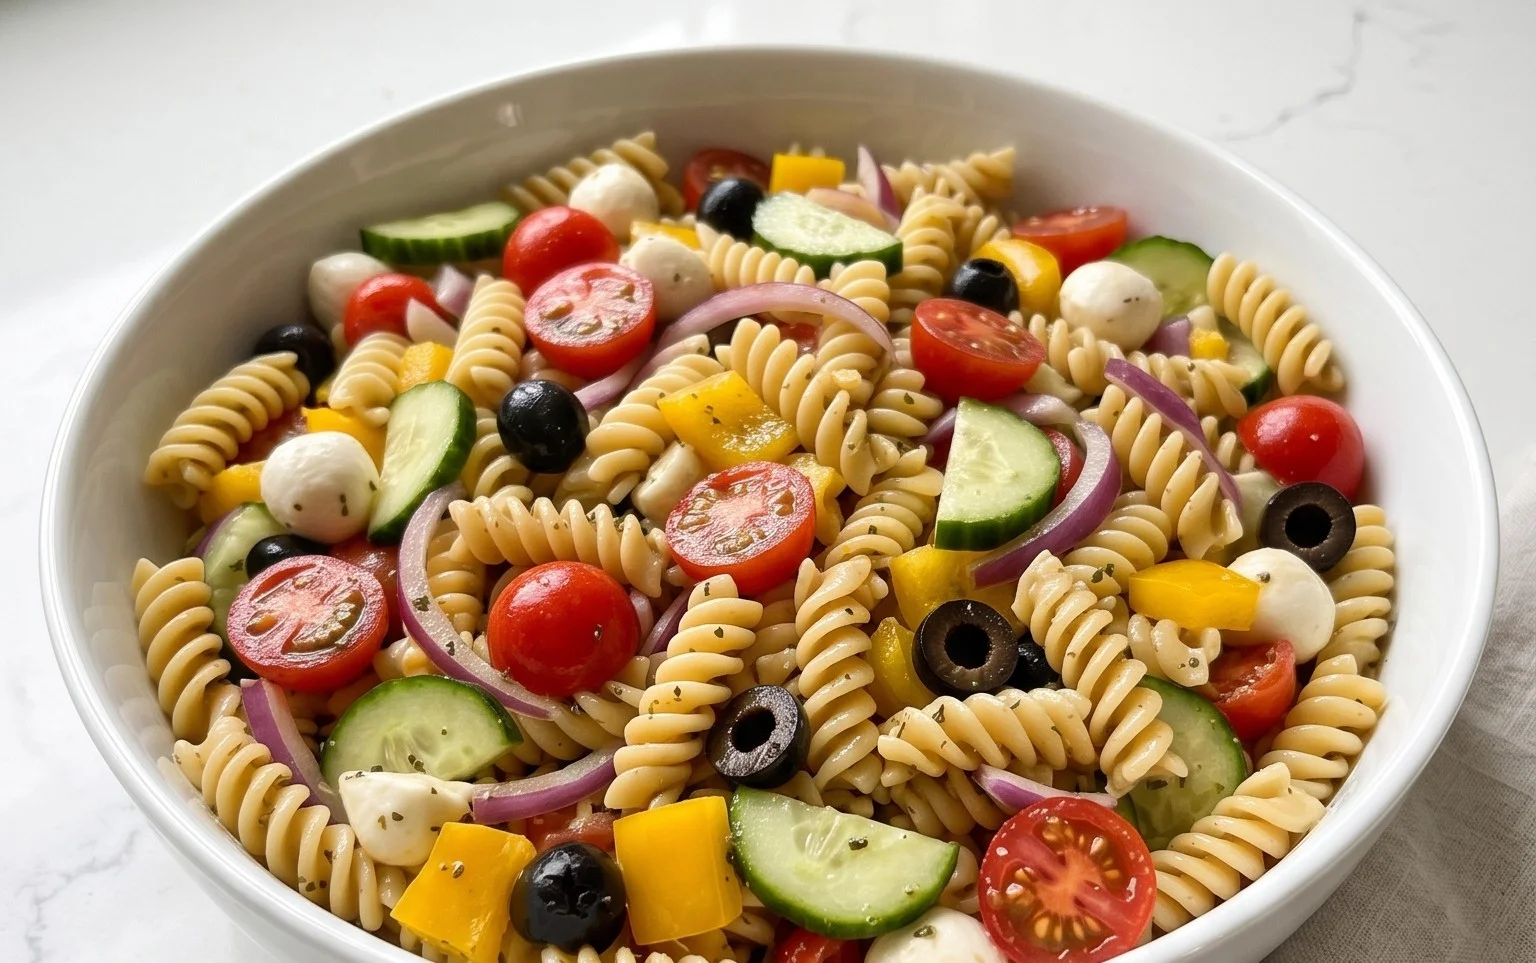
There’s something undeniably comforting and endlessly satisfying about a well-made pasta salad. It’s the perfect dish for potlucks, barbecues, or even a simple weeknight meal that tastes even better the next day. This recipe for Classic Pasta Salad is a crowd-pleaser, packed with vibrant flavors and textures that will have everyone asking for the recipe. It’s a hearty, savory, and slightly tangy creation that balances the familiar with just enough punch to keep things interesting. We’re going to build this from the ground up, ensuring every component shines.
The beauty of this pasta salad lies in its simplicity and the quality of its ingredients. We’re not reinventing the wheel here; we’re perfecting a classic. The tri-color rotini provides a fun visual appeal and its twists and turns are perfect for catching all the delicious dressing. The combination of savory beef pepperoni, fresh vegetables, and creamy mozzarella creates a symphony of flavors that’s truly irresistible. And the dressing? It’s a zesty blend of olive oil and red grape juice vinegar, infused with classic Italian herbs and spices that tie everything together.
Let’s get started on assembling this culinary masterpiece. Remember, the key to a great pasta salad is to let the flavors meld, so while it’s delicious served immediately, it truly reaches its peak after a few hours in the refrigerator. This allows the pasta to fully absorb the dressing and the ingredients to harmonize.
Ingredients:
Cooking Instructions:
Cook the Pasta:
Begin extract by cooking the tri-color rotini according to the package directions. It’s crucial to cook the pasta al dente, meaning it should still have a slight bite to it. Overcooked pasta will turn mushy in the salad, and nobody wants that! While the pasta is cooking, fill a large pot with water and add a generous pinch of salt. Once the water comes to a rolling boil, carefully add the 24 ounces of uncooked tri-color rotini. Stir the pasta occasionally to prevent it from sticking together. Cook for approximately 8-10 minutes, or until it reaches that perfect al dente texture. Once cooked, drain the pasta thoroughly in a colander. It’s important to drain it well to avoid a watery salad. For optimal results, you can rinse the pasta with cold water after draining. This stops the cooking process immediately and helps prevent the pasta from clumping together as it cools. Spread the drained pasta out on a baking sheet or a clean kitchen towel to cool completely. This step is vital; adding warm pasta to the other ingredients will cause them to wilt and can affect the overall texture and temperature of your salad. Patience here is rewarded!
Prepare the Vegetables and Beef Pepperoni:
While the pasta is cooling, it’s time to prep your other components. Wash and halve the pint of cherry tomatoes. Dice the red onion and the green bell pepper. The size of your dice is a matter of personal preference, but aim for pieces that are roughly bite-sized and uniform so they are evenly distributed throughout the salad. If you’re not a fan of raw onion’s sharp bite, you can soak the diced red onion in cold water for about 10-15 minutes before draining it. This process helps to mellow out its intensity. Slice the 8 ounces of olives. For the 12 ounces of sliced beef beef pepperoni, you can leave them whole if they are small, or you can cut them in half or quarters for easier eating within the salad. We want a good distribution of all these flavorful additions.
Assemble the Salad Base:
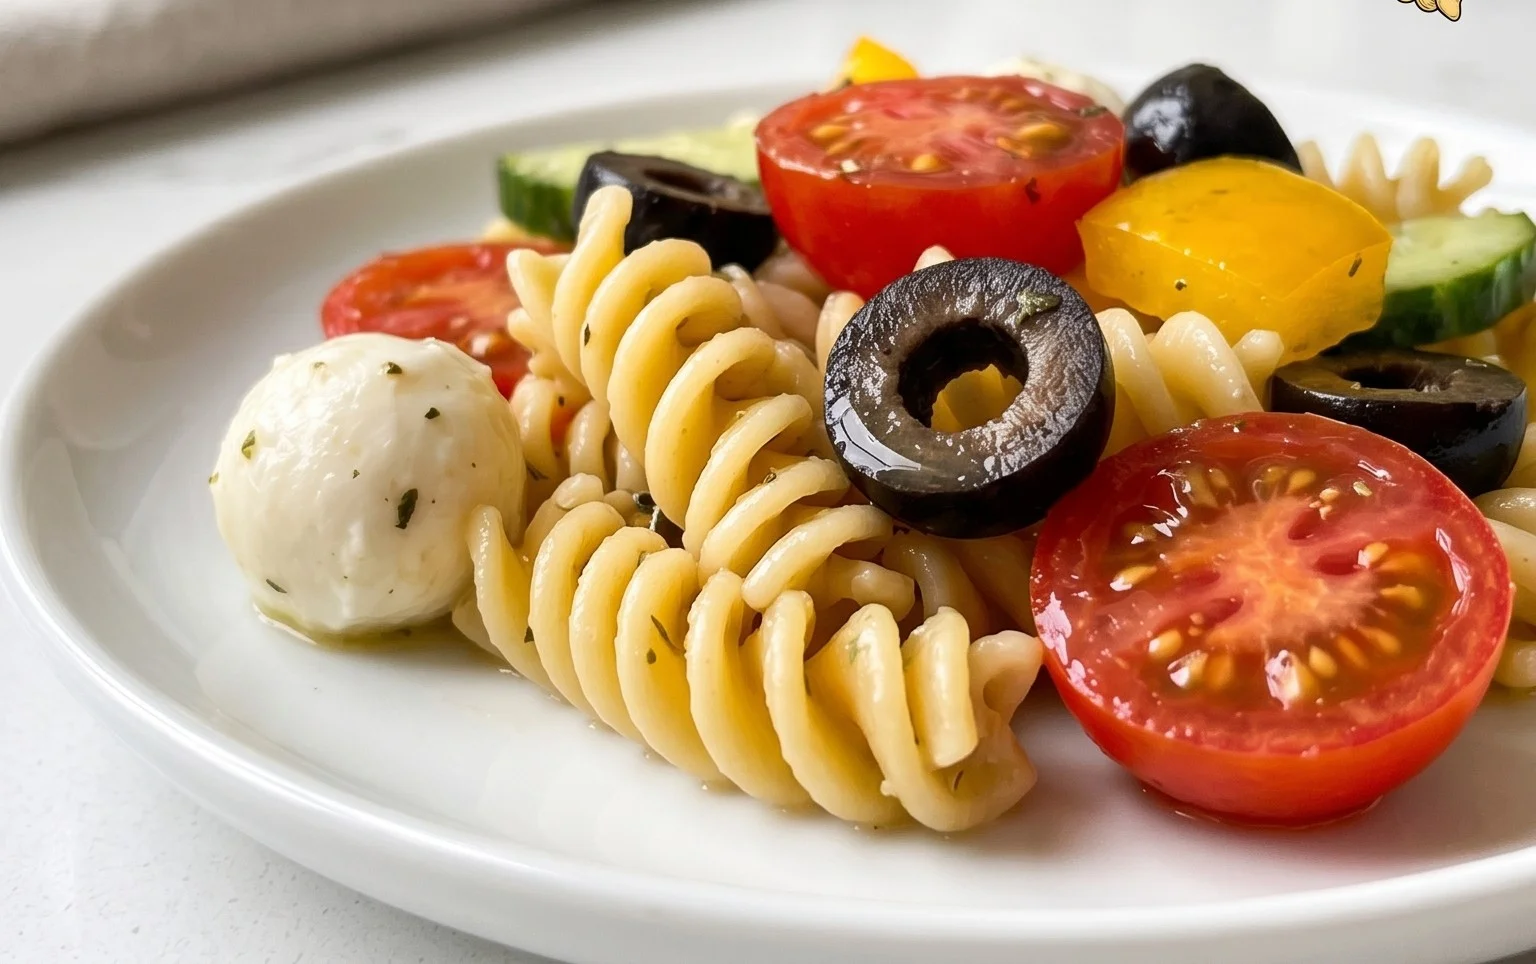
Once the pasta has completely cooled, transfer it to a large mixing bowl. Add the halved cherry tomatoes, diced red onion, diced green bell pepper, sliced olives, and the cubed 16 ounces of mozzarella cheese to the bowl with the pasta. Gently toss these ingredients together to ensure they are evenly distributed before we add the dressing. This initial mix helps to get everything acquainted before the flavorful marinade comes into play.
Whisk the Dressing:
In a separate medium-sized bowl or a large jar, whisk together the dressing ingredients. Start with 1 1/2 cups of olive oil. Add the 1/2 cup of red grape juice vinegar. Next, add the seasonings: 2 tablespoons of Italian seasoning, 2 teaspoons of garlic powder, 1 1/2 teaspoons of salt, 1 teaspoon of pepper, and 1/2 teaspoon of red pepper flakes for a touch of heat. Whisk vigorously until all the ingredients are well combined and the dressing is emulsified. Taste the dressing at this point and adjust the seasonings if necessary. You might want a little more salt, pepper, or even a pinch more red pepper flakes depending on your preference. The red grape juice vinegar provides a delightful tang that cuts through the richness of the other ingredients.
Combine and Chill:
Pour the prepared dressing over the pasta and vegetable mixture in the large bowl. Add the 1 cup of grated parmesan cheese to the bowl as well. Now, it’s time for the crucial step of combining everything. Gently toss the salad with large spoons or salad tongs, ensuring that every piece of pasta and vegetable is coated with the zesty dressing. Be thorough but gentle to avoid breaking up the pasta or vegetables. Once everything is thoroughly mixed and coated, cover the bowl tightly with plastic wrap or a lid. For the best flavor, refrigerate the pasta salad for at least 2-3 hours, or ideally, overnight. This chilling time is essential for the flavors to meld and develop. The pasta will absorb the delicious dressing, and all the components will harmonize beautifully. When you’re ready to serve, give the salad another good stir as some of the dressing might have settled. This Classic Pasta Salad is perfect served cold and makes a fantastic side dish or a light main course. Enjoy this explosion of flavor!
Conclusion:
There you have it – our recipe for a truly Classic Pasta Salad! This dish is a perennial crowd-pleaser for so many reasons. It’s incredibly versatile, allowing you to customize it to your liking. The perfect balance of tender pasta, crisp vegetables, and a zesty dressing makes it ideal for any occasion, from casual backyard barbecues to potlucks and picnics. It’s a fantastic make-ahead option, meaning you can save precious time on the day of your event.
We love serving this pasta salad as a substantial side dish alongside grilled meats, chicken, or fish. It also shines as a light lunch on its own, especially when topped with some grilled chicken or shrimp. Don’t be afraid to get creative with variations! Consider adding diced beef salami or beef pepperoni for a more robust flavor, swapping out cucumbers for bell peppers of various colors, or even tossing in some sun-dried tomatoes. The possibilities are truly endless. So, gather your ingredients and give this delightful Classic Pasta Salad a try. We’re confident you’ll love it as much as we do!
Frequently Asked Questions:
Can I make this pasta salad ahead of time?
Absolutely! In fact, it’s best when made a few hours or even a day in advance. This allows the flavors to meld together beautifully. Just be sure to store it in an airtight container in the refrigerator.
What kind of pasta is best for pasta salad?
Elbow macaroni is a classic choice, but many other short pasta shapes work wonderfully. Consider rotini, penne, farfalle (bow-tie pasta), or fusilli. The key is a shape that holds the dressing well and has a pleasant texture.
How long does pasta salad last in the refrigerator?
When stored properly in an airtight container, classic pasta salad typically lasts for 3-4 days in the refrigerator. If you’ve added delicate ingredients like fresh herbs that can wilt, you might want to enjoy it within the first 2-3 days.
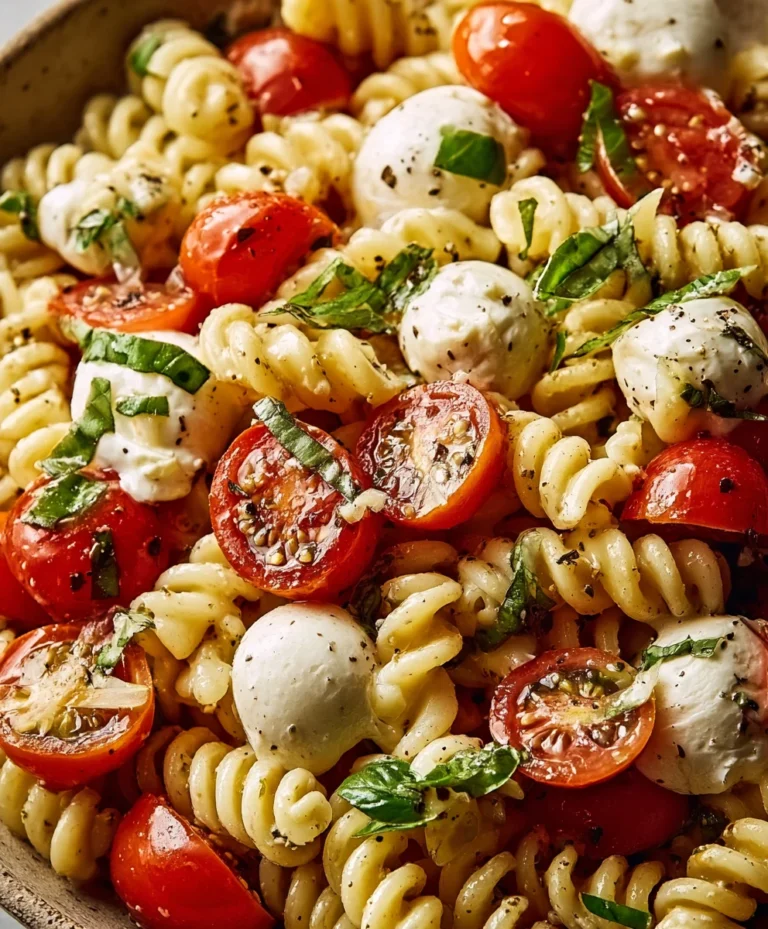
Classic Pasta Salad
A vibrant and flavorful classic pasta salad with a zesty dressing, perfect for potlucks and gatherings.
Ingredients
-
24 ounces tri-color rotini pasta (uncooked)
-
1 pint cherry tomatoes (halved)
-
12 ounces sliced pork pepperoni
-
1 red onion (diced)
-
1 green bell pepper (diced)
-
16 ounces mozzarella cheese (cubed)
-
1 cup grated parmesan cheese
-
8 ounces olives (sliced)
-
1 1/2 cups olive oil
-
1/2 cup red grape juice vinegar
-
2 tablespoons Italian seasoning
-
2 teaspoons garlic powder
-
1 1/2 teaspoons salt
-
1 teaspoon pepper
-
1/2 teaspoon red pepper flakes
Instructions
-
Step 1
Cook the rotini pasta according to package directions until al dente. Drain and rinse with cold water to cool. -
Step 2
In a large bowl, combine the cooked and cooled pasta, halved cherry tomatoes, sliced pork pepperoni, diced red onion, diced green bell pepper, cubed mozzarella cheese, grated parmesan cheese, and sliced olives. -
Step 3
In a separate small bowl or jar, whisk together the olive oil, red grape juice vinegar, Italian seasoning, garlic powder, salt, pepper, and red pepper flakes to create the dressing. -
Step 4
Pour the dressing over the pasta salad ingredients. Toss gently to ensure everything is evenly coated. -
Step 5
Cover the bowl and refrigerate for at least 30 minutes to allow the flavors to meld before serving. -
Step 6
Stir the salad again before serving. Enjoy!
Important Information
Nutrition Facts (Per Serving)
It is important to consider this information as approximate and not to use it as definitive health advice.
Allergy Information
Please check ingredients for potential allergens and consult a health professional if in doubt.