Best Chocolate Chip Banana Bread Recipe-Easy & Delicious
Chocolate Chip Banana Bread is more than just a sweet treat; it’s a warm hug in edible form. There’s a reason why this classic comfort food holds such a special place in our hearts and kitchens. The aroma that wafts from the oven as it bakes is pure magic, a sweet symphony of ripe bananas and melting chocolate that instantly evokes feelings of home and happiness. What makes this particular rendition of Chocolate Chip Banana Bread so irresistible? It’s the perfect harmony of moist, tender banana bread studded with generous pockets of gooey, melted chocolate chips. It’s the ideal balance between the natural sweetness of the bananas and the rich indulgence of chocolate, creating a flavor profile that’s both comforting and utterly delightful. Whether enjoyed for breakfast, as an afternoon snack, or a late-night craving solver, this Chocolate Chip Banana Bread recipe is guaranteed to become a beloved staple.
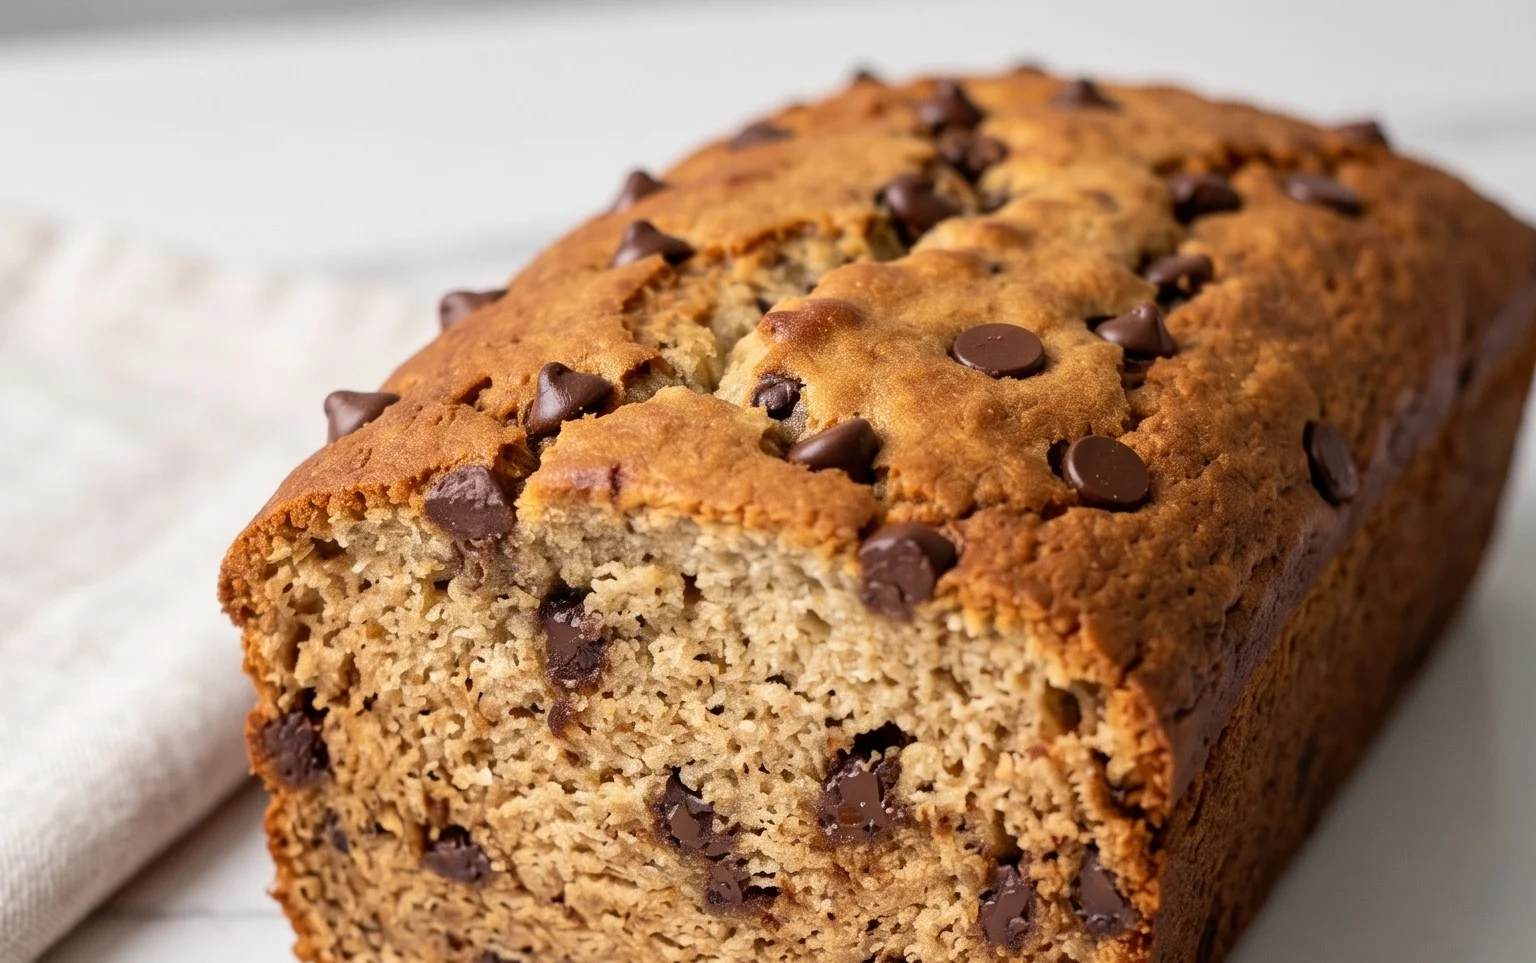
Chocolate Chip Banana Bread
There’s something undeniably comforting about a slice of warm, moist banana bread. And when you add a generous swirl of melty chocolate chips, you elevate it from delicious to utterly irresistible. This Chocolate Chip Banana Bread recipe is my go-to for a reason. It’s simple, forgiving, and consistently delivers a loaf that’s packed with banana flavor and studded with pockets of gooey chocolate. The combination of ripe bananas, sweet sugars, and that little bit of tang from the Greek yogurt creates a tender crum extractb that’s just beggin extractg to be slathered with butter or enjoyed on its own.
This recipe is perfect for those moments when you have a few overripe bananas sitting on your counter, threatening to go bad. Instead of tossing them, transform them into a delightful treat that will have everyone asking for seconds. The mini chocolate chips are my preference because they distribute more evenly throughout the batter, ensuring a chocolatey bite in almost every mouthful. But feel free to use regular-sized chips if that’s what you have on hand; they’ll just create larger, more dramatic pockets of chocolate.
Ingredients:
Instructions:
Phase 1: Preparing the Batter
1. Preheat and Prepare: Begin extract by preheating your oven to 350°F (175°C). Grease and flour a standard 9×5 inch loaf pan, or line it with parchment paper. This step is crucial for ensuring your beautiful banana bread releases easily from the pan once baked. If you’re using parchment paper, leave some overhang on the sides to act as “handles” for lifting the bread out. This makes it much simpler to remove without damagin extractg the loaf.
2. Combine Wet Ingredients: In a large mixing bowl, combine the mashed bananas, packed light brown sugar, and granulated sugar. Stir these together until well combined. Don’t worry if it’s a bit lumpy; that’s perfectly fine. Next, pour in the melted unsalted butter and whisk it into the banana-sugar mixture until everything is incorporated. Then, crack in your two large eggs, one at a time, whisking thoroughly after each addition until the mixture is smooth and emulsified. Stir in the vanilla extract. Finally, add the 2% Greek yogurt (or sour cream) and mix until just combined. The yogurt or sour cream is a secret weapon for achieving that incredibly moist and tender crum extractb. It adds fat and acidity, which tenderizes the gluten and contributes to a softer texture.
3. Combine Dry Ingredients: In a separate medium-sized bowl, whisk together the all-purpose flour (or your chosen gluten-free alternative), baking soda, and salt. Whisking these dry ingredients together before adding them to the wet ingredients helps to distribute the leavening agent (baking soda) and salt evenly throughout the flour, preventing pockets of saltiness or uneven rising.
4. Combine Wet and Dry: Gradually add the dry ingredients to the wet ingredients, mixing with a spatula or wooden spoon until just combined. It’s very important not to overmix here! Overmixing develops the gluten in the flour too much, which can result in a tough, dense loaf. A few streaks of flour are perfectly acceptable; they will disappear as you gently fold in the chocolate chips.
5. Fold in the Chocolate Chips: Gently fold in 3/4 cup of mini chocolate chips until they are evenly distributed throughout the batter. Reserve a handful of the chocolate chips for sprinkling on top before baking; this adds a lovely visual appeal and an extra burst of chocolatey goodness on the crust.
Phase 2: Baking and Cooling
6. Bake the Bread: Pour the batter into your prepared loaf pan, spreading it evenly. Sprinkle the reserved chocolate chips over the top of the batter. Place the loaf pan in the preheated oven and bake for 50-65 minutes, or until a wooden skewer or toothpick inserted into the center of the loaf comes out clean, or with just a few moist crum extractbs attached (no wet batter). The baking time can vary depending on your oven, so start checking around the 50-minute mark. If the top of the bread starts to brown too quickly before the center is cooked, you can loosely tent it with aluminum foil for the remainder of the baking time.
7. Cooling is Key: Once baked, carefully remove the loaf pan from the oven and let it cool in the pan on a wire rack for about 15-20 minutes. This initial cooling period allows the bread to set up and become firm enough to handle. After this, invert the loaf onto the wire rack to cool completely. Allowing it to cool completely on the wire rack is essential for preventing a soggy bottom and ensuring the flavors meld together. Resist the urge to slice into it immediately; patience will be rewarded with the best texture and flavor.
This Chocolate Chip Banana Bread is wonderful served warm or at room temperature. It’s fantastic on its own, toasted with a smear of butter, or even as a base for a scoop of ice cream. Enjoy every delightful bite!

Conclusion:
There you have it – my favorite recipe for the most delicious Chocolate Chip Banana Bread! This recipe is truly a winner because it’s incredibly moist, bursting with sweet banana flavor, and studded with pockets of melty chocolate. It’s simple enough for begin extractners but impressive enough for any gathering. The aroma alone as it bakes is enough to make your home feel instantly cozier!
This versatile bread is perfect for breakfast, a delightful snack, or even a simple dessert. Enjoy it as is, or try toasting a slice and slathering it with a little butter or cream cheese for an extra treat. For variations, feel free to add a sprinkle of cinnamon to the batter for warmth, or swap out the chocolate chips for chopped walnuts or pecans for added texture. Don’t be afraid to get creative!
I truly hope you’ll give this Chocolate Chip Banana Bread a try. It’s a crowd-pleaser that never disappoints and is sure to become a staple in your baking repertoire. Happy baking!
Frequently Asked Questions:
Q: How do I know when my banana bread is done?
A: Your banana bread is ready when a toothpick inserted into the center comes out clean, or with just a few moist crum extractbs attached (but no wet batter). The edges should also be golden brown and slightly pulling away from the sides of the pan.
Q: Can I make this banana bread ahead of time?
A: Absolutely! This bread stores beautifully. Once completely cooled, wrap it tightly in plastic wrap or store it in an airtight container at room temperature for up to 3 days, or in the refrigerator for up to a week. It also freezes wonderfully, so you can bake a batch and save some for later!
Q: My bananas aren’t very ripe. Can I still make this recipe?
A: While super ripe, spotty bananas are ideal for the sweetest flavor and best moisture, you can still use slightly less ripe ones. They might just not be as intensely banana-flavored, and you might need to mash them a little more vigorously. For a stronger flavor, you can even try baking them in their skins at 300°F (150°C) for about 15-20 minutes until they turn black and soft.
Chocolate Chip Banana Bread
A moist and delicious banana bread loaded with chocolate chips, perfect for breakfast or a snack.
Ingredients
-
1 1/2 cups (380g) ripe and mashed banana (3-4 medium bananas), measured
-
1/2 cup (100g) packed light brown sugar
-
1/2 cup (100g) granulated sugar
-
1/2 cup (112g) unsalted butter, melted
-
2 large eggs
-
1 tsp vanilla extract
-
1/2 cup (120g) 2% Greek yogurt
-
1 1/3 cups (172g) all-purpose flour
-
1 tsp baking soda
-
1/2 tsp salt
-
3/4 cup (140g) mini chocolate chips
Instructions
-
Step 1
Preheat oven to 350°F (175°C). Grease and flour a 9×5 inch loaf pan. -
Step 2
In a large bowl, mash the ripe bananas. Stir in the packed light brown sugar and granulated sugar until combined. -
Step 3
Add the melted unsalted butter, large eggs, vanilla extract, and Greek yogurt to the banana mixture. Mix until smooth. -
Step 4
In a separate bowl, whisk together the all-purpose flour, baking soda, and salt. -
Step 5
Gradually add the dry ingredients to the wet ingredients, mixing until just combined. Do not overmix. -
Step 6
Fold in the mini chocolate chips. Pour the batter into the prepared loaf pan and sprinkle a few extra chocolate chips on top. -
Step 7
Bake for 50-60 minutes, or until a wooden skewer inserted into the center comes out clean. -
Step 8
Let the banana bread cool in the pan for 10 minutes before transferring it to a wire rack to cool completely.
Important Information
Nutrition Facts (Per Serving)
It is important to consider this information as approximate and not to use it as definitive health advice.
Allergy Information
Please check ingredients for potential allergens and consult a health professional if in doubt.