Fruity Pebbles Cheesecake Tacos – A Sweet Treat
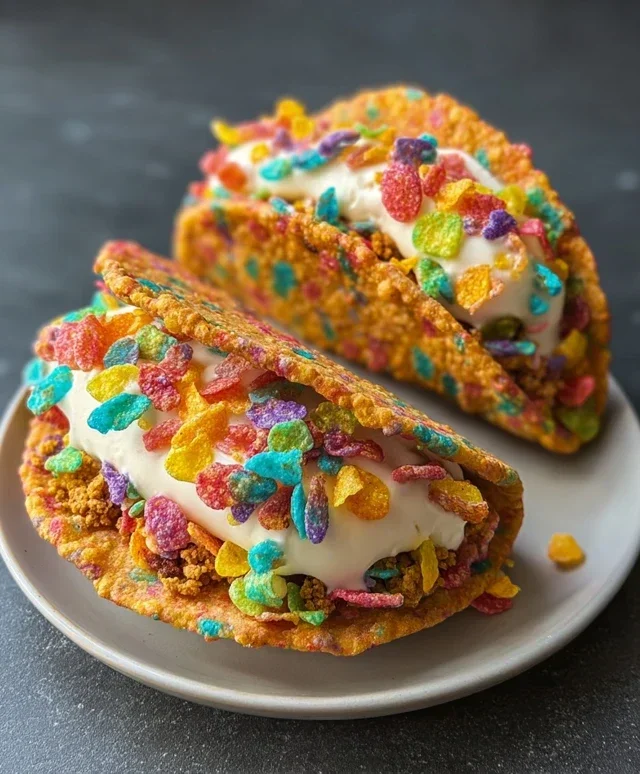
Fruity Pebbles Cheesecake Tacos are the vibrant, whimsical dessert you didn’t know you were craving. Imagin extracte biting into a crispy, taco-shaped shell, not filled with savory goodness, but with a cloud-like, tangy cheesecake filling. Then, picture that creamy filling studded with the nostalgic crunch and rainbow hues of Fruity Pebbles cereal. It’s pure joy in every bite! We’ve all fallen in love with the creamy indulgence of cheesecake and the fun, playful nature of tacos, so why not combine them? What makes these Fruity Pebbles Cheesecake Tacos truly special is their unexpected fusion of textures and flavors. The sweet, almost candy-like cereal perfectly complements the rich, slightly tart cheesecake, while the crispy shell offers a delightful contrast. Get ready for a dessert experience that’s as fun to make as it is to devour!
Fruity Pebbles Cheesecake Tacos
Get ready for a dessert that’s as fun to make as it is to eat! These Fruity Pebbles Cheesecake Tacos are a vibrant explosion of flavor and texture, combining the creamy decadence of cheesecake with the crunchy, sweet joy of everyone’s favorite colorful cereal. Forget everything you thought you knew about tacos; these are purely for your sweet tooth and will be the showstopper at any gathering or a delightful treat just for yourself. The magic lies in the unexpected marriage of classic cheesecake flavors with the playful crunch and fruity burst of Fruity Pebbles, all nestled within a crispy, sweet shell.
Ingredients:
Crafting the Taco Shells
The foundation of our Fruity Pebbles Cheesecake Tacos starts with creating edible shells that are reminiscent of our beloved cereal. This is where the initial magic happens, transforming a pantry staple into a delightful vessel for our creamy filling.
First, we need to prepare our Fruity Pebbles mixture for the shells. In a large microwave-safe bowl, combine the 3 cups of colorful fruity cereal with the 1/2 cup of melted unsalted butter. Stir this together until all the cereal pieces are well coated with the melted butter. This butter coating is crucial as it will help bind the cereal together and create a more cohesive, crispy shell once formed.
Now, it’s time to form our taco shells. You’ll need a muffin tin for this. Lightly grease the cups of your muffin tin. This will prevent the cereal mixture from sticking and ensure easy removal once they’ve set. Spoon the buttered cereal mixture evenly into the bottom of each muffin cup, pressing it down firmly with the back of a spoon or your fingers to create a compact base. Then, carefully press the cereal mixture up the sides of the muffin cups to form the taco shell shape. Aim for a consistent thickness so they bake evenly. You want them to hold their shape without being too thick or too thin. Don’t worry if they aren’t perfectly uniform; a little rustic charm adds to their appeal!
With our taco shells shaped and ready, it’s time to bake them. Preheat your oven to 350°F (175°C). Place the prepared muffin tin in the preheated oven and bake for approximately 8-10 minutes. Keep a close eye on them during this time. You’re looking for the edges to become slightly golden and for the cereal to be lightly toasted, indicating it’s starting to firm up. The aroma will be wonderful! Once they appear set and lightly toasted, carefully remove the muffin tin from the oven. Let the shells cool in the muffin tin for about 5-10 minutes before attempting to remove them. This initial cooling period allows them to firm up further.
After the initial cooling, gently remove the Fruity Pebbles taco shells from the muffin tin. You might need to use a small offset spatula or a butter knife to carefully loosen them from the sides. Place them on a wire rack to cool completely. This is very important; attempting to fill warm shells will result in a melted, messy filling. Patience is key here! Ensure they are completely cool and firm before proceeding to the next step.
Whipping Up the Creamy Cheesecake Filling
While our taco shells are cooling, we’ll prepare the luscious cheesecake filling that will transform these into true dessert tacos. This is a simplified, no-bake cheesecake filling that’s incredibly easy to whip up.
In a medium-sized mixing bowl, combine the 8 oz of softened cream cheese with the 1/2 cup of sifted powdered sugar. Using an electric mixer on medium speed, beat these two ingredients together until the mixture is smooth, creamy, and well combined. Ensure there are no lumps of cream cheese remaining; the sifting of the powdered sugar helps with this. Gradually add the 1 tsp of pure vanilla extract and continue to beat until it’s fully incorporated. The vanilla extract adds a wonderful depth of flavor that complements the sweetness.
Now, we’ll gently fold in the whipped cream. Add the 1 cup of whipped cream to the cream cheese mixture. Using a spatula, gently fold the whipped cream into the cream cheese mixture until just combined. Be careful not to overmix, as this can deflate the whipped cream and make the filling less airy. You want a light and fluffy texture that will pipe beautifully into our taco shells. The goal is a smooth, luscious filling that’s not too stiff but holds its shape well.
Assembling Your Fruity Pebbles Cheesecake Tacos
The grand finnon-alcoholic ale! It’s time to bring all the elements together to create these delightful dessert tacos. This is the most fun part, where you get to be creative with your presentation.
Once your Fruity Pebbles taco shells are completely cool and your cheesecake filling is ready, it’s time to assemble. You can pipe the cheesecake filling into each taco shell using a piping bag fitted with a star tip for a decorative touch, or you can simply spoon it in. Fill each shell generously with the creamy cheesecake mixture. Don’t be shy; the more filling, the better!
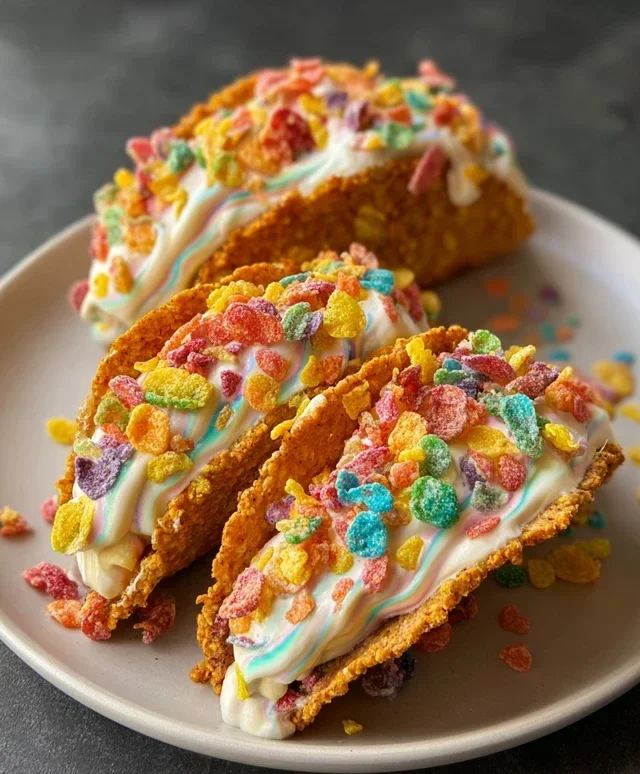
Finally, it’s time for the finishing touch: garnish! Sprinkle additional colorful fruity cereal over the top of the cheesecake filling in each taco. This adds an extra pop of color, texture, and fruity flavor. You can be as generous or as sparing as you like with the garnish. For an extra touch of fun, you could even add a few extra cereal pieces pressed gently into the sides of the filling.
Serve these Fruity Pebbles Cheesecake Tacos immediately for the best texture, or refrigerate them for a short period before serving if you prefer them slightly chilled. Enjoy this whimsical and delicious dessert that’s sure to bring smiles to everyone who tries it! They are best enjoyed the same day they are made to maintain the crispness of the shells.
Conclusion:
You’ve just unlocked the secret to the most delightful and unexpected dessert: Fruity Pebbles Cheesecake Tacos! This recipe is a winner because it perfectly balances the creamy richness of cheesecake with the fun, nostalgic crunch of Fruity Pebbles, all nestled in a crisp taco shell. It’s a truly whimsical treat that will impress your friends and family, or simply bring a huge smile to your own face. I love these as a fun alternative to traditional cheesecake, and they’re surprisingly easy to make! For serving, consider a dollop of whipped cream, a drizzle of chocolate sauce, or even some fresh berries to complement the fruity flavors. Feel free to experiment with other colorful cereals for even more vibrant variations, or even try different flavored cheesecakes like strawberry or lemon. Don’t be afraid to get creative! I highly encourage you to give these Fruity Pebbles Cheesecake Tacos a try; they are guaranteed to be a memorable and delicious experience.
Frequently Asked Questions:
Can I make the taco shells ahead of time?
Absolutely! You can bake your taco shells a day or two in advance and store them in an airtight container at room temperature. This makes assembly even quicker when you’re ready to serve!
What if I don’t have Fruity Pebbles?
No worries! You can substitute with your favorite colorful breakfast cereal. Consider brands like Lucky Charms for marshmallow bits, or any other fruity-flavored cereal for a similar vibrant and sweet experience.
Can I make the cheesecake filling ahead of time?
Yes, you can prepare the cheesecake filling a day in advance. Cover it tightly and refrigerate. Just be sure to give it a good stir before spooning it into the taco shells.
Fruity Pebbles Cheesecake Tacos
A vibrant and fun dessert taco featuring a creamy Fruity Pebbles cheesecake filling in a crispy cereal shell, perfect for a playful treat.
Ingredients
-
3 cups colorful fruity cereal
-
1/2 cup unsalted butter, melted
-
8 oz cream cheese, softened
-
1/2 cup powdered sugar, sifted
-
1 tsp pure vanilla extract
-
1 cup whipped cream
-
Additional fruity cereal for garnish
Instructions
-
Step 1
Prepare the taco shells: Melt the butter and toss with 3 cups of fruity cereal until well combined. Press the mixture into a greased taco mold or shape into small taco shells on a baking sheet lined with parchment paper. Bake at 350°F (175°C) for 10-15 minutes, or until firm. Let cool completely. -
Step 2
Make the cheesecake filling: In a medium bowl, beat the softened cream cheese until smooth. Gradually beat in the sifted powdered sugar until well incorporated. -
Step 3
Add the vanilla extract to the cream cheese mixture and beat until combined. -
Step 4
Gently fold in the whipped cream until the filling is smooth and creamy. Be careful not to overmix. -
Step 5
Assemble the tacos: Carefully spoon the cheesecake filling into the cooled cereal taco shells. -
Step 6
Garnish the tacos with additional fruity cereal before serving.
Important Information
Nutrition Facts (Per Serving)
It is important to consider this information as approximate and not to use it as definitive health advice.
Allergy Information
Please check ingredients for potential allergens and consult a health professional if in doubt.