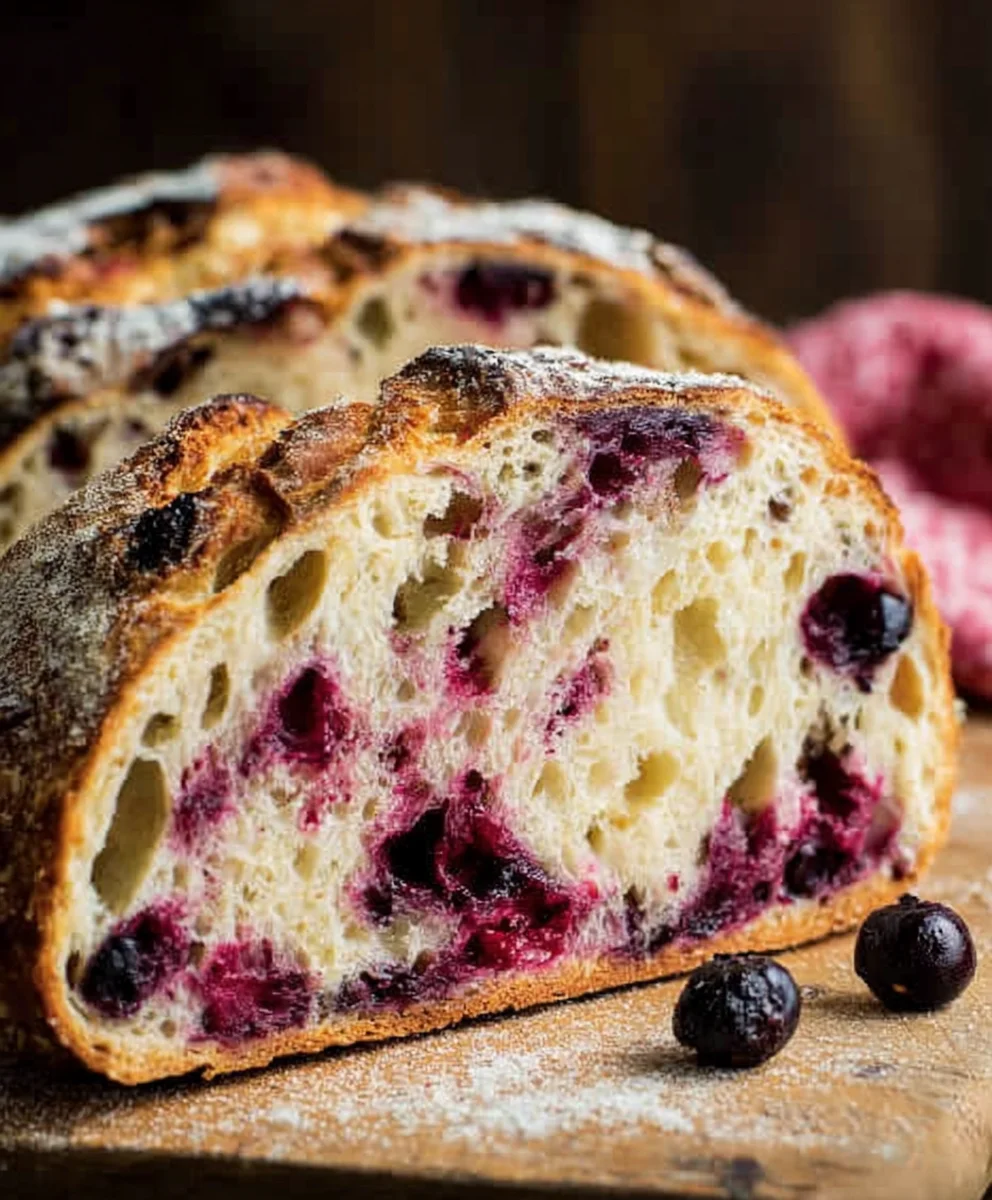
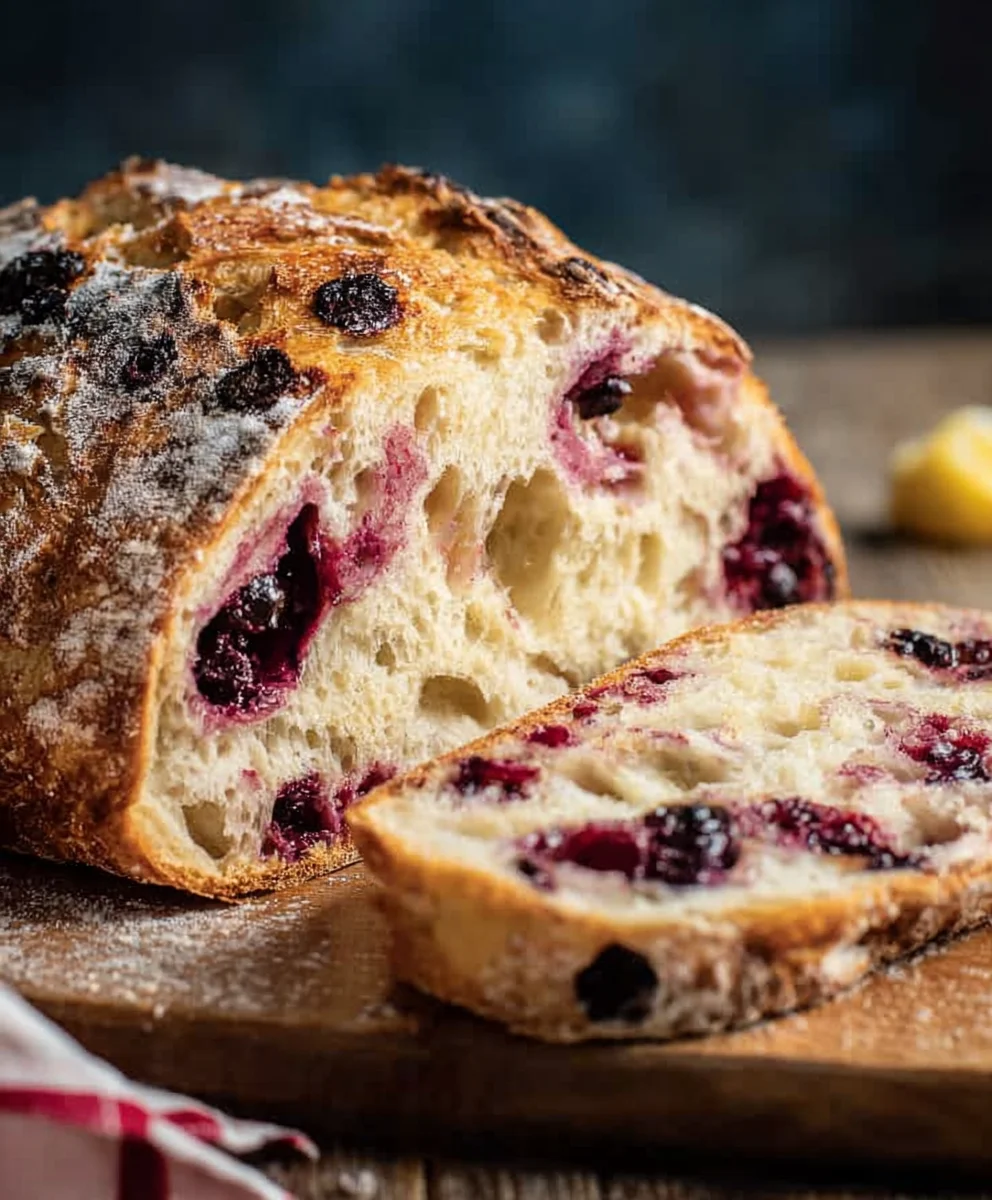
Lemon Blueberry Sourdough Bread-Easy Recipe
Lemon Blueberry Sourdough Bread Recipe is more than just a way to start your day; it’s an experience. Imagin extracte that first glorious slice, warm from the oven, its tangy sourdough aroma mingling with the sweet burst of plump blueberries and the bright zest of lemon. This isn’t your average loaf. It’s the culmination of patience, a starter bubbling with life, and the magic that happens when humble ingredients transform into something extraordinary. People adore this particular sourdough recipe because it strikes that perfect balance: the satisfying chew and characteristic tang of well-fermented sourdough, elevated by the vibrant, sunny flavors of fresh lemon and juicy blueberries. What makes this Lemon Blueberry Sourdough Bread Recipe truly special is the way the slight acidity of the blueberries and the citrus notes of the lemon interact with the sourdough’s complexity, creating a flavor profile that is both comforting and exhilarating. It’s a delightful twist on a classic, perfect for breakfast, brunch, or a truly inspired afternoon treat.
Ingredients:
- 50g active sourdough starter
- 350g water
- 500g bread flour
- 11g salt
- 150g fresh blueberries
- zest of one lemon
- 8 Tablespoons butter, room temperature (113g)
- 1/2 cup fresh blueberries, mashed (75g)
- 2 Tablespoons honey (45g)
- a pinch of salt
Preparing the Dough
Autolyse (Initial Hydration)
Begin extract by combining your active sourdough starter with 350g of lukewarm water in a large mixing bowl. Whisk them together until the starter is mostly dissolved into the water, creating a milky mixture. This is the foundation for your bread’s fermentation. Next, add the 500g of bread flour to this liquid. Use your hands or a sturdy spatula to mix everything until just combined. It’s okay if there are still some dry bits of flour; we’re not aiming for a perfectly smooth dough at this stage. This initial mix, known as autolyse, allows the flour to fully hydrate and gluten developmegin extractto begin without any kneading. Cover the bowl with a damp cloth or plastic wrap and let it rest for 30 minutes to an hour. This resting period is crucial for a more extensible dough later on.
Incorporating Salt and Initial Mixing
After the autolyse period, it’s time to add the 11g of salt. Sprinkle the salt evenly over the surface of the douggin extractNow, we’ll begin the mixing process to start developing the gluten structure. Using wet hands (this prevents sticking), pinch and fold the dough into itself within the bowl. Continue this pinching and folding motion for about 5-7 minutes. You’ll notice the dough will start to feel a bit more cohesive and elastic. It will still be somewhat shaggy, and that’s perfectly normal at this point. The goal here is to evenly digin extractibute the salt and begin building the gluten network that will give your sourdough its structure. Once the salt is fully incorporated and the dough feels a bit smoother, cover the bowl again and let it rest for another 30 minutes.
Bulk Fermentation and Additions
Now begins the process of building significant gluten strength through a series of “stretch and folds.” Over the next 2-3 hours, you will perform a set of stretch and folds every 30 minutes. To do a stretch and fold, wet your hands slightly. Grab one side of the dough, gently stretch it upwards without tearing, and then fold it over onto itself towards the center of the bowl. Rotate the bowl 90 degrees and repeat this process, stretching and folding from all four sides. This technique gradually builds tension and structure in the dough. You’ll notice with each set that the dough becomes smoother, stronger, and more elastic. It should start to hold its shape better between folds. After about 3-4 sets of these stretch and folds, the dough should feel noticeably stronger and more cohesive. Once your dough has undergone its stretch and folds and feels robust, it’s time to incorporate the vibrant flavors of lemon and blueberry. Gently spread the dough out a little on your work surface. Sprinkle the zest of one lemon evenly over the surface. Then, scatter the 150g of fresh blueberries over the lemon zest. Now, carefully fold the dough over itself to gently enclose the blueberries and lemon zest. Perform a few more gentle folds to distribute them as evenly as possible without crushing the blueberries too much. The goal is to tuck them into the dough’s structure. Be patient here; it might take a few folds to get them distributed. Once incorporated, place the dough back into its bowl, cover it, and let it continue to ferment at room temperature. This stage of bulk fermentation can take anywhere from 4 to 8 hours, depending on your room temperature and starter activity. You are looking for the dough to increase in volume by about 50-75% and show some signs of bubbly activity. After the bulk fermentation is complete and your dough has visibly risen, it’s time to shape it. Lightly flour your work surface and gently turn the dough out of the bowl. Be careful not to degas it too much. Perform a gentle pre-shape by folding the edges of the dough towards the center, creating a rough ball. Let the dough rest on the counter, uncovered, for about 20-30 minutes. This “bench rest” allows the gluten to relax, making the final shaping much easier. You’ll notice the dough will relax and spread out slightly during this time. After the bench rest, it’s time for the final shaping. Depending on whether you’re using a round or oval proofing basket (banneton), you’ll shape the dough accordingly. For a round loaf, gently cup your hands around the dough and pull it towards you, rotating it as you go to create surface tension. For an oval loaf, you’ll generally fold it in half lengthwise and then roll it up like a jelly roll, pinching the seams to seal. Once shaped, carefully place the dough seam-side up into a well-floured proofing basket or a bowl lined with a floured tea towel. Cover the basket or bowl with plastic wrap or a reusable bag and place it in the refrigerator for at least 12 hours, or up to 24 hours. This cold retardation allows for further flavor development and makes the dough easier to handle for baking. When you’re ready to bake, preheat your oven to 475°F (245°C) with a Dutch oven or baking vessel inside for at least 30 minutes. Carefully remove the hot Dutch oven from the oven. Gently invert your cold dough from the proofing basket onto a piece of parchment paper. Score the top of the dough with a sharp blade (like a lame or a razor blade) to allow for controlled expansion. Carefully transfer the dough, using the parchment paper as a sling, into the hot Dutch oven. Cover the Dutch oven with its lid and bake for 20 minutes. After 20 minutes, remove the lid from the Dutch oven. Reduce the oven temperature to 450°F (230°C) and continue baking for another 25-30 minutes, or until the crust is a deep golden brown and the internal temperature of the bread reaches at least 205°F (96°C). While your bread is baking, you can prepare the delicious blueberry honey butter to serve with it. In a medium bowl, add the 8 tablespoons of room temperature butter. Ensure your butter is truly soft; it should yield easily to the touch. Add the 2 tablespoons of honey and a pinch of salt to the butter. Using a fork or a hand mixer on low speed, cream the butter, honey, and pinch of salt together until they are well combined and slightly fluffy. Then, add the 1/2 cup of mashed blueberries. Fold them into the butter mixture until they are evenly distributed. You should have a beautiful, slightly pinkish butter with little flecks of blueberry throughout. Spoon the butter into a small serving dish and refrigerate until ready to serve. This butter is best served slightly chilled but not hard. I hope you’ve enjoyed learning how to make this delightful Lemon Blueberry Sourdough Bread Recipe! This recipe brings together the tangy goodness of sourdough with the bright bursts of lemon and sweet blueberries for a truly special loaf. Whether you’re a seasoned sourdough baker or just starting out, this recipe is designed to be approachable and rewarding. The slightly crisp crust, airy crum extractb, and incredible flavor make it perfect for any occasion. Enjoy it toasted with butter for breakfast, as a sweet treat with your afternoon tea, or even as a unique accompaniment to a light meal. Don’t be afraid to experiment with adding a touch of lemon zest for an extra zing or perhaps a sprinkle of poppy seeds for added texture and visual appeal. Happy baking, and I can’t wait to hear about your delicious creations! Yes, absolutely! If using frozen blueberries, toss them with a tablespoon of the recipe’s flour before adding them to the dough. This helps prevent them from bleeding too much color into the batter and ensures they distribute evenly. Be sure to use them straight from frozen, without thawing. While this is a sourdough recipe, you can adapt it for a quick bread by using baking powder and baking soda as leavening agents. You would typically need about 2 teaspoons of baking powder and 1/2 teaspoon of baking soda, combined with an acidic ingredient like buttermilk or yogurt. Keep in mind this will alter the texture and flavor profile significantly from a true sourdough. This Lemon Blueberry Sourdough Bread Recipe will stay fresh at room temperature for about 2-3 days when stored in an airtight container or bread bag. For longer storage, it freezes beautifully. Slice the cooled bread and wrap individual slices or the whole loaf tightly in plastic wrap, then in foil, and freeze for up to 3 months. A delightful and easy recipe for homemade lemon blueberry sourdough bread, perfect for any occasion. Includes a recipe for a complementary blueberry honey butter. It is important to consider this information as approximate and not to use it as definitive health advice. Please check ingredients for potential allergens and consult a health professional if in doubt.Adding the Flavor Elements
Shaping and Baking
Pre-Shaping and Bench Rest
Final Shaping and Cold Retardation
Baking the Sourdough
Blueberry Honey Butter
Creaming the Butter and Honey
Incorporating the Mashed Blueberries
Conclusion:
FAQs
Can I use frozen blueberries?
What if I don’t have a sourdough starter?
How long will this bread stay fresh?
Lemon Blueberry Sourdough Bread-Easy Recipe
Ingredients
Instructions
Combine active sourdough starter and lukewarm water in a large bowl until mostly dissolved. Add bread flour and mix until just combined. Cover and let rest for 30 minutes to an hour for autolyse.
Add salt to the dough. Using wet hands, pinch and fold the dough for 5-7 minutes until cohesive and elastic. Cover and rest for another 30 minutes.
Perform stretch and folds every 30 minutes for 2-3 hours, building gluten strength. Gently spread dough, sprinkle lemon zest and fresh blueberries, then fold to enclose. Continue bulk fermentation for 4-8 hours until increased in volume by 50-75% and bubbly.
Gently turn dough onto a floured surface, pre-shape into a rough ball, and let rest for 20-30 minutes. Then, perform final shaping for your proofing basket, place seam-side up, cover, and refrigerate for at least 12 hours, or up to 24 hours.
Preheat oven to 475°F (245°C) with a Dutch oven inside for 30 minutes. Invert dough onto parchment paper, score the top, and carefully transfer into the hot Dutch oven. Bake covered for 20 minutes. Remove lid, reduce oven to 450°F (230°C), and bake for another 25-30 minutes until deeply golden brown.
While bread bakes, cream softened butter, honey, and a pinch of salt. Fold in mashed blueberries until evenly distributed. Refrigerate until ready to serve.
Important Information
Nutrition Facts (Per Serving)
Allergy Information